
In order for the Pi to be as flexible as possible, a Wifi connection is very advantageous. Of course, you need a Wifi Stick and have to configure everything, which is shown in this tutorial. The only thing needed is a one-time connection to the router with an Ethernet cable.
First said: If you have a Raspberry Pi 3 with built-in Wifi Module, the configuration of the Wifi has become even easier. You will find out how in another Tutorial.
First, we have to connect to the Pi and load the drivers. To do that, let’s update the paths first.
sudo apt-get update
Then we find out the Module name.
lsusb
If only the Wifi Stick and the Ethernet Cable are connected, Device 004 would have to specify the Stick.

An overview of all compatible Sticks can be viewed here. In my case, it’s ZD1211.
So we can search for the appropriate driver:
apt-cache search zd1211
![]()
After the name of the Firmware nn is known, it still has to be loaded and installed.
sudo apt-get install zd1211-firmware
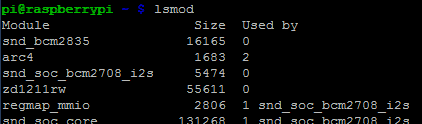
A final check should affirm that the Drivers were installed correctly.
lsmod
In the list should also be the device name of the Stick (for me zd1211rw).
In the next step, the Wifi Stick must connect to your router, for which you need the name and password of your Wifi Network. This must first be encrypted.
wpa_passphrase "Name of the Wifi network" "Password"
Save the value behind psk=…. (not #psk=…), you have to insert this again right away.
Now the Wifi Stick must be informed that it connects to your Wifi Network. For this we have to save the Data:
sudo nano /etc/network/interfaces
and change the file to the following
auto lo

iface lo inet loopback
iface eth0 inet dhcp

allow-hotplug wlan0
auto wlan0
iface wlan0 inet dhcp
wpa-ssid "Name of the Wifi network"
wpa-psk previously_created_password
Ctrl + O saves the file and Ctrl + X closes the editor.
Now it only has to be activated once
sudo ifup wlan0
Then the stick should be connected to your Wifi (if not, check Data again) and the Ethernet cable can also be safely removed.
Who is interested in the details, can with
ifconfig
see everything, how many Packets were sent and received, etc.
3 Comments
thank you for this ?
Hello everyone,
I’m glad the i can ask for some help. The firmware for the Device 0004 Edimax EW-7811 can not be found. I need that Wi Fi idevice to connect wireless a Raspberry pi 3 with another Raspberry pi 3. Your help will be greatly appreciate
Your link to a stickless wifi setup does not exist.