
One of the many advantages of the Raspberry Pi is that it is possible to connect almost all standard Arduino and Raspberry Pi sensors and components to the dhtvarious GPIOs. Moreover you can evaluate and / or process the values with programs and other software. This accessory can be used in projects such as Smart Home (home automation), robot kits or weather stations, etc.
This article describes and summarizes over 50 of the most important sensors and components for Raspberry Pi’s as well as Arduinos and provides you with a full Raspberry Pi sensor list.
Menu
The described Raspberry Pi sensors, modules and components are divided into the following categories:
- Temperature / Humidity / Air Pressure / Gas
- Motion Sensors
- Navigation Modules
- Wireless / Infrared (IR) / Bluetooth
- Motors
- Analogue Sensors
- Current Supply
- Displays
- Other Modules, Components and Sensors
Temperature / Humidity / Air Pressure / Gas
-
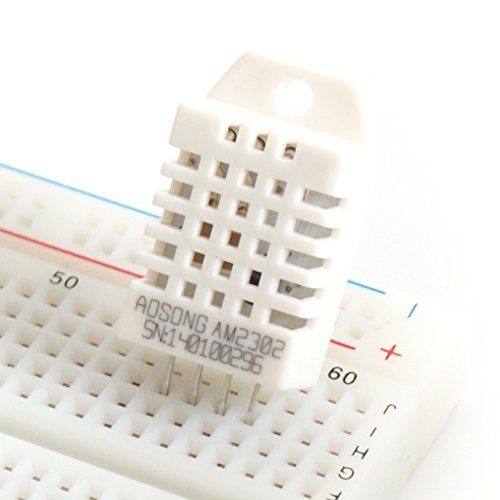
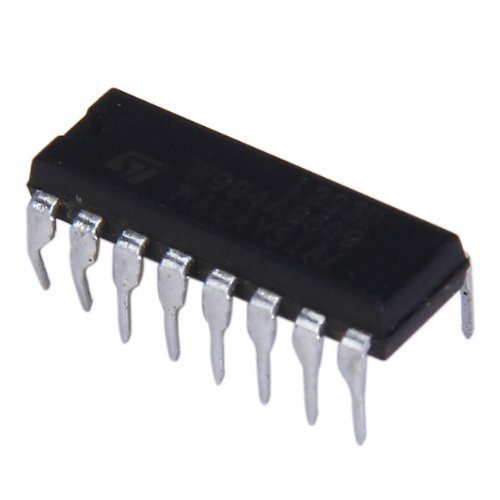
DHT11 / DHT22
The DHT11 and DHT22 sensors can measure humidity as well as temperature. Only one GPIO is used. The difference between the two is mainly the measuring range and accuracy. The white DHT22 can measure all humidity ranges from 0-100% with an accuracy of 2%. By comparison, the DHT11 (blue) is only able to measure areas of 20-90% humidity and above all, the accuracy is significantly worse with 5%. The light blue DHT11 sensor has a small price advantage (about one buck).
Price: about $3-4 / ca. £3
-
DS18B20
The DS18B20 and DS18S20 represents a very simple sensor. These Raspberry Pi sensors are addressed via the so-called 1-wire bus. An advantage is that many different 1-wire components can be connected in series and read out by a single GPIO. However, these modules can not measure additional information such as humidity and / or air pressure. The DS18B20 is particularly suitable for outdoor use, as there are also water resistant versions available. With a measuring range of -55°C to +125°C it is well suited even for non-everyday applications.
-
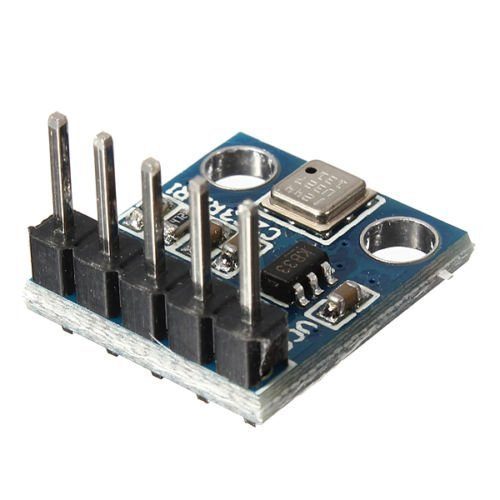
BMP180 Barometer
The determination of the air pressure can be meaningful in weather stations and similar projects. This is best done using the BMP180, which is controlled via I2C on the Raspberry Pi. In addition to the air pressure, the temperature can be read out as well as the altitude. However, the last value is not very accurate. If you need the height, you should read the values with a GPS receiver.
Price: about $5-6 / ca. £3-4
-
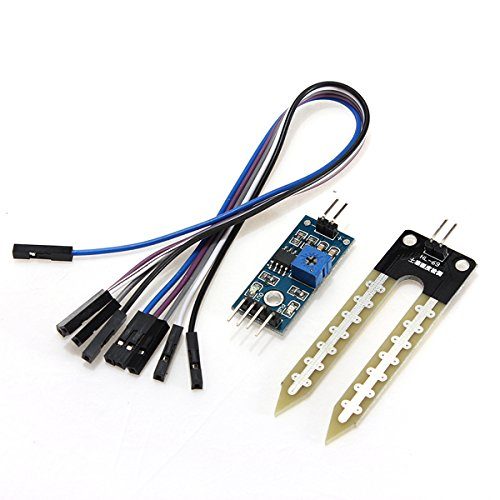
Moisture Sensor
This analogue humidity sensor finds an excellent place in automatic irrigation systems. It is placed in the ground and measures the humidity by current flowing between the strands. The more humid the earth in between, the higher the (analog) signal. In order to read the value with the Raspberry Pi, the MCP3008 is needed (Arduinos can recognize analog signals directly).
Price: about $4-5 / ca. £2-3
-
Capacitive ground moisture sensor
A problem with analog moisture sensors is that they erode over time and are not always very precise. Capacitive sensors prevent these problems. The relative humidity is calculated by means of the frequency. However, a frequency divider is also suitable for use with the Raspberry Pi.
Price: 5-7€
-
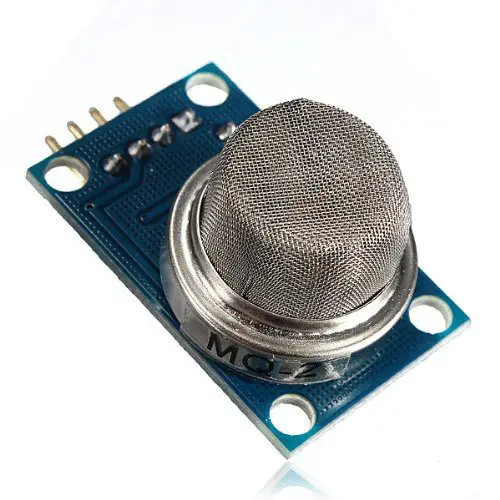
MQ-2 Gas Sensor
The MQ gas sensors can detect different gases at room temperature. Depending on the model, other gases are supported. The MQ-2 can recognize methane, butane, LPG and smoke, the MQ3 detects, for example, alcohol, ethanol and smoke, etc. You can find a list of all MQ sensors and their supported gases here.
You should take care that these sensors can be very hot and they should not be touched directly. Since these modules also work analogically with 5V, you need also a MCP3008 as well as a 3.3V-5V TTL to read the signals.
Motion Sensor
These Raspberry Pi sensors can be used to detect motion, but not all of them are “real” motion sensors.
-
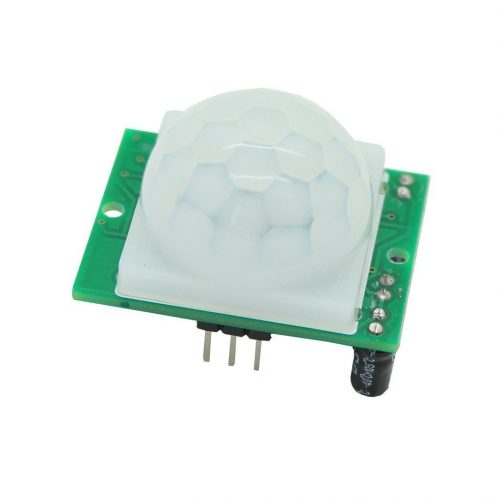
PIR Motion Sensor
The PIR motion sensor has some advantages over other similar products: besides the low price, a signal is sent only if something moves. This allows you to wait for signal flanks using the GPIOs. In addition, a resistance can be varied so that a signal is only sent when the movement is close, or changes that are already far away are perceived.
In addition to outdoor projects, the PIR can also be used in buildings – whether to activate the lighting or, as I use it, to turn on my touch screen for home automation as soon as someone approaches it. -
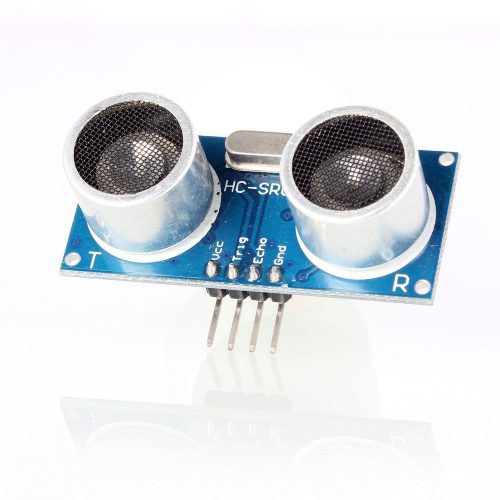
HC-SR04 ultrasonic sensor
The HC-SR04 sensor is not a distance / motion detector, but an ultrasonic sensor. Through a small trick it is nevertheless possible to measure distances. By measuring the time elapsed between transmitting and receiving an ultrasound signal, you can derive the distance as the sound velocity in the air is known. In the tutorial I explain the details. The wide opening angle is an aspect which, however, must be considered: since the ultrasound propagates not only on a straight line, but at an angle of about 15°, the signal is first reflected from the nearest point in this area – which can be also an external point.
As a rough estimate, or for moving robots, it is nevertheless useful, also because of the low price. -
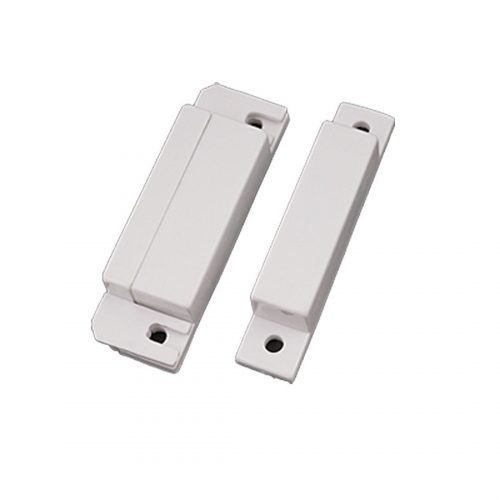
Magnetic Switch / Reed Relay
By means of magnetic sensors / reed relay, you can check for binary states. The magnetic relay is opened as soon as a magnet is in the vicinity. Otherwise the access is closed. So if voltage is then passed through, you can check the condition.
In particular, these magnetic sensors are suitable for inspecting windows and doors by mounting them on the frame and checking whether the door / window is open or closed.Price: about $2-3 / ca. £2
-
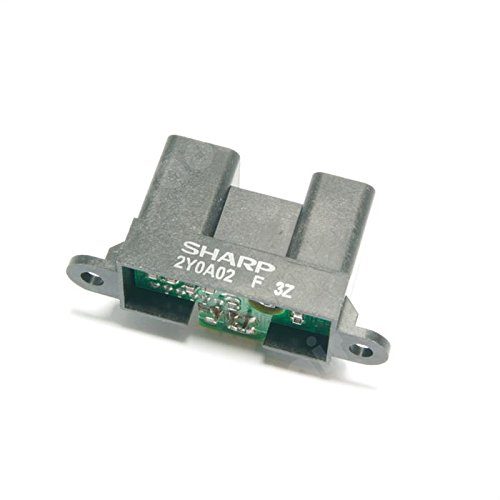
GP2Y0A02YK
With the GP2Y0A02YK infrared distance meter, much more accurate measurements can be performed, as with e.g. the HC-SR04. The module is limited to a range of 20-150cm. Alternatively, the similar sensor GP2Y0A710K0F can be used, which has a range of 100 to 500cm.
Price: about $8-12 / ca. £10
-
RFID-RC522 – Inductive RFID card reader
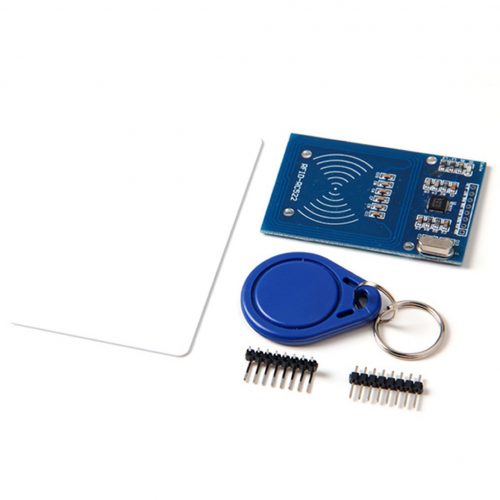
The RFID-RC522 is a card reader for check cards. A signal is transmitted via the SPI data bus as soon as a card approaches on a few centimeters. Each card has a different code, which you can read out. Thus, for example, locks and / or doors could be realized, which open without contact – sesame open up 😉
Price: about $4-5 / ca. £3-4

Navigation modules
-
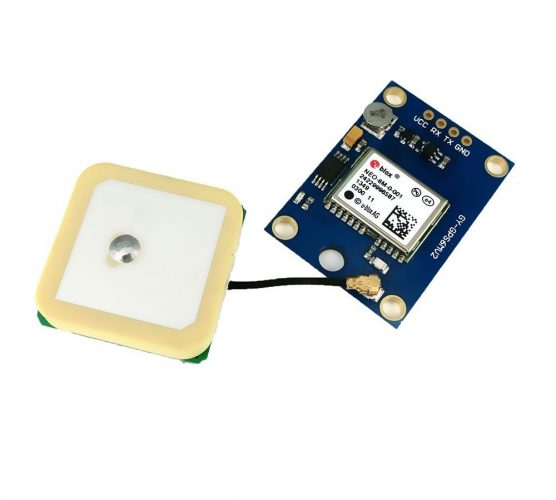
GPS NEO-6M Module
-
USB GPS Receiver
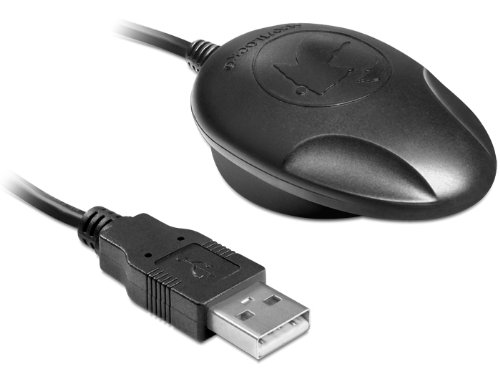
As an alternative to GPS modules which are connected via the GPIOs, USB GPS receivers can also be used. Those have the advantage that (almost) all are compatible with Windows, Linux and Mac and no additional connection is necessary. On the other hand, these modules are usually more expensive, but they are not inferior in terms of accuracy. It is therefore an individual question, which type of receiver is preferred.
-
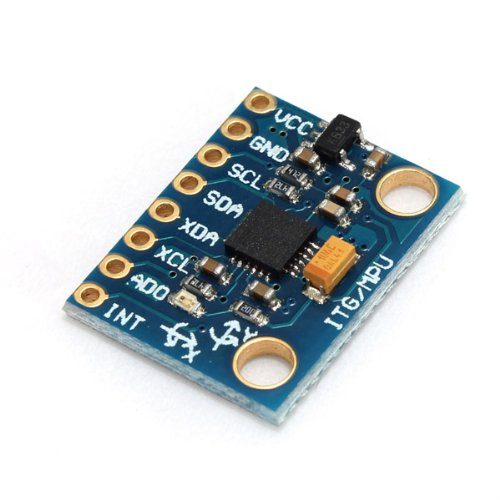
MPU-6050 Gyroscope
A gyroscope (circular instrument) is used to detect the rotation along the three axes. The MPU 6050 sensor also contains an acceleration sensor. This module can be used e.g. in robot arms to determine the angle of rotation.
Price: about $3-4 / ca. £2-3
-
HMC5883L / GY-271 Compass
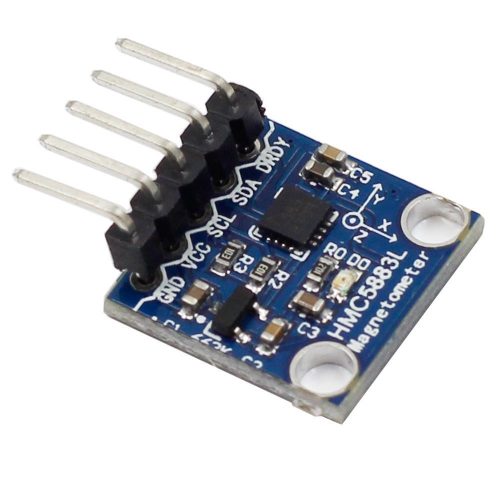
As with analogue compasses, the directional display can also be read digitally. The HMC5883L sensor, which is read out via I2C, which returns an angle in radians, is suitable for this purpose. As with a normal compass, the value can be confounded by metal objects nearby
Price: about $4-5 / ca. £2-3
-
DS1307 RTC
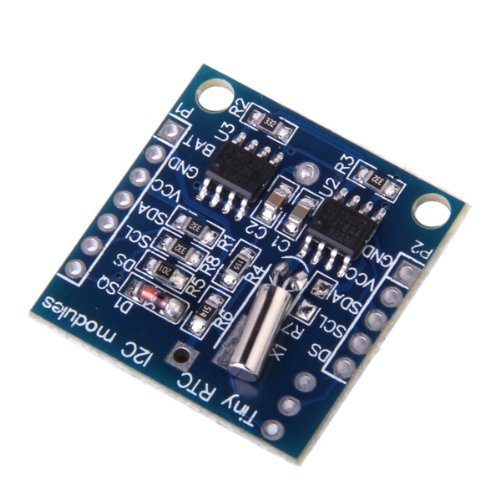
If the Raspberry Pi is connected to the Internet, it can request the exact time. This could be a problem in applications where no (permanent) Internet connection is given, but the date and the exact time is important (car PC, weather station, etc.). A so-called Realtime Clock (RTC) module can help: Once initialized, it saves the current time – even if the power supply is not present – due to the small battery. On computer mainboards such a module is installed, which is why the time of the computer does not have to be re-adjusted every time you restart. Since the Raspberry Pi / Arduino does not carry an RTC module from within, this can be retrofitted.
Price: about $2-3 / ca. £2

Raspberry Pi Sensors – Wireless / Infrared (IR) / Bluetooth
-
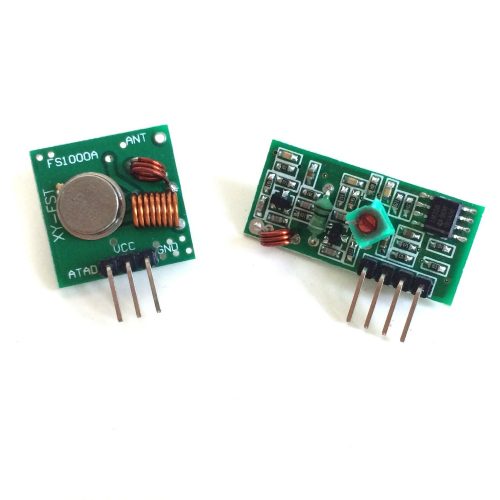
433 MHz Set
One of the simplest method to transmit signals via radio are 433 MHz transmitter and receiver. Since these sets are very cheap, they are used in many projects. So you can for example let several Raspberry Pi’s communicate with each other.
Many other devices work also with 433 MHz radio signals, such as garage doors or radio controlled outlets, and these codes can be recorded and sent for specific tasks.Price: about $2-3 / ca. £2
-
2.4 GHz NRF24L01+ Modul
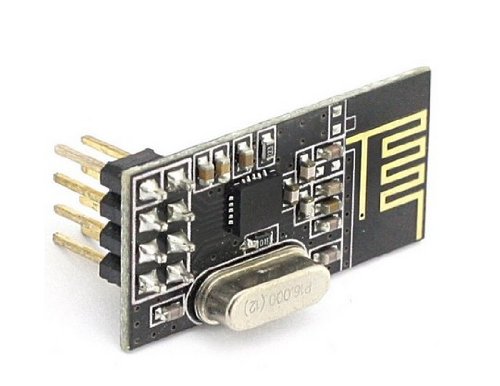
A more advanced method for wireless communication is the use of the 2.4 GHz frequency. The advantages compared to the 433 MHz transmission rate are mainly that a larger amount of data can be transferred at once. Thus, whole sentences and commands can be sent with a signal / data package. A second Raspberry Pi or an Arduino can also be equipped with a 2.4 GHz receiver / transmitter and thus receive commands from a “base station” and send back data.
Price: about $3-4 / ca. £3
-
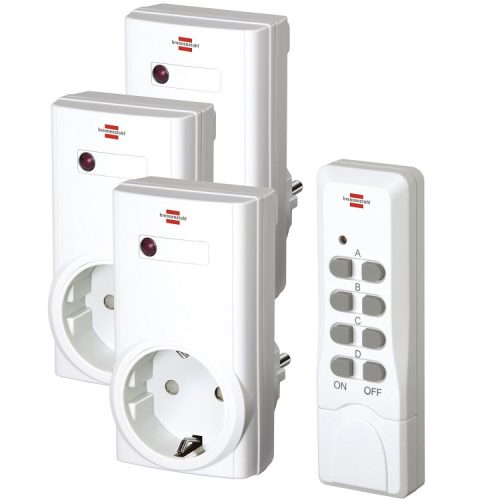
Radio controlled outlets / Power sockets
In the field of home automation, wireless sockets are almost a standard. The vast majority of these devices work with 433 MHz radio signals. By reading the codes of the remote control with a receiver on the Raspberry Pi, one can switch these radio sockets individually.
There are different models, usually pure switchable radio sockets, but also (dimmable) lamp sockets are offered.
You should pay attention to one criterion: There are models with a so-called “generic” code, i.e. on these models the code is randomly generated and changes. These frequencies are hard to read out. On the other hand, those sockets, in which the code is freely selectable, are very easy to control.Price: about $10-15 / ca. £10+
-
Si4703 Radio receiver
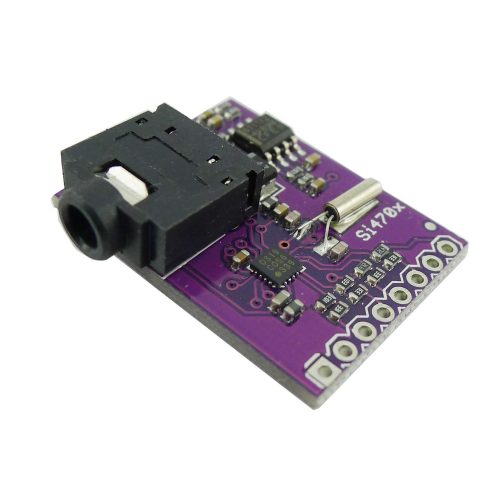
The Si470x module offers the option to upgrade the Pi to a radio receiver, which can be very interesting in Car PCs or Raspberry Pi Jukeboxes. As with conventional radios, the frequency and certain options can be adjusted (via software). If that is not enough, you can also use your Pi as a radio station.
-
Bluetooth Adapter
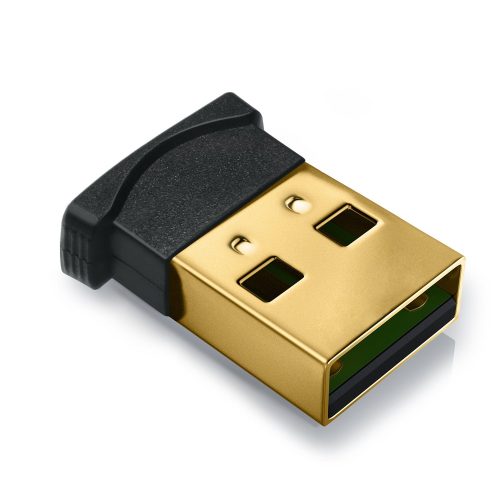
The Raspberry Pi has not always had an integrated Bluetooth module. Before the model 3 was published, neither Bluetooth nor WiFi modules were onboard. The inexpensive Zero model also comes without a Bluetooth adapter. Since almost every mobile phone supports this communication method as standard, it is so easy to exchange pictures and other files between the smartphone and Raspberry Pi. Other projects such as controlling the Pi via Bluetooth commands are also possible.
Price: about $7-10 / ca. £7-8
-
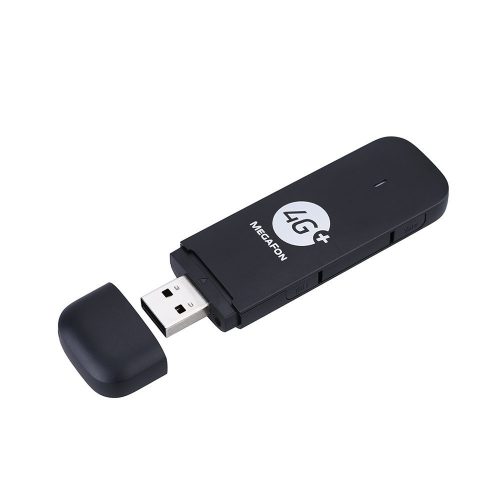
GSM Surfstick
The Raspberry Pi is used in many outdoors projects, e.g. as a weather station or for monitoring certain things. However, even if no (or only a weak) WIFI signal is available, many functions are restricted. If you still want to have access to the Pi and also receive the data of such an outside project, an Internet connection is necessary. The mobile surfsticks, which are also often available as gifts for data rate contracts, can be useful. With such a stick and a SIM card with data volume, the Pi can be permanently online. In addition, it is also possible to use the stick to send and receive SMS, for example to remotely control the Raspberry Pi by a mobile phone.
Price: about $25-30 / ca. £20-25
-
Infrared diodes
Most remote controls use infrared LEDs to transmit signals. These codes can be read and stored easily with an infrared receiver. With the program LIRC, it is also possible to send those codes with an IR transmitter diode. For example, a TV can be controlled with the Raspberry Pi.
In addition, there are also IR LEDs, which can be used as a light barrier. -
Laser Module
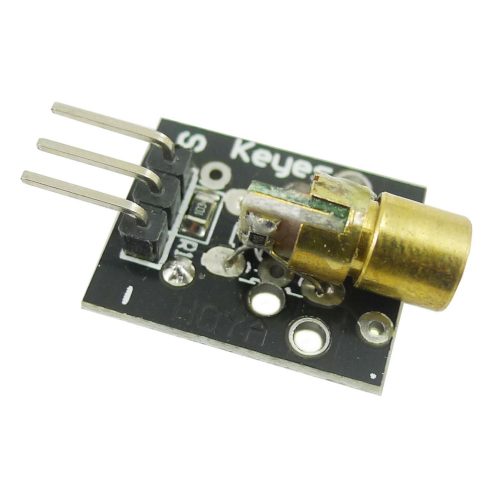
Although standard laser modules do not have great functionality (can be switched on and off), they are used in various interesting projects. Thus, for example, there are projects of distance measuring devices, which are using a camera and a laser module. The laser is switched on and off very quickly and pictures are recorded. The distance can then be calculated by means of the beam set.
Due to the exchangeable mirrors at the head of the laser modules, different patterns such as grids are possible.


Motors
-
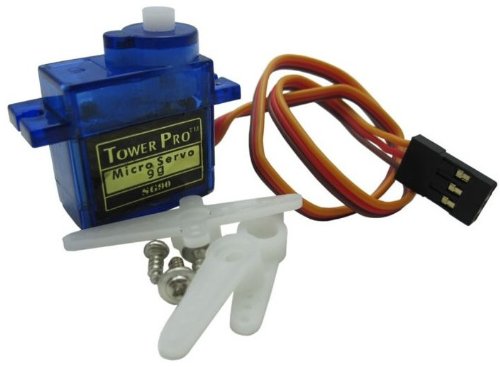
Servo Motors
Unlike ordinary motors, servo motors can be individually controlled. Only the indication of the angle of rotation for moving the motor is necessary. PWM (pulse width modulation) signals are sent to the motor. The Raspberry Pi can use this method of transmission. Using the Python GPIO library or WiringPi is particularly easy.
Price: about $2-3 / ca. £2
-
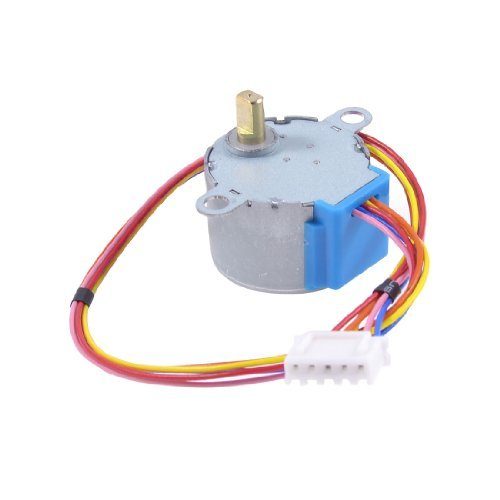
28BYJ-48 Stepper Motor
Step motors are motors that can “go” a certain number of steps in one revolution. Two electromagnets are built in, which move the axis through different poles. How the polarity looks like is written in the data sheet of the motor.
One of the most popular stepping motors (because it has a lot of steps and is nevertheless cheap) is the model 28BYJ-48. This motor has 512 steps, each step consisting of 8 sequences. This means that a full revolution has 4096 steps (or one step is made per 0.087°).Price: about $2-3 / ca. £2
-
PCA9685 Servo Board
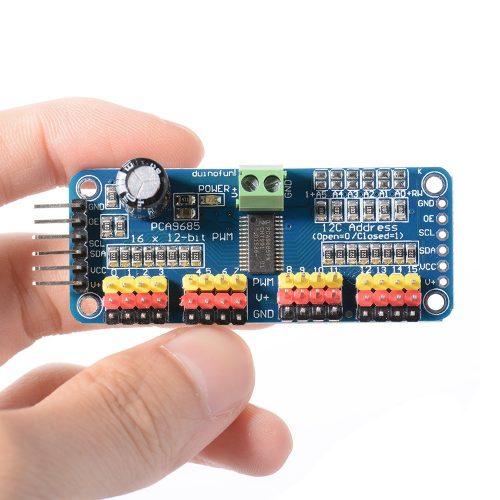
Using PWM, servos can be controlled directly from the Raspberry Pi. However, as soon as you want to control several servo motors, either the GPIOs can become scarce, or you need more power. The PCA9685 servo driver board is ideally suited for this purpose because you can control up to 16 motors per board via I2C. And not enough. It is even possible to connect several boards one after the other. In addition, an external power supply can be easily connected. If you want to use a robot arm, for example, this is the optimal board.
Price: about $4-5 / ca. £2-3
-
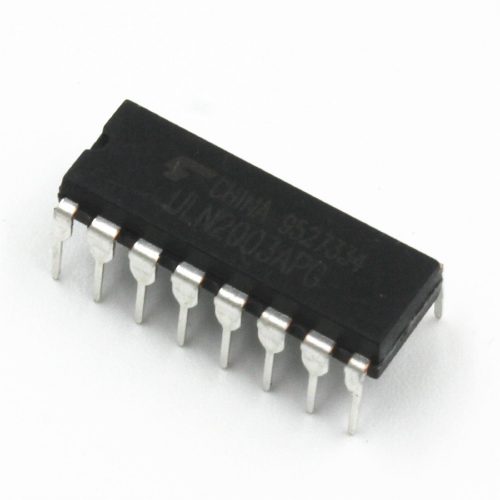
ULN2003
Those 28BYJ-48 stepping motors are often supplied with a driver board. The supplied board usually has a ULN2003 IC, which holds the voltage for the 5V motor, but can be controlled with 3.3V. This is important because the GPIOs are protected and no transistor or relay is needed.
Price: about $3-4 / ca. £2-3
-
L293D
An alternative driver IC is the L293D. The advantage of this module, compared to the ULN2003, is that it can also be used with higher voltages than 5V. Because many alternative stepping motors (e.g., fewer steps for faster rotation or higher pulling force) require more than 5V, they must be powered by an external current source. The L293 IC is ideal for controlling these motors. By the way, it is even possible to control two motors simultaneously (individually).
-
A4988


Analogous Raspberry Pi Sensors
-
MCP3008 Analog-to-digital converter
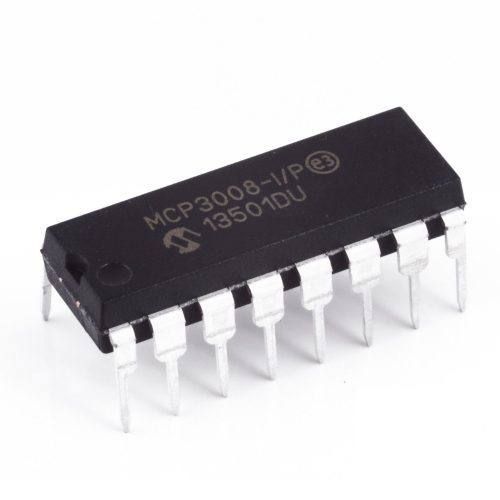
Unlike the Arduino, the Raspberry Pi does not have its own analog IO pins. This means that you can not simply read out analog modules. The MCP3008 module helps you: It makes it possible to use analog modules with the Raspberry Pi and therefore this digital converter is required for all analog modules on the Raspberry Pi.
-
Joystick
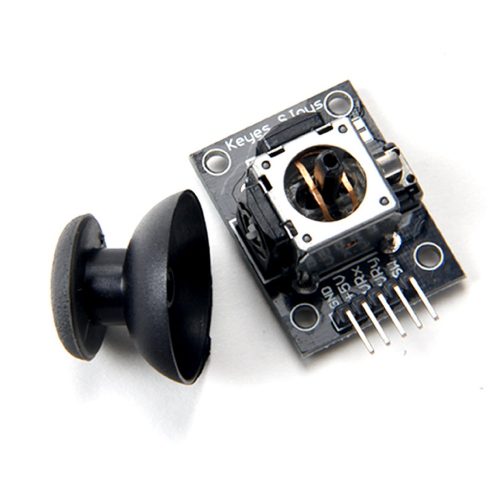
One of these analog modules is a 2-axis joystick. Two potentiometers (see below) for X and Y axes are installed, which allow more or less voltage to pass through the movement. If one converts the analog value into a digital, one gets numbers between 0 (no voltage) and 1023 (full voltage). In the center, a digital value of approx. 512 is returned on both axes.
Price: about $4-6 / ca. £3
-
Potentiometer / Rotary Switch
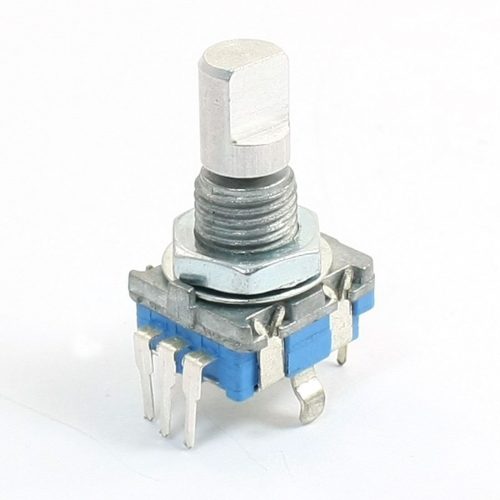
Potentiometers are basically rotatable resistors. You can change the resistor value easily by rotating the control knob. Each module has a maximum resistance (minimum is zero). In addition to joysticks, potentiometers can also be found e.g. in brightness or volume controllers.
Price: about $3-4 / ca. £2-3
-
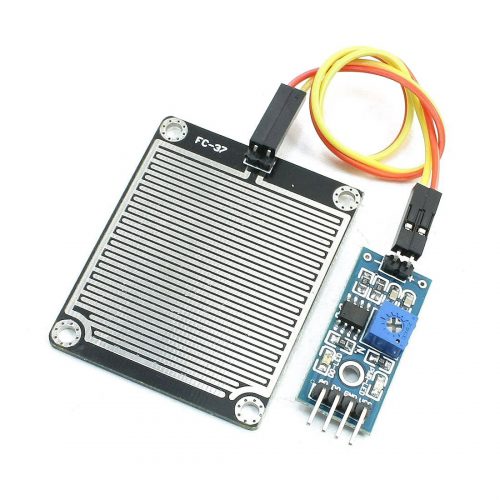
Raindrop Sensor
-
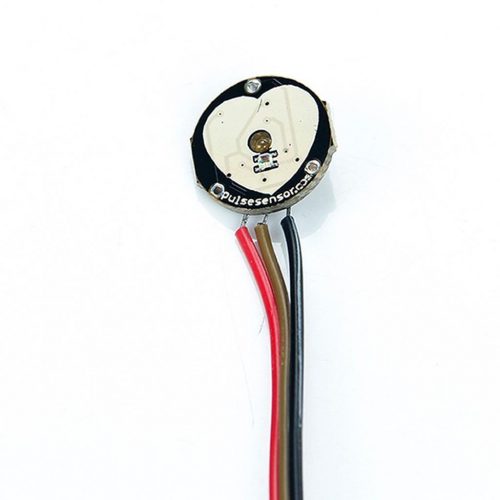
Heartbeat / Pulse Sensor
With a pulse sensor, the heart rate can be read out on the Raspberry Pi. The analogously detected value changes, depending on the pulse beat. This is again converted with an ADC and the pulse is determined on the basis of the last measured values.
Price: about $6-7 / ca. £4-5


Power / Current Supply
-
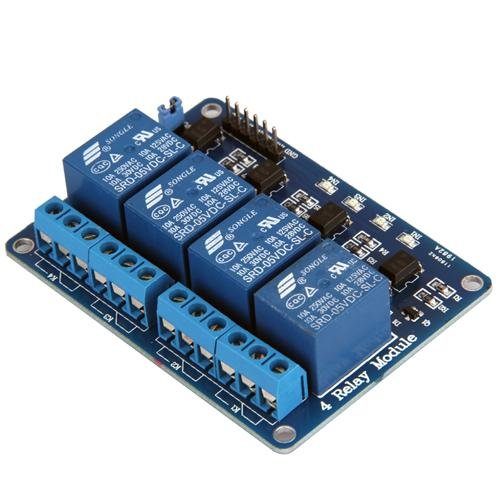
Relais
The GPIOs of the Raspberry Pi work with 3.3V, although it also has a 5V pin. However, many devices require a higher voltage. In order not to combine the circuits, one can use relays, which are basically switches. This has the advantage that you can also switch circuits with higher voltages with the Raspberry Pi, without risking something.
Price: about $3-4 / ca. £2-3 (depending on the amount)
-
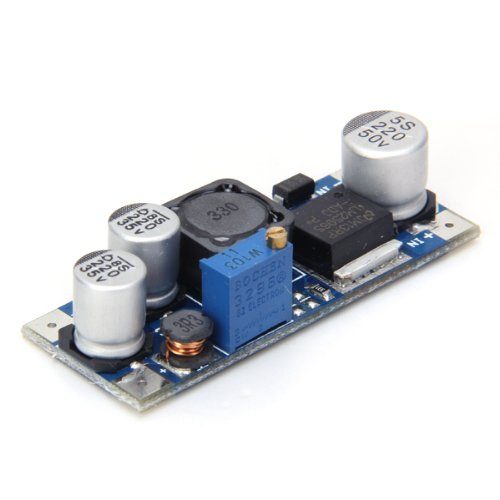
LM2596 Buck Converter / Step Down Module
With the LM2596 (and similar) modules, higher voltages can be regulated downwards. For example, you can regulate the current of (rechargeable) batteries to the required 5V USB input voltage. However, no alternating current (AC) is allowed, but only direct current (DC), as supplied by batteries.
-
3.3V – 5V TTL I2C Logic Level Converter
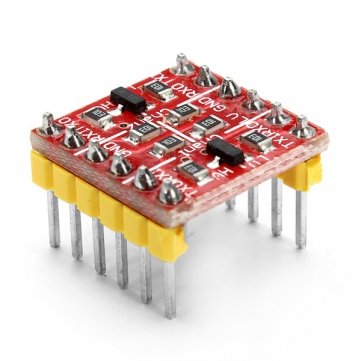
Some modules and sensors for the Arduino output 5V signals, but this would destroy the GPIOs, since those work with 3.3V. Here, a level converter can be used to further control the signals.
It is important to ensure that bi-directional level converters are purchased so that you can send and receive signals as well.
Displays
-
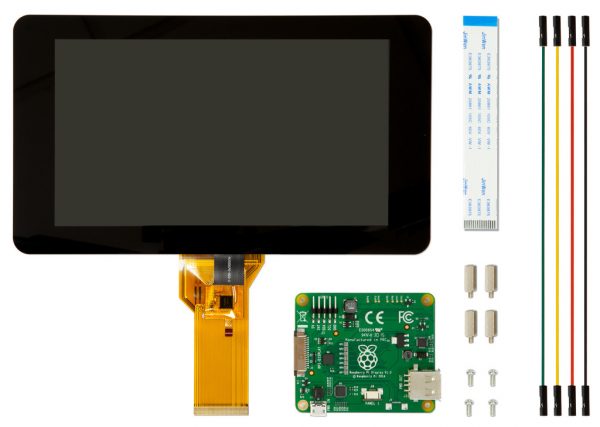
Official 7″ Touchscreen
In September 2015 the Raspberry Pi Foundation introduced the official touch screen display after a long time. It has 7″ at a resolution of 800×480 pixels. The 10 point capacitive touchscreen is connected through the DSI port and doesn‘t occupy any USB ports or GPIOs. The inital startup is very easy and you even don‘t need additional software (only an actual version of Raspbian or NOOBS).
Price: about $65-75 / ca. £70
-
Other 7″ Touchscreen
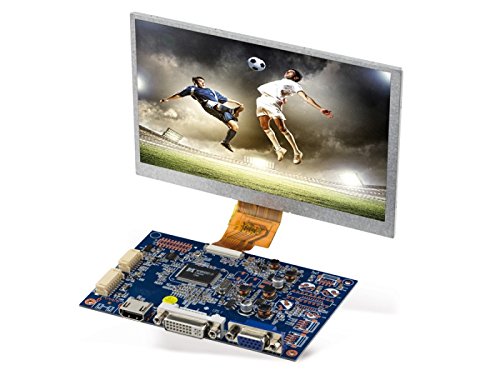
Before the Raspberry Pi Foundation introduced their touchscreen module, many other companies developed touch displays for the Pi. The advantages are mostly the better resolution and sometimes even a bigger size (10“ or more). Although most of them don‘t use the DSI port and therefore the HDMI and USB port (for touch) and / or several GPIO pins will be used. Moreover a separate driver is usually needed.
-
3.2″ Touchscreen
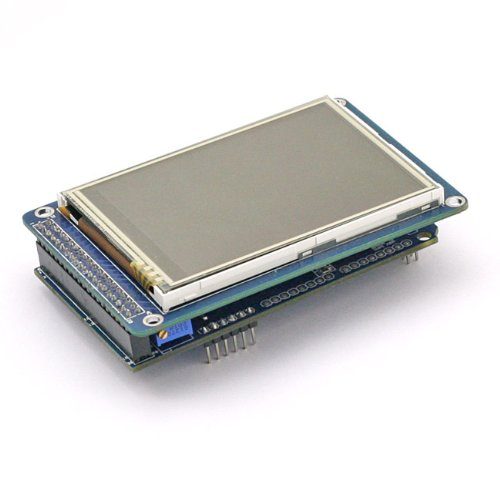
Not everyone needs 7 “or larger displays, sometimes a smaller touch screen is also enough, but the choice is relatively large. Sizes between 2.4 and 4.3 inches are very common, but these modules have almost exclusively resistive touch, You can connect them, depending on the model, via the GPIOs or (if available) directly via HDMI.
-
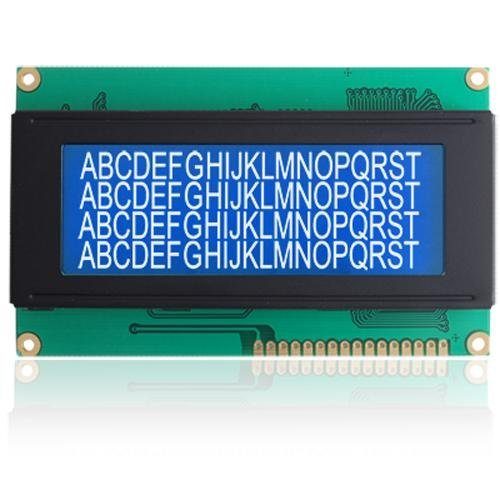
HD44780 Displays
In addition to touch screens, there are also pure character displays. The most common are 16×02 and 20×04 displays, which specifies the number of characters per line and amount of rows. Almost all of these displays have an HD44780 controller, which can be easily accessed with the Raspberry Pi.
Price: about $4-5 / ca. £3-4
-
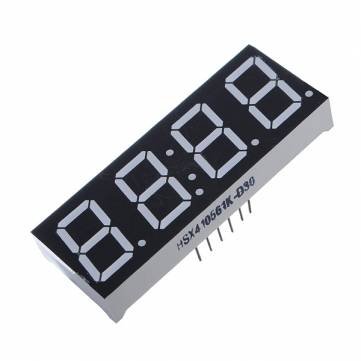
7 Segment Display
7 Segment displays are often used to display numbers and, as the name implies, have seven luminous segments, which can be addressed individually. In order not to occupy too many GPIOs, one usually takes a controller like the MAX7219.
In addition to the usual 7 segment displays, there are also models, which contain 15 controllable segments and with it it is also possible to display letters (even if that does not look so nice).

Other Modules, Components and Raspberry Pi Sensors
-
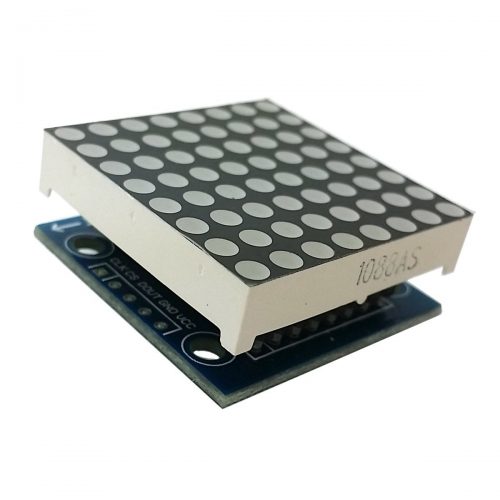
MAX7219 LED Matrix
The square 8×8 LED matrices are available in red and green. It is possible to control each individual LED with the help of the MAX7219 IC. In addition, many of these modules can be plugged together, resulting in a large dot display. The signal is sent via SPI. I have written a library, which let’s you easily control these matrices.
Price: about $3-5 / ca. £2-3
-
Optical Fingerprint Sensor
Fingerprint Sensor can be used to implement safety-relevant applications. For example, the fingerprints of different persons are stored and authorization rights are given to them. Electronic saves or door locks can be built. A password can also be requested in conjunction with a numpad.
The interrogation of the sensor is surprisingly accurate and takes place by means of features. After reading or storing the imprint, it is even possible to export the imprint as an image. -
Arduino
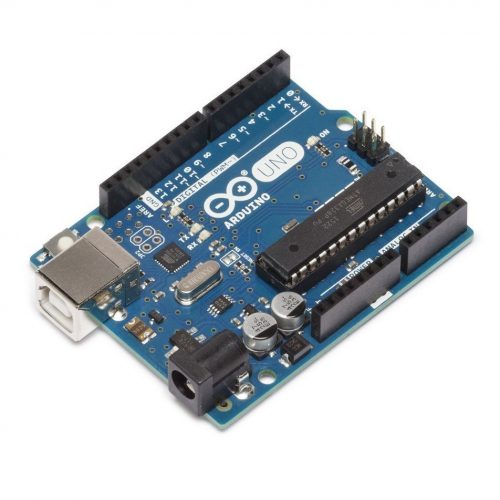
The Raspberry Pi can also be used as a micro-controller, but it has a lot more functions because it runs an operating system. A true micro-controller is e.g. the Arduino. It can, for example, also read analog sensors. The Arduino can also be operated very easily on and with the Raspberry Pi, e.g. via USB or 433 MHz or 2.4 GHz radio. Since Arduinos are cheaper than normal Raspberry Pis, they can either serve as extensions for the GPIOs or as an outdoor station for certain sensors whose data is transmitted wirelessly. As there are more projects for the Arduino than for the Raspberry Pi, you can also implement and run those projects on the Raspberry Pi (via the Arduino detour).
Price: about $5-6 / ca. £4 (Nano Model)
-
ESP8266 NodeMCU
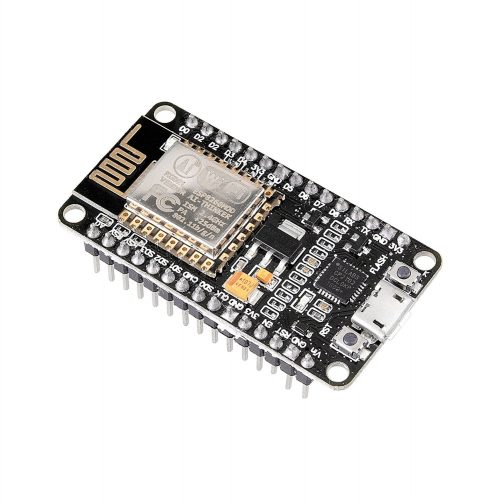
The ESP8266 NodeMCU is a microcontroller that has a built-in Wifi module. Because of this and by its very low price, it is clearly more attractive than an Arduino. The programming takes place via the serial port can be done either via the Arduino IDE or other programs (LUA). If one has distributed a weather station or other IoT devices that are on the same WLAN network, you can send their data to a Raspberry Pi “mother station” via wifi. The ESP8266 is available in different versions, although the most favorable variant (ESP-01) has only two GPIO pins. Other models like the ESP-12 offer a lot more pins for a small extra charge.
-
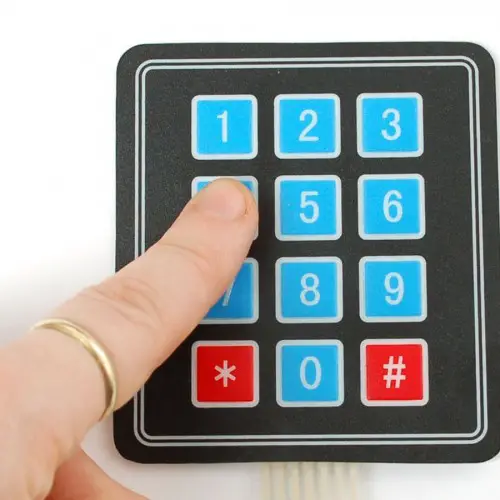
KeyPad / Numpad
A numeric input field is required for vault or code lock projects. For this there are own modules, which look like a numpad on the PC keyboard. These modules are available in different sizes (3×4, 4×4, etc.) and can be read directly at the Raspberry Pi. By entering certain numerical codes / combinations, you can execute secret actions 😉
Price: about $2-3 / ca. £2-3
-
Magnet valve
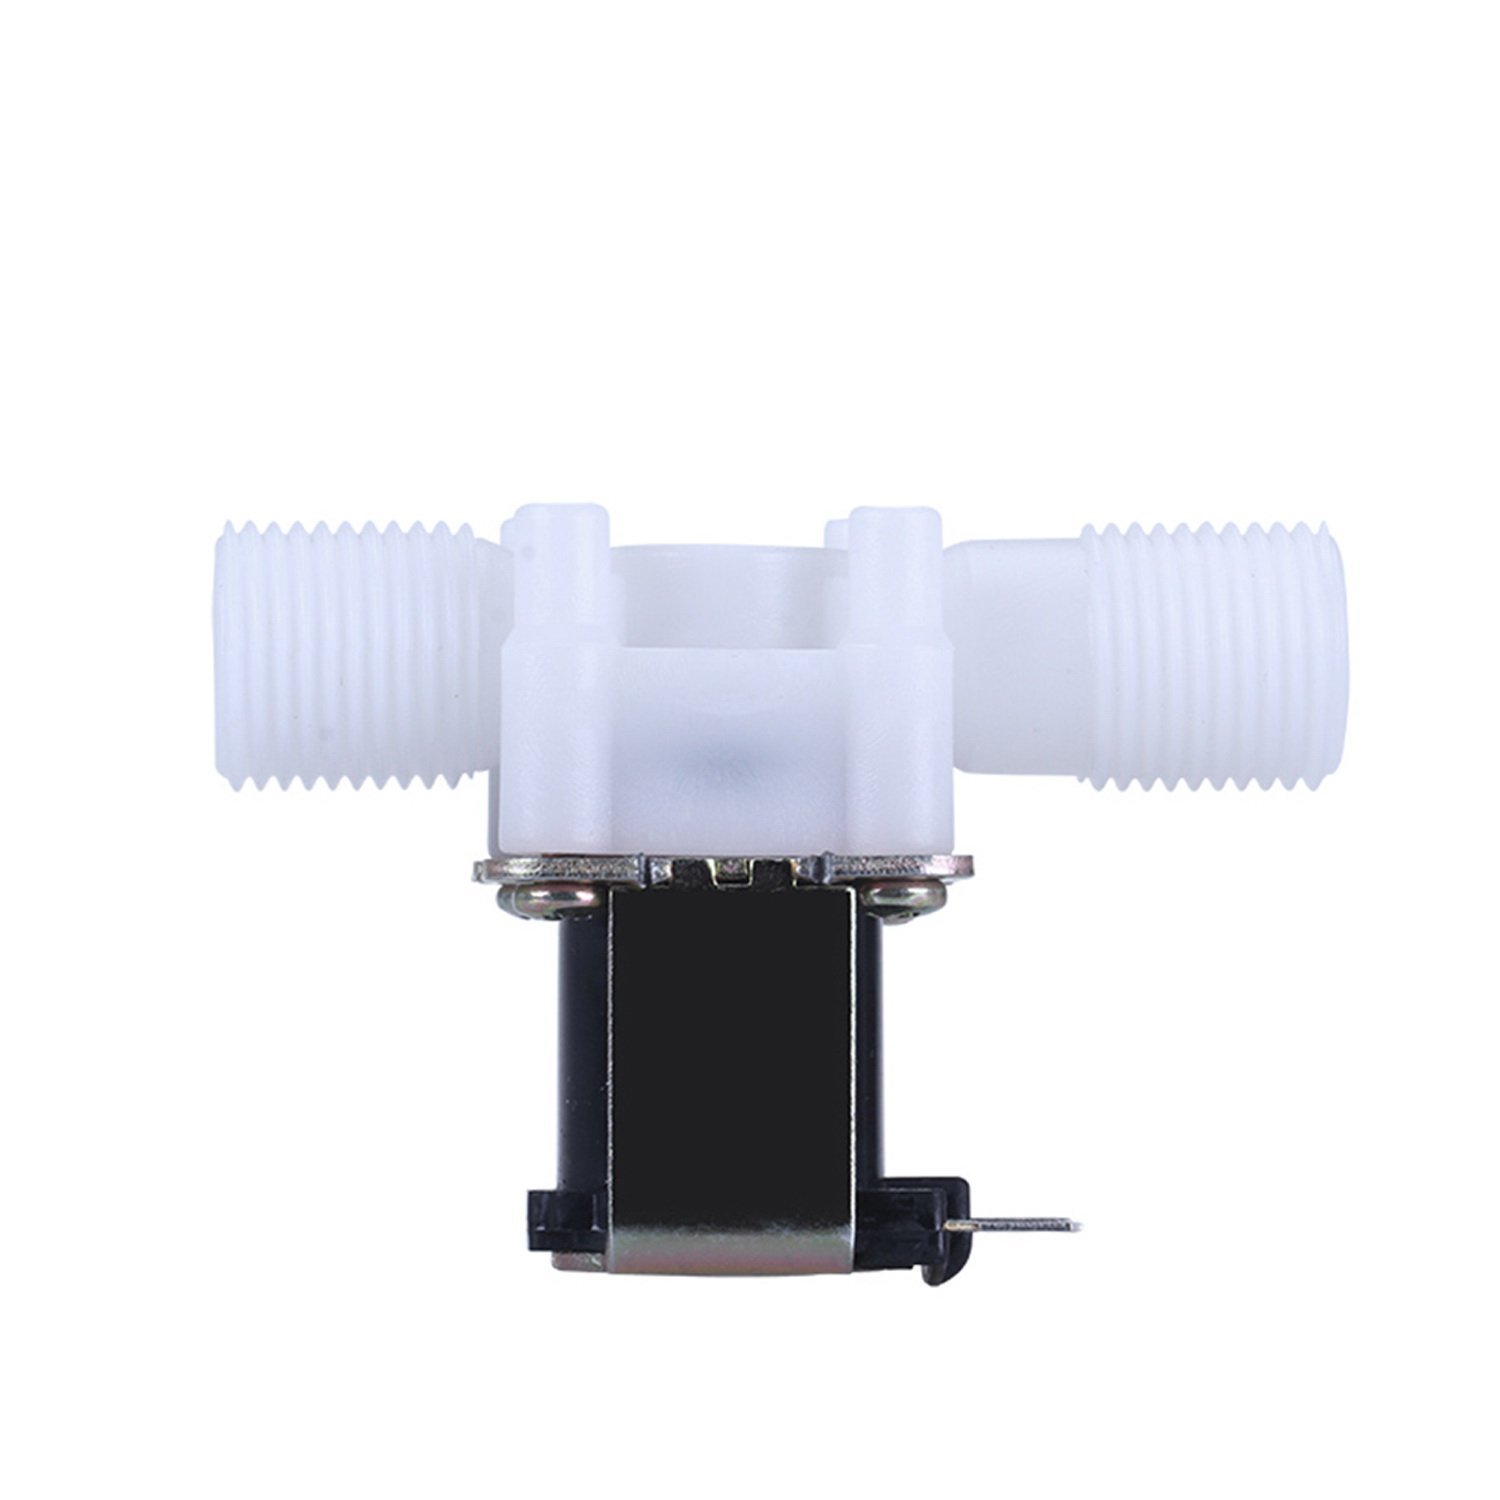
A solenoid valve is suitable for interrupting the flow of liquids or gases. A kind of “opener” can be built between two pipes or hoses. Ideally, magnetic valves are used, which are operated with 12 volts. All you need is an external power supply and a relay on the Raspberry Pi, which switches the solenoid.
You can use those valves e.g. in the outdoor area (keyword: automatic irrigation) or also in smaller projects such as intelligent coffeemakers, etc.
-
Water Flowmeter
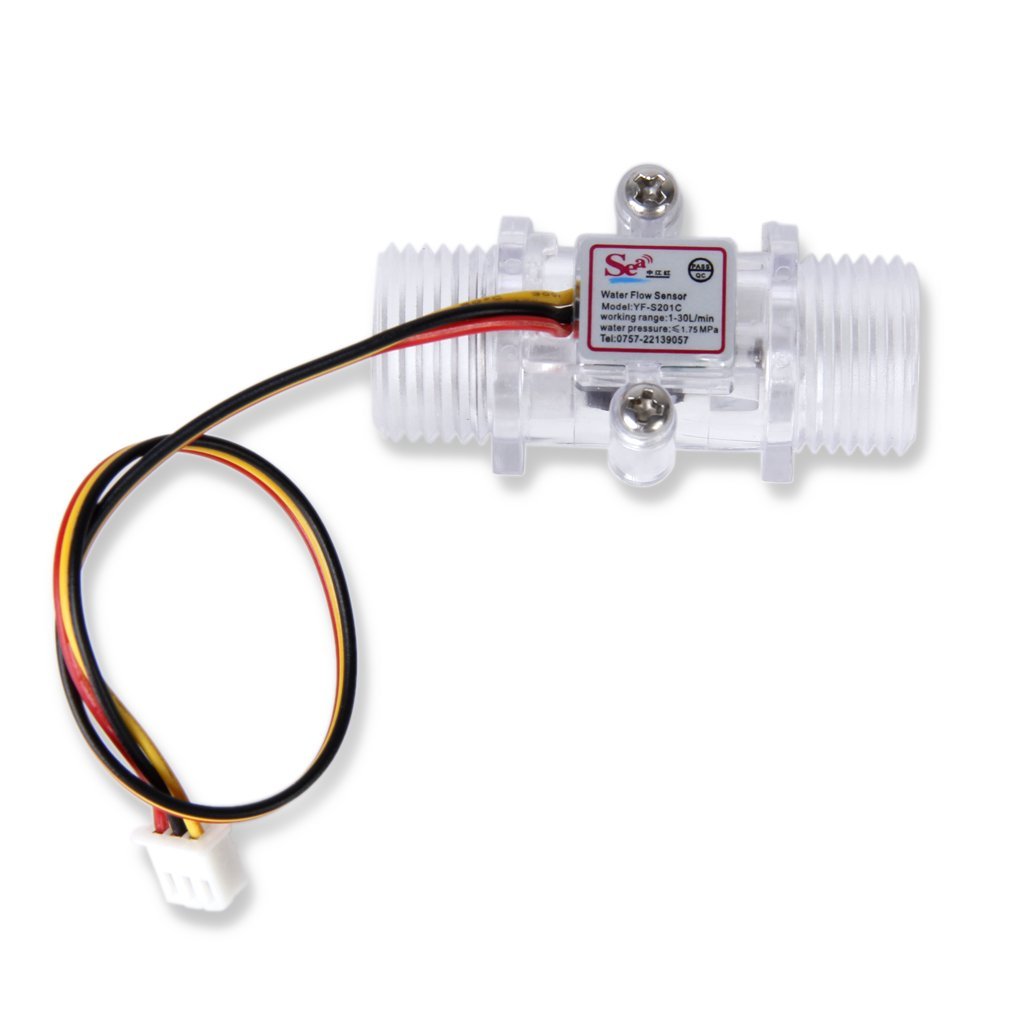
With the aid of water flow meters (Hall effect sensors), the amount of water flowing through the tube per minute / second can be determined at the Raspberry Pi. There are different sensors which have a higher accuracy or a higher flow rate and maximum water pressure. These measuring aids are particularly interesting in the outdoor and garden areas. For example, the rainfall of a thunderstorm can be determined (drainage channel) or the irrigation of the plants can be checked.
-
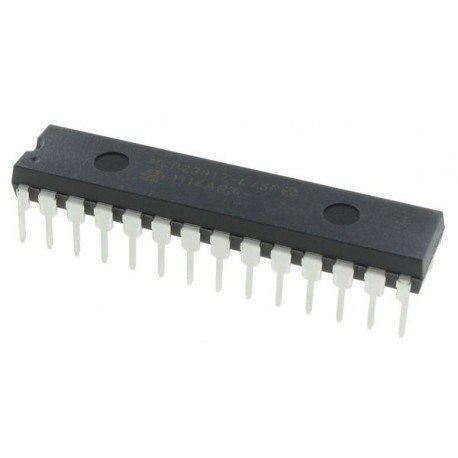
MCP23017 Port Expander
The MCP 23017 device is an IO port expander. Because the Pi has only a limited number of GPIOs, these can easily run out for larger projects or multiple connected modules. A port expander is controlled by I2C and extends the number of IO pins. You have (per port expander) an additional 16 pins, which you can declare as input or output. You can also connect and control multiple port expanders at the same time.
-
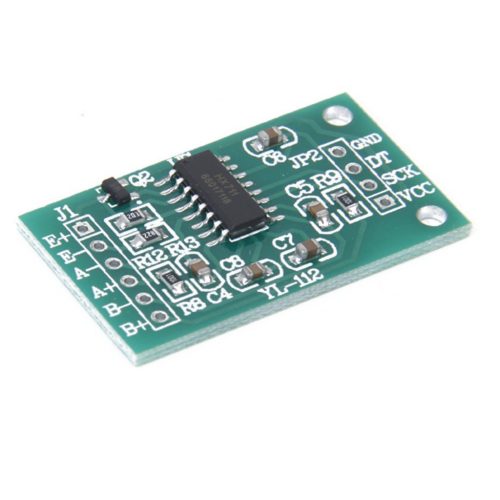
HX711 Weighing Sensor + Load Cell
-
ENC28J60 Ethernet module
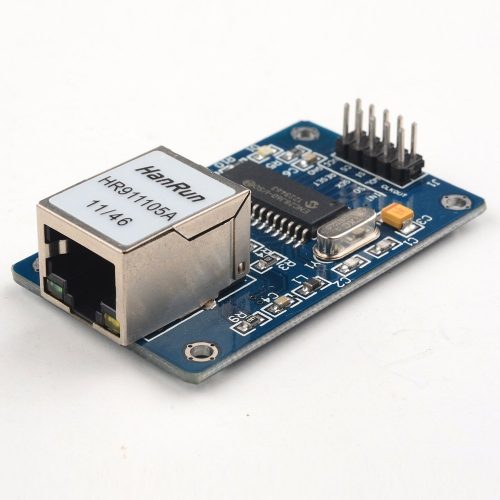
If you call a Raspberry Pi Zero your own, you probably know the problem: Because there is only one (micro) USB port, an Internet connection is only per WiFi possible, because – unlike the Raspberry Pi 3 – it does not have an integrated WiFi adapter. If you would like to use another USB device, a USB hub is necessary. The ENC28J60 module can be used here: it is connected to the GPIOs and allows a wired Ethernet connection. Thus no external Wi-Fi stick is necessary and no USB hub is needed.
Price: about $3-4 / ca. £3
-
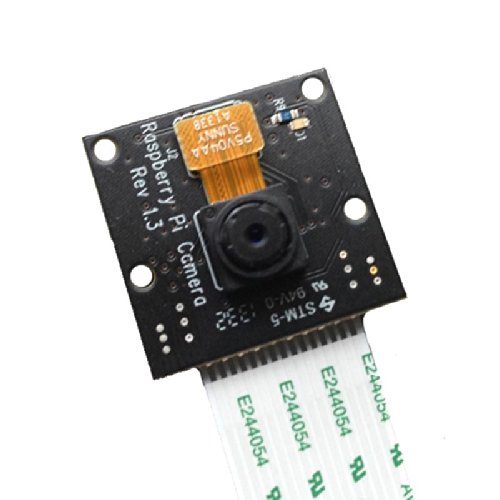
Official Raspberry Pi Camera Module
In many Raspberry Pi projects, cameras are also used. In this case, customary USB webcams can be used, but their quality is often not very good and also it occupies a USB port. A better alternative is the official camera module of the Raspberry Pi Foundation, which can be directly connected via the CSI port. The module is available in two versions: With (green) and without (black) infrared filter. The lack of an infrared filter allows a higher light sensitivity, which results in better images at dusk / night.
Price: about $15-20 / ca. £20
-
6DOF Robot Arm

Multiple servos allow you to control a multi-axis robot arm with the Raspberry Pi. There are different versions, of which the most familiar is the one with 6 engines. Each individual servo can be individually controlled, resulting in a high degree of accuracy. Besides the servomotors, a driver board like the PCA9685 is very useful.
-
Photoresistors
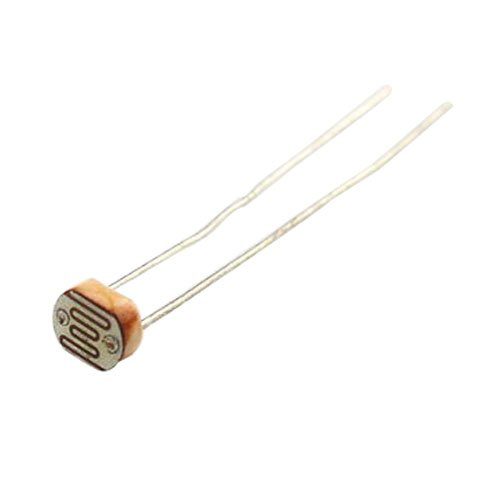
In addition to conventional resistors and potentiometers, there are also photoresistors. These have a light-sensitive surface and have a different resistance value, depending on the light intensity. They can be used, for example, to detect day / night or to build light barriers.
-
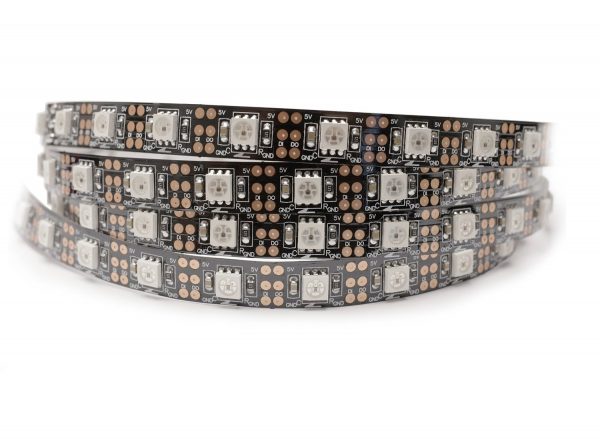
WS2801B RGB LED Stripe
WS2801 LED strips contain many controllable RGB LEDs, which can be addressed individually. Depending on the model, there are variants with 30/60/144 LEDs per meter. With these LED strips Ambilight projects can be implemented very well. In contrast to the cheaper WS2812B models (which have only one data line), the WS2801B RGB LED strips can be addressed directly from the Raspberry Pi, which means that no additional Arduino is required as an intermediate storage.
Price: about $20 / ca. £19 (depending on length and density)
-
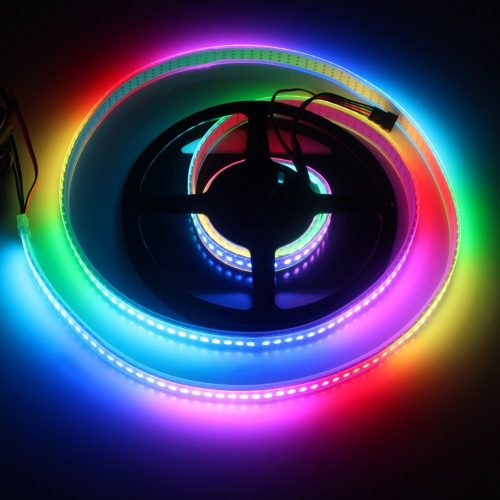
WS2812 RGB LED Strip
The WS2812 LED strips offer the advantage of a better price / performance ratio. However, either an Arduino must be used as an intermediate segment, or the onboard sound is deactivated, whereby this strip is also directly accessible. However, since the Raspberry Pi does not send real-time signals and the frequency is not so high, this strip is not suitable for all projects. However, the WS2812 offers some advantages.
Price: about $10 / ca. £10 (depending on length and density)


If you think there are still important Raspberry Pi sensors missing, I would be happy about a comment and I will add it to the list.
33 Comments
i never imagine before sensors like this ..very interesting . It should lead to create many digital services in future . Can i get Clear content document about sensors advantages and uses .
What type of documents do you mean? You can just google for the datasheets.
Rain drop sensor should be added,
Hall magnet sensor should also be added ,
Really informative, Great work
Hi,
Very informative, thanks!
Are there better fluid pressure sensors. Basically I want to check resistance on a surface moving in a fluid; resistance of a boat.
Great work bro
I loved reading this. Great content!
LIFE Bruh
Great list and very helpful, thank you!
hi there – very very informative – one question though – i need a sensor for PH values
I am looking for AC current sensor too.
I think that Nextion HMI monitors are missing in this list.
Even if I knew most of them before, some where new and I like to have them in a nice list.
Thanks for compliation!
Is there a sensor to measure mechanical force; for example, I am trying to build various solid rocket engines and I need to test the thrust force. Is there anything for this for RaspberryPi?
Replying to my own question above: Maybe weight sensor is worth adding to the list:
https://www.amazon.com/Degraw-Load-Cell-HX711-Combo/dp/B075317R45/ref=sr_1_1?ie=UTF8&qid=1537464395&sr=8-1&keywords=raspberry+pi+Force+Sensors
VERY GOOD / USE FULL
THANKS ALL IN THIS GROUP.
ANY ONE CAN ADVICE ME HOW TO CONNECT THESE SENSORS TO RASPBERRY Pi3 B+ BOARD.
1)PH SENSOR.
2)DO (DISSOLVED OXYGEN) SENSOR.
3)PT-100(TEMPERATURE SENSOR)
4)FOAM IR (IR)SENSOR
Great list. With the increased focus on air pollution, it would be good to add some PM10 and PM2.5 sensors to the list.
This list is helpful, I got one I was looking in it. Thanks.
Is there a sensor on the rasberry pi or a seperate sensor for detecting when it is moved, like the fluid inside our ears to detect when the pi or sensor is at a angle or something like that? I’m a raspberry pi kid hobbyist, and I really need something like that.
You need a gyroscope for this.
Amazing article. Also, is there a sensor for Oxygen specifically?
Thanks for sharing this info
I have a question for you if you have a second. Do air compressors with vertical tanks work better than air compressors with horizontal tanks? I was told that the vertical tank compressors can handle higher PSI. That doesn’t seem right though… I appreciate the response.
I am surprised at the lack of power requirement data for these sensors, as these are given an “A Ball Park Figure” in Android open source projects/ information pages.
A Link to Raspberry Pi and Arduino for basic power requirements, might help those considering building a small mobile project, to assess if it is likely to be possible, or whether it should be based on available mobile phone chips which are very capable for information processing and low power, though some physical sensors eg Gyroscope, require a relatively high burst of power to read them.
Lastly languages needed to write code should be mentioned for such sensors, as not all languages are suitable when things are to be read quickly. An example would be a comparison between BASIC and Assembler. Basic controlled sensors have a limited read time, before misreads occur due to processing speed. Assembler(compiled) is the quickest but a pain to write, making a short embedded routine which can be called from BASIC, when speed is required, a good solution. This can be demonstrated by comparing the response time of a CDS light sensor and a Silicone based light transmitter receiver pair, by lets say reading the rpm of a propeller. Problems soon become apparent, make it a good problem solving exercise, as to what is the cause.
bestaan er sensoren die frequenties van geluid opvangen en weergeven ingrafiek?
You wrote “The DS18B20 and DS18S20 represents a very simple sensor. These Raspberry Pi sensors are addressed via the so-called 1-wire bus. An advantage is that many different 1-wire components can be connected in series and read out by a single GPIO. ”
Not connected in …series…, connected in…parallel!
I am interested in sensors for detecting pool chemical levels in water(chlorine, calcium) as well as ph and alkalinity.