
Most printers these days can easily be integrated into the network and can therefore also be used on the Raspberry Pi. Thus, they can be operated by many devices and documents or pictures can be printed with them. We can either print simple text documents on the Raspberry Pi or e.g. pictures.
In this tutorial, we first install the software to be able to print something from the Raspberry Pi and do the configuration. Then we build an “instant camera” by taking a picture at the push of a button and sending it to the printer immediately.
Required Hardware Parts
If you only want to print files, images or other documents with the Raspberry Pi, you only need the following:
- Raspberry Pi (no matter the model, but a CSI or USB connection should be available)
- Network-compatible printer (ideal: with Wi-Fi functionality)
It doesn’t matter which printer you use. If it can be reached over the network, you can connect multiple devices to it. But even purely wired devices are fine.
If a picture is to be taken at the push of a button and then printed out, the following parts are also required:
Installation of the Raspberry Pi Printer Software
The prerequisite for being able to recognize a wireless printer in the network with the Raspberry Pi is that the printer has already been configured. How to do this is in the printer manual and is best done using a computer.
In order to be able to recognize our printer, we use the CUPS software from Apple, which was developed for MacOS and other Unix systems. Drivers for all possible printers are available here and the entire configuration, integration, etc. is managed by them.
We start with the installation, which can take a few minutes. To do this, we call up a terminal (preferably via remote desktop connection, as we will need this afterwards):
sudo apt-get update && sudo apt-get install upgrade
sudo apt-get install cups --yes
During the installation, among other things, new user groups were created in which we add our users (usually: pi):
sudo usermod -a -G lpadmin pi
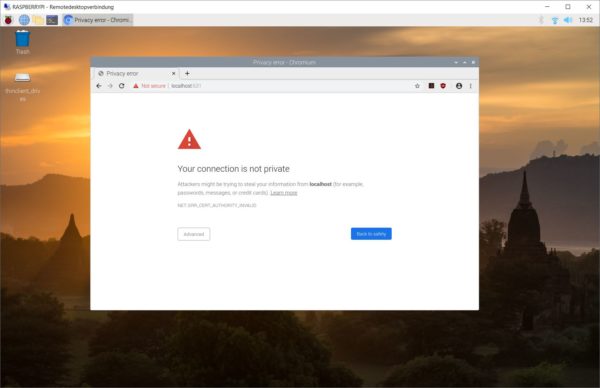
Now we can open the browser (RDC) on the Raspberry Pi and enter the following address:
There is a warning that the (self-signed) certificate is invalid, but we can ignore it (Advanced -> Continue):
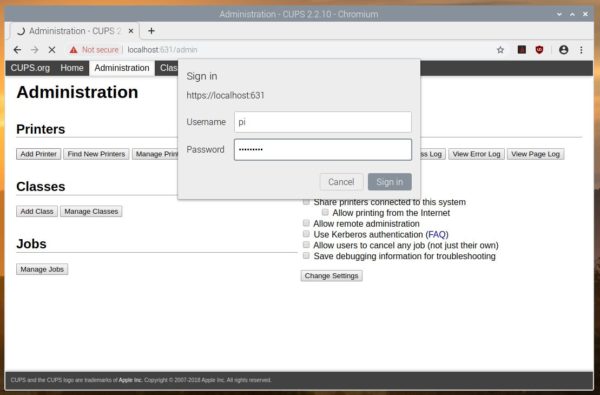
In the next step, we navigate to Administration and are asked for the access data. Here we enter our access data for the user (standard: pi/raspberry):
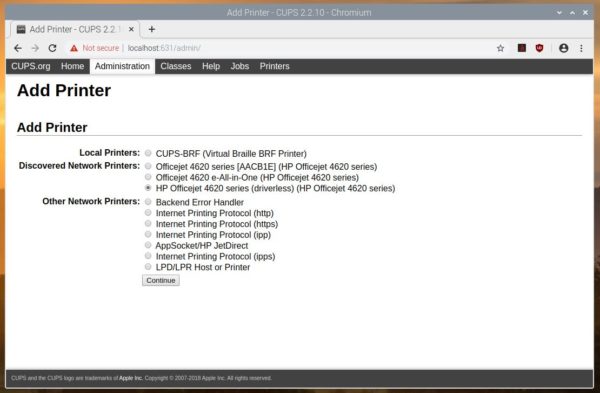
 Now press “Add Printer”.
Now we are shown different printers. To do this, we select the relevant entry. Often printers have several entries, whereby I have chosen the “Driverless” variant. If you are having trouble printing, you can try one of the other options. In my case, it is an HP Office Jet 4620 multifunction printer (we can go into more detail on the scan function in another tutorial).
Afterwards, some settings are requested (ideally we share the printer), whereupon we save the configuration. We get to the overview where, among other things, all print jobs are listed:

Last but not least, we set the printer as default (selection: “Set as Server Default”). This saves us having to enter the printer name if we add a file to the queue via the command line.
First Test of the Printer
The printer is set up, so let’s do our first test: We switch to the printer detail page and select “Print Test Page” or use a text editor or LibreOffice.
To do this, go to the menu at the top left: Accessories -> Text Editor, File -> Print and select the printer.
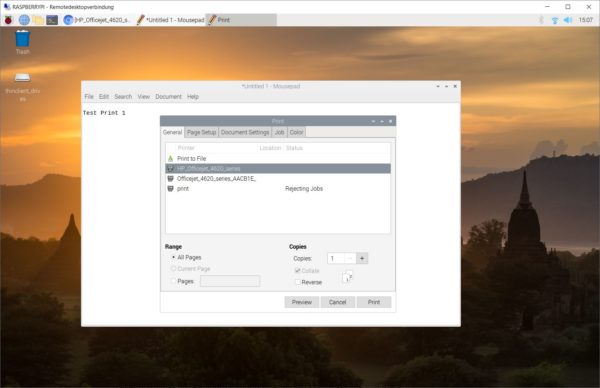
Printing should start immediately. Otherwise, you just edit the settings of the printer.
Project: Take a Picture at the Push of a Button and Print it on the Raspberry Pi
In a previous tutorial, we built a camera at the push of a button. We would like to expand this setup so that we can print the image immediately afterwards. So let’s start with the structure first:
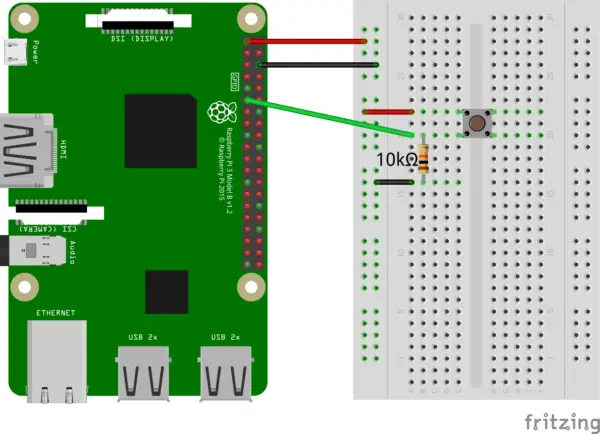
We use GPIO 17 (pin 11) as a trigger. You can find more details on the structure in the linked tutorial.
Before we can print the image, we first have to convert it to a PDF file. This can then be printed. We use the Python Package Pillow for this:
pip3 install Pillow
Now we create the script that waits for the button and then creates the image of the camera, creates a PDF from it and then prints out the whole thing:
sudo nano camera_print.py
|
1 2 3 4 5 6 7 8 9 10 11 12 13 14 15 16 17 18 19 20 21 22 23 24 25 26 27 28 29 30 31 32 33 34 |
# -*- coding: utf-8 -*- from RPi import GPIO from datetime import datetime import os, time from PIL import Image GPIOPin = 17 FILE_PATH = "/home/pi/img_%s.%s" def button_callback(gpio_number): print("Button pressed!") datetime_string = datetime.now().strftime("%Y-%m-%d_%H-%M-%S") filename = FILE_PATH % (datetime_string, "jpg") os.system("raspistill -o %s" % filename) # convert image1 = Image.open(filename) im1 = image1.convert('RGB') pdf_filename = FILE_PATH % (datetime_string, "pdf") im1.save(pdf_filename) # send to printer os.system("lp %s" % pdf_filename) GPIO.setmode(GPIO.BCM) GPIO.setup(GPIOPin, GPIO.IN, pull_up_down = GPIO.PUD_DOWN) GPIO.add_event_detect(GPIOPin, GPIO.RISING, callback=button_callback) try: while True: time.sleep(0.01) except: GPIO.cleanup() |
Save with CTRL + O and exit the editor with CTRL + X.
The following changes are interesting (all details and explanations can be found in the other tutorial):
- Lines 18-21: We convert the saved image into a PDF file and save it.
- Line 24: With the lp command we can add files to the print queue. You can also first enter the command manually in the console and set other options (such as resolution, size, standard printer, etc.) if necessary. If you have set up several devices or have not set a standard printer, you need the parameter -d followed by the printer name.
Now we can do the whole thing:
sudo python3 camera_print.py
By the way: This tutorial was also created due to one of the many Raspberry Pi tutorial requests.