
More and more data is being stored in the clouds. This has the advantage that the files can be accessed from anywhere. However, these are usually stored in an online service, and not everyone wants that. If the data is only needed at home by several PCs, a Raspberry Pi Samba server is ideal: There is a central network storage device that all other devices can access while on the same network. This means that the files are not stored with third-party providers, and the transfer speed is also much higher.
The integration of a Samba server is very easy under Windows 10, Mac, Linux as well as Android and iOS. This means that images and documents can be processed by various devices at the same time. How to do this is explained in this tutorial.
Required Hardware Parts
First of all, we need a few components to be able to follow this tutorial. I have used the following:
- Raspberry Pi
- Micro SD card
- Power supply (USB type C power supply)
- Recommended: external hard drive
Since the Raspberry Pi can only deliver limited power via the USB 3.0 port, a hard drive with an external power supply is recommended. In addition, these are usually cheaper than small 2.5 inch external hard drives.
Install and Configure the Raspberry Pi Samba Server
……….
First, we bring the package sources up to date. To do this, open an SSH terminal and enter the following:
sudo apt-get update
sudo apt-get upgrade
Then we install Samba:
sudo apt-get install samba samba-common-bin
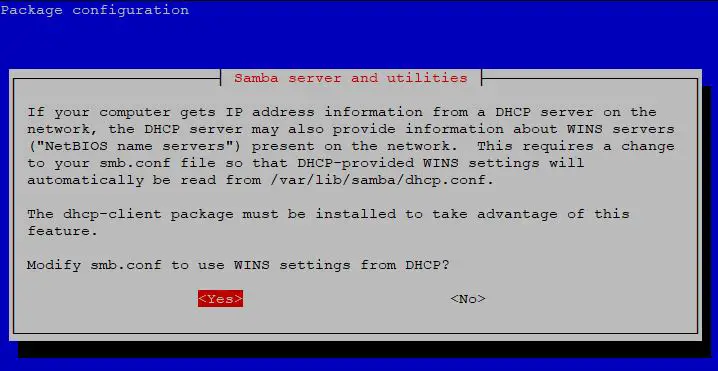
You will be asked whether the settings should be used by DHCP. Answer yes.
 Before we go on to the actual configuration, let’s take a look at how to use an external hard drive as a storage medium.
Mount the External Storage Device on the Raspberry Pi
First of all, the hard drive must be connected via USB (ideally to the USB 3.0 port). We then need the UUID of the device, which we can find out as follows:
ls -l /dev/disk/by-uuid/

If you see multiple devices, you can run the command again when the hard drive is not connected and then compare. In my case, the UUID is 9678-B72E, which is shown under sda1.
Now we create a new folder (you can also create it somewhere else) that points to the contents of the storage device and give our user (pi) ownership rights to it:
sudo mkdir /media/usb
sudo chown -R pi:pi /media/usb
We mount the device:
sudo mount /dev/sda1 /media/usb -o uid=pi,gid=pi
That’s it already. One last point is the automatic mounting. This is recommended because it can happen that the Raspberry Pi has to be restarted. To do this, execute the following command:
sudo nano /etc/fstab
The following line must be added to the end of this file (with the correspondingly adapted UUID)
UUID=9678-B72E /media/usb vfat auto,nofail,noatime,users,rw,uid=pi,gid=pi 0 0
Save with CTRL + O and exit the Nano Editor with CTRL + X.
Create and Configure Shared Directory
The files can either be located directly on the hard drive or in a subdirectory. Of course, it is also possible to save the files on the SD card of the Raspberry Pi.
We create a new folder in the previously mounted directory:
mkdir /media/usb/share
Now we can edit the Samba configuration. But first, we create a backup (just in case):
sudo cp /etc/samba/smb.conf /etc/samba/smb.conf_backup
sudo nano /etc/samba/smb.conf
Add the following section to the end of the file and save with CTRL + O.
[share]
Comment = Raspberry Pi Shared Folder
Path = /media/usb/share
Browseable = yes
Writeable = Yes
only guest = no
create mask = 0777
directory mask = 0777
Public = yes
Guest ok = yes
This configuration means that every user can read, write and execute files. Either a Samba user or a “guest” is authorized.
The Samba user (also called “pi”) has to get a password. This password can differ from the SSH password of the user. We hereby put it:
sudo smbpasswd -a pi
The last step on the Raspberry Pi is to restart the Samba server.
sudo service smbd restart
Setting up the Samba Server Under Windows 10, Mac, Android, iOS
Now we want to include the set-up share on a computer. To do this, we switch to the Windows PC.
Open “Start” and search for “Control Panel” -> “Programs” -> “Activate or deactivate Windows features” and activate “SMB 1.0 / CIFS File Sharing Support”. Then the PC has to be restarted.
After the restart, you can open a file explorer window and under “Network” there is now an entry with the name “RASPBERRYPI”. This contains the “share” folder in which all files can be stored.

You will be asked for your login details. Save this so you don’t have to enter it every time.
No reboot is necessary on Mac Systems. Here you can simply open a Finder window and select “Network” in the sidebar. Then select “raspberry pi” and the “shared” folder to get to the directory.
4 Comments
Thank you for this excellent tutorial. I went through several sites on this subject and they all had inaccurate info which caused me to fail numerous times accomplishing this task, not to mention a mountain of frustration. All of them, except you, failed to mention that support for Samba isn’t enabled by default on Windows 11. They also gave inaccurate configuration settings. Thanks again, and keep up the good work.
I second what jpd wrote. Having followed many tutorials without success activating “SMB 1.0 / CIFS File Sharing Support” was the key. Thank you
good tutorial.
A suggestion is it would help if there were pointers to troubleshooting approaches.
I rather sense this point is true for most tutorials.
In my case my Ubuntu based computer shows there is a ‘share’ instance on Raspberrypi.local but cannot resolve the type or its permissions.
Any ideas?.
Great post! I’ve learned a lot from it, but unfortunately the PI was never shown on Windows 11. The solution was to install wsdd:
sudo apt update && sudo apt upgrade -y
sudo apt install wsdd
Restart the PI and it should work fine.