
Part 6 of the web server installation is about making the server available outside of the local network using a DNS server (such as No-IP, DynDNS).
With the previous programs we were able to set up a complete web server, but in the vast majority of cases, the files should also be accessible via the internet. This will be covered in this tutorial.
First, we need a DNS provider, where I prefer No-IP (free). So we create a free account at https://www.noip.com/sign-up. The only “disadvantage” of the Free Version is that every month an email arrives asking you to confirm the account (via captcha input).
After logging in, we click on Add a Host and choose a host name and, as domain, one of the No-IP Free Domains listed below. As Host Type, we use DNS Host (A).
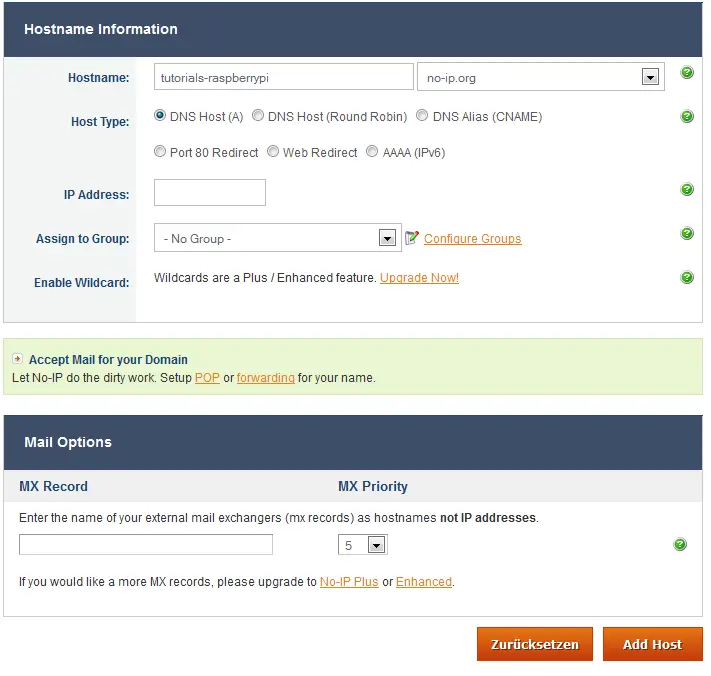
Now click on Add Host and we can come to the configuration on the Pi.
The package must be downloaded from the site
sudo wget http://www.noip.com/client/linux/noip-duc-linux.tar.gz
and unpacked:
sudo tar xf noip-duc-linux.tar.gzTo install the package, we first have to switch to the folder
cd noip-2.*and compile
sudo make installThen a query will come to the email address, as well as the password used. As an interval, I left 30 seconds and on “Do you wish to run something at successful update?” answered with a no.

You start the service by means of
sudo noip2
but attention: If you restart the Pi, No-IP will not start automatically. How to do that is described in this tutorial.
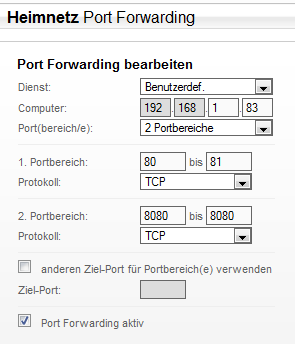
So that the service can now also forward from the outside to the Pi (when calling your-domain.no-ip.org or similar) you also have to share in your router the ports 80, 81 and 8080 (TCP). In my router, this is possible under the Port Forwarding tab. As the IP address, you give the internal IP of the Raspberry. With me, that is 192.168.1.83 (which it is exactly with you, can be seen in your router).
If you want to change the configuration at a later time, you can find it under /usr/local/etc/no-ip2.conf.
2 Comments
You could also use staticIP.io, which is a very good DDNS
What are the URLs of all the articles in this series, those prior, and those succeeding, if any?
I have used the following search args with no luck:
1. “Webserver” and “webserver”
2. “Raspberry Pi Web Server Installation” and “Raspberry Pi Web Server Installation Part”
None of these searches yielded articles that appear to be “Part of this series!”
Your help is much appreciated
Thank you
tb