
The Raspberry Pi is ideal for monitoring, so local live streams can be set up (via Android, too). Also, a Raspberry Pi Youtube Live Streaming is possible, e.g., for somebody who wants to watch his plants grow or wants to share other projects live.
In addition, it is possible to make the stream publicly or privately accessible. With YouTube taking care of everything else, this tutorial is very easy to follow.
Accessories
To follow this tutorial and implement the Raspberry Pi YouTube Live Streaming, you will need the following components:
- Raspberry Pi
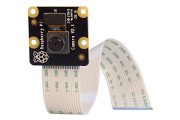
- official RPi camera module (with or without IR filter)
- Ribbon cable (50cm or 1m)
- if necessary, attach suction cups
For a better and faster transfer rate, I also recommend the connection to the Internet via an Ethernet cable, as it can sometimes lead to connection problems with the Wifi connection.
In principle, the newer Raspberry Pi Zero W models with CSI port and Wifi are possible to use as well. These can be used with appropriate waterproof housing for outdoor usage (garden, street, etc), since they require even less power than a normal Raspberry Pi.
The exact differences between the normal and NoIR camera model are mainly that the NoIR model is suitable for night shots or videos in the dark. There are also different versions. The v1 has only an average resolution, but is very cheap. The v2 model has a HD resolution and better image contrast, etc.
Installation on the Raspberry Pi
The packages we need for the live stream are included in a Docker container. So that we can use and unpack them, we first have to install Docker via SSH and assign rights to our user:
curl -sSL https://get.docker.com | sh
sudo usermod pi -aG docker
Then we connect the official Raspberry Pi camera and activate it.
sudo raspi-config
Under “Interfacing Options” -> “Camera” you will find the menu item for activating the camera. Thereafter, it will restart.
Now we test the recording function of the camera. Enter the following in the console:
sudo raspistill -o test.jpg
This should take a picture. If you get an error here, enter the following command and then restart the system (sudo reboot):
sudo modprobe bcm2835-v4l2
Whether the recording worked and how the picture looks like we can either check by logging into the desktop and view the picture (alternatively also by remote desktop connection) or by installing an FTP server and download so the picture. Anyway, if something is visible, then the camera was recognized without problems and can be used.
The actual Docker image is very large and would have to be compiled for hours. Therefore, users have already made their compiled images available, which we can use (which is much faster):
docker pull alexellis2/streaming:17-5-2017
The download may take a while.
Set up Raspberry Pi YouTube Live Streaming
In order to set up the Raspberry Pi YouTube Live streaming, we need to have a YouTube channel. If not, we will first create a Google Account. We will switch to the YouTube Live Streaming Dashboard. Here we create a new live stream.
Under the tab “General Information” we can stop the stream as public or private. In addition, many more options are possible. At the bottom is the “Encoder Setup” tab.
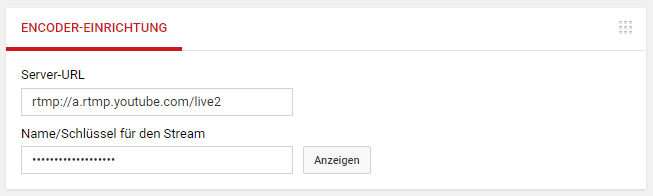
Have the key displayed and copy it. We will now have to enter it in the Raspberry Pi (instead of xxxx-xxxx-xxxx-xxxx):
docker run --privileged --name cam -ti alexellis2/streaming:17-5-2017 xxxx-xxxx-xxxx-xxxx
Here, we have some more options that we can specify with flags, such as the start in the background (-d) or the automatic start when booting the system (--restart=always).
If you have stopped the stream with Ctrl+C and would like to restart it later, you will get an error if you start in the same way (“docker: Error response from daemon: Conflict. The container name “/cam” is alrea dy in use by container …”). So just start with:
docker start cam
Quitting is just as easy:
docker stop cam
You can also make other settings for the stream and other options via the YouTube Live Streaming Manager.
3 Comments
hello, how can I get the camera to record and go live at a specific time. I know the camera has motion detection, anyway I can utilize that feature.
If you have a UVC webcam, what are the steps to make that work instead of the official RPi cam?
How would I change the stream key?