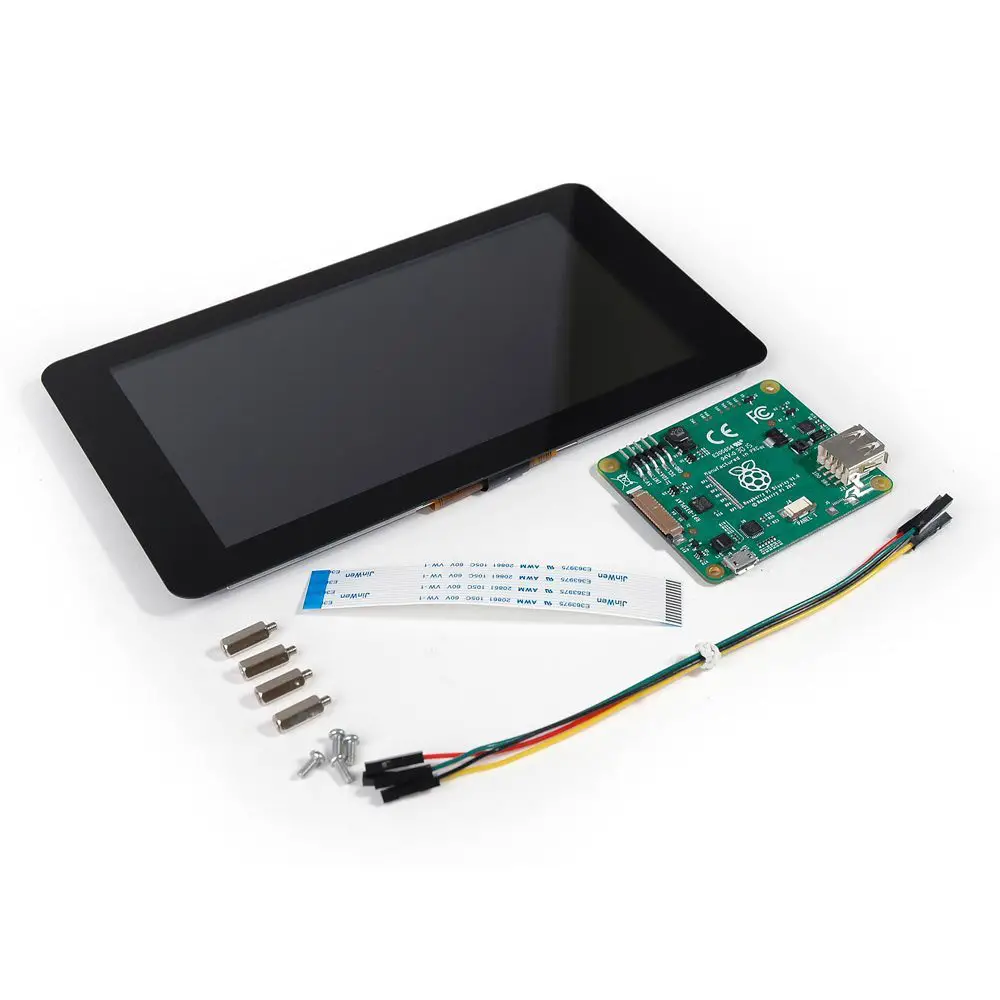
There is an official 7-inch touchscreen module for the Raspberry Pi: After testing it under different applications for some time and also putting together a FAQ thread, in this article I summarized my impressions and the advantages and disadvantages of the display.
Specifications
| Touchscreen Type: | Capacitive touch (10 fingers multitouch) |
|---|---|
| Dimensions (Display): | 7 inches, 155mm x 86mm (with edges: 194mm x 110mm x 20mm) |
| Port: | DSI-Port (Display Serial Interface) |
| Power Supply: | 5V MicroUSB or via the GPIOs |
| Resolution: | 800 x 480px @60Hz |
| Accessories included: | 7″ touchscreen display, an adapter board, DSI ribbon cable, 4 x fastening screws and screws, 4 x jumper cable |
| Price: | from approximately 70$ (including shipping and taxes) |
The display comes with all that is necessary (adapter board, DSI cable, etc.) and is very well packed so that nothing can go wrong during shipping.
With its 7 inches, the display is in a good range – big enough to handle GUI applications, but still power-efficient (350-390mA at 5V). What I liked very much is that everything has worked without complicated driver loading and initialization. At first, I was sceptical because no calibration was needed, but as it turned out, touch detection is amazingly accurate, even more accurate than my resistive touchscreen with calibration.
I was also amazed with, in my opinion, low resolution of 800×480 pixels. Since 720p and partially FullHD videos are playable on the Pi, I would have expected more here, but in practice, this had less impact than I suspected. Now that I have tested the display for some time (and possibly got used to the resolution), I find it is not as annoying as initially assumed. On the other hand, this has probably also been sacrificed to the price – the Raspberry Pi Foundation manufactures devices that are as affordable as possible, sometimes compromising (such as the Raspberry Pi Zero).
In comparison, partially similar displays cost a little less, but almost all of them have no capacitive touch. In addition, all other displays occupy many GPIOs and/or the HDMI connection. With the official 7″ display it is possible to connect another display.
Applications
Anyone who plays with the idea or has already bought such a display, most likely already has a project in mind, for which he wants to use it. I especially like the display for the following projects:
Car PC
I’ve been thinking for a while about building a CarPC, but so far I was been sceptical, especially because of the displays. First of all, most other good 7″ touchscreens, which are compatible, need at least 12V. I plan to build a module that can either be powered by a cigarette lighter USB or built into the radio slot. Well, with this display, I will probably implement a car PC in the near future.
Panel for home automation
The previous places of use for my display were as a panel for my radio-controlled sockets, surveillance camera, infrared barriers, etc. For this, I have written a GUI with Python, which accepts my input and executes appropriate commands/scripts (GUI tutorial will follow soon). So that the display does not draw power constantly, I have put a motion detector over it, whereby the display is switched on as soon as someone approaches the panel.
If this is an exact tutorial which is desired, please write it in the comments, otherwise, the functions can a.o. be read in the FAQ and this article.
Tablet-Pi
Another interesting project, which was found is the Raspberry Pi as a tablet. For this, you can download a 3D model and print it with a 3D printer. In addition, you need a flex cable, a PowerBoost and a Li-Polymer battery.
I have not tried this project myself, but I think I’ll do it in the future. For those who are interested, here is a video:
Advantages and disadvantages overview
As mentioned earlier, the touchscreen has some very positive aspects, but also some that speak against the display, which I will briefly summarize so that everyone can decide for themselves if this display is suitable for their own projects and ideas:
- Advantage: No calibration or external drive necessary – connect and start.
- Advantage: 10-finger capacitive multi-touch, which is far more accurate than resistive touch.
- Advantage: Better support than for third-party displays.
- Advantage: Very wide viewing angle (60 ° or 70 ° in all directions)
- Advantage: External 5V power supply not (really) necessary – just power over the GPIOs.
- Neutral: Price about the same or slightly higher than comparable displays.
- Disadvantage: The resolution is only 800×480 pixels.
- Disadvantage: Brightness (so far) not adjustable – only the backlight can be switched on/off.
- Disadvantage: Wider border than the other models.
Conclusion
For some of my applications, the DSI cable was too short, but luckily a longer (50cm) can be purchased or e.g. the longer ribbon cable of the Raspberry Pi camera module can be used.
I suppose that in the future more applications will appear for the Pi which makes use of the 10-finger touch and thereby also it should be easier to find answers to certain problems of the display, than previously, where one had to be lucky to find support for exactly his touchscreen model.
All in all, I can say that I have been very satisfied during the time I tested it.
What do you think of the 7″ RPi touch screen module and what projects do you have in mind?


1 Comment
“Helderheid (tot nu toe) niet instelbaar – alleen de achtergrondverlichting kan worden in-/uitgeschakeld” dit is wel beschikbaar als je android (gaat alleen met raspberry pi 3b(+)/4b) erop zet.