
The Raspberry Pi does not save the date permanently. With the help of the Raspberry Pi RTC (Real Time Clock) module DS1307 you have a real-time clock – regardless of an existing internet connection. This is an advantage in many applications that require a timestamp but cannot be connected to the Internet. Especially for outdoor Pi’s and logging systems, it is important to know the exact date and time.
This tutorial is about installing a real-time clock (RTC) and synchronizing the system time of Linux/Raspbian.
Required Hardware Parts
You will need the following hardware parts:
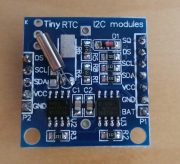
- Tiny RTC DS1307 I2C Module
- Soldering Utensils (important, see the explanation)
- Female-Female Jumper Cable
Alternatively, the RTC DS3231 module should also work, but I have not (yet) tested this with it.
Preparation
The Tiny RTC modules are actually made for the Arduino, whose IO pins work at 5V. Since the GPIOs of the Raspberry Pi only work at 3.3V and a higher voltage can damage them, we have to remove two resistors from the board.

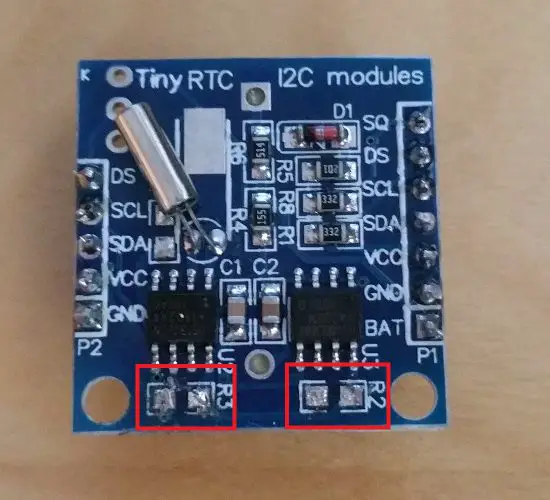
Alternatively, a Logic Level Converter (like here) could be interposed.
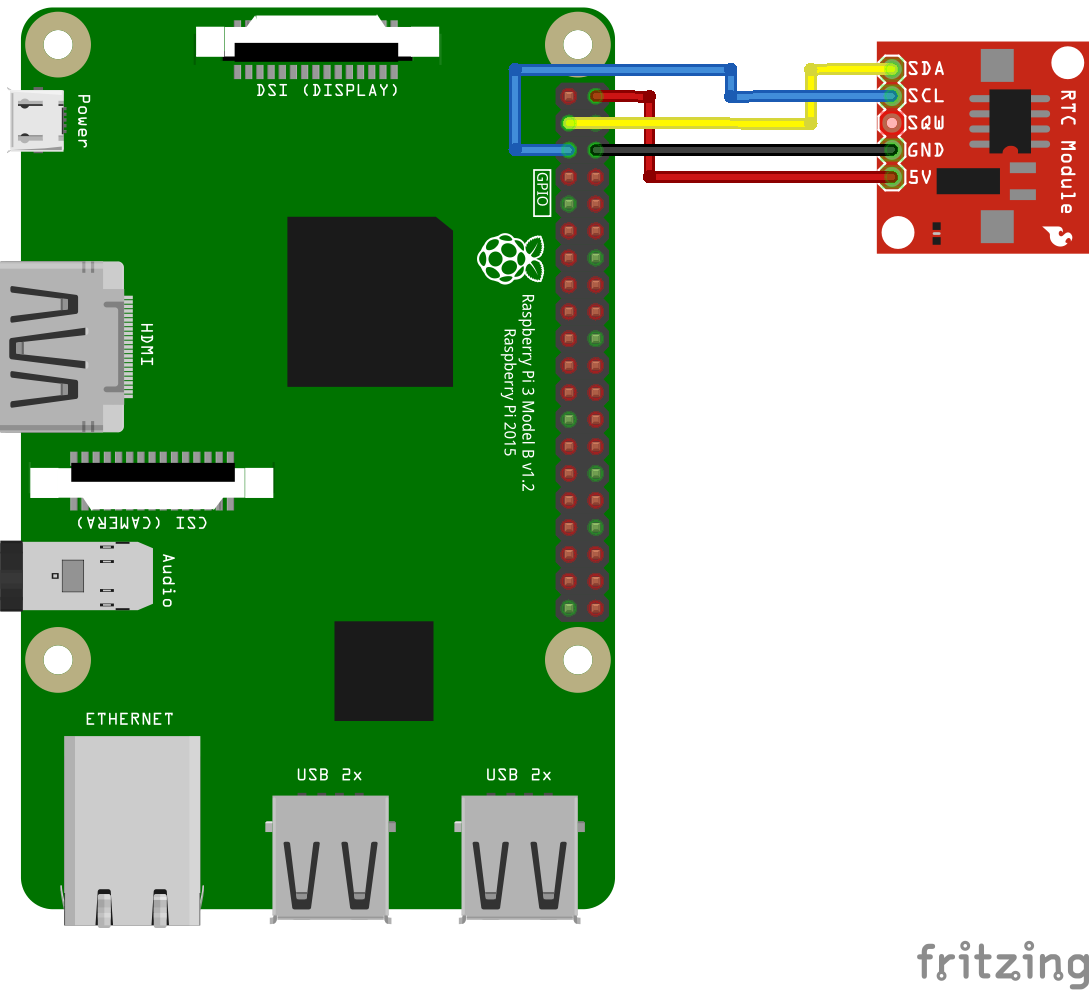
Connection of the Raspberry Pi RTC I2C Module
The module is connected via I²C interface. For this, we use the right pin side (which has 7 pins), because in the offline mode of the Raspberry the current is to be drawn from the battery so that the clock does not stop. Other modules may only have a pin strip. The assignment is as follows:
| RTC Module | Raspberry Pi |
|---|---|
| SCL | GPIO 3 / SCL (Pin 5) |
| SDA | GPIO 2 / SDA (Pin 3) |
| VCC / 5V | 5V (Pin 2) |
| GND | GND (Pin 6) |
The RTC Modules differ slightly from the structure, so the following picture should only be taken as a guide. It is important that the connected pins are correct:
Raspberry Pi RTC Software
Before we can really get started, it must be ensured that all packages and package sources are up to date, so we update them first and then install the I2C software:
sudo apt-get update && sudo apt-get upgrade --yes
sudo apt-get install i2c-tools
Afterwards, the I2C bus has to be activated, if that’s not already done:
sudo raspi-config
Activate everything under “Advanced Options”> “I2C” (simply confirm with Yes). A restart may be necessary.
Now we edit the modules file
sudo nano /etc/modules
and add the missing entries at the end:
i2c-bcm2708
i2c-dev
rtc-ds1307
You save and exit with CTRL + O, CTRL + X.
To activate the modules, they must be loaded:
sudo modprobe i2c_bcm2708
sudo modprobe i2c_dev
sudo modprobe rtc-ds1307
We can now see whether the RTC module was recognized by I2C (the parameter -y 1 indicates that it is Rev.2. Only that the first Raspberry Pi corresponds to Revision 1):
i2cdetect -y 1
You should see the following output:
pi@raspberrypi:~ $ i2cdetect -y 1
 0 1 2 3 4 5 6 7 8 9 a b c d e f
00: -- -- -- -- -- -- -- -- -- -- -- -- --
10: -- -- -- -- -- -- -- -- -- -- -- -- -- -- -- --
20: -- -- -- -- -- -- -- -- -- -- -- -- -- -- -- --
30: -- -- -- -- -- -- -- -- -- -- -- -- -- -- -- --
40: -- -- -- -- -- -- -- -- -- -- -- -- -- -- -- --
50: 50 -- -- -- -- -- -- -- -- -- -- -- -- -- -- --
60: -- -- -- -- -- -- -- -- 68 -- -- -- -- -- -- --
70: -- -- -- -- -- -- -- --
The module is therefore recognized and can be queried using i2cget -y 1 0x68. Since a hex code is difficult to read, we enter the module as a new I2C device:
sudo bash
echo ds1307 0x68 > /sys/class/i2c-adapter/i2c-1/new_device
exit
Then we can simply read the time using sudo hwclock -r. You can get the local time of the system with date.
For me, the real-time clock was not set correctly (January 1, 2000), which is why I had to set it first. Since the local system time is correct (automatically accessed via an NTP server), I have synchronized it as follows (by the way, all commands can be found in the hwclock documentation):
sudo hwclock --set --date="$(date "+%m/%d/%y %H:%M:%S")"
If you want to change the system time (and time zone!), You should do this using sudo raspi-config, before you synchronize the times.
In order to set the system time automatically with every restart, we have to write a set command in the autostart. To do this, we edit the file:
sudo nano /etc/rc.local
The following two lines are added before exit 0:
echo ds1307 0x68 > /sys/class/i2c-adapter/i2c-1/new_device
hwclock --hctosys
After a restart, the correct time should now be read and set from the Raspberry Pi RTC module – without any internet connection.
3 Comments
Thank you very much!
Hi. Can’t get to work this with a raspberry Pi 3B+, it says “Failed to start /etc/rc.local Compatibility
When use “i2cdetect -y 1” the result has no conetions
but “i2cdetect -y 2” detect some.
Can you help me to solve?
Nevermind, the 5 modules that I buyed came defective.