Making an Android TV box out of a Raspberry Pi 4 is quite easy and straight forward practice. Not only is it an affordable alternative, but it is a fun experiment to try that save you a lot of bucks in the process.
When it comes to experimenting with the Raspberry Pi, the sky is the limit. This versatile credit-card-sized single-board computer maybe (perhaps) even programmed to operate a nuclear plant, just hoping to one-day wake up to this wonderful news.
Anyway, getting back to reality, Android TVs are becoming increasingly popular, no? But affording one is something not so feasible for everyone. Which is why we have Android Box, which are also not so affordable. And the cheap ones don’t offer the same functionality as expensive ones, which makes it a dilemma.
Luckily, our handy Raspberry Pi is here to save the day, yet again. So gear up, as we are about to show you how to build a Raspberry Pi Android TV of your own. All you need are a few components, and you are all set to go. The best part is, this is a relatively simple project, so even if you are new to Raspberry Pi, you can do it too.
Parts You Will Need
You will need to have the following parts to build your Raspberry Pi Android TV:
- Raspberry Pi 4
- A micro SD card
- Power supply for your Raspberry Pi
- A combi-remote (a keyboard and a mouse will also do)
- USB flash drive
- An HDMI cable
As for the needed software, be sure to download the following beforehand:
- LineageOS 17.1 (Android 10) for Raspberry Pi 4
- SD card writing software BalenaEtcher
- Open GApps Pico package. Be sure to select ARM → 10.0 → tvstock.
The Approach:
The entire process, as we have said before, consists of just a few straightforward steps.
- On your Raspberry Pi, install a dedicated Android ROM.
- Install some Android TV software on your Raspberry Pi.
- Test and enjoy.
What is a Raspberry Pi Android TV?
It is essentially an Android TV box that is powered by, or rather, consists of a Raspberry Pi. Though not comparable to true Android TV boxes like Xiaomi Mi Box or Nvidia Shield TV, it is still an affordable alternative that provides a number of features that Android TV boxes such as MeCool B2b Pro would. Though you may not be able to run any DRMed content, you can enjoy a number of other apps including Embi, Plex, Kodi and many more.
The Process
By having the LineageOS installed on your Raspberry Pi, you can avail the benefit of Android OS and have better support for media software (like Kodi or YouTube) which makes your Raspberry Pi a great Android TV.
Step 1
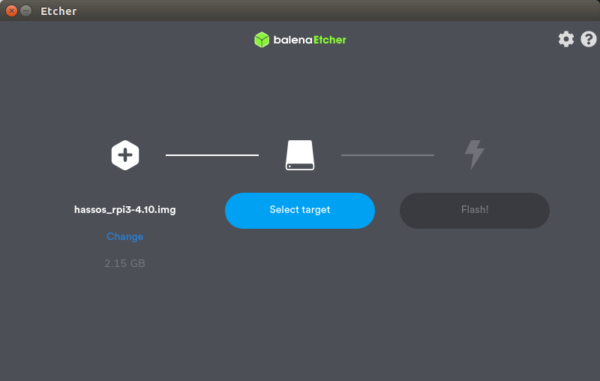
Unpack the zipped file and let’s set things in motion. Remember the micro SD card? Well, connect it to your PC (insert it in the PC card reader slot) and run Etcher. Click on the Select Image which will let you browse the unzipped image file of LineageOS/Android OS. You can write the Android disk image on your micro SD card by clicking Flash. Just make sure that you have your SD card selected under the Select Drive.
Step 2
Once the process is completed by Etcher, you will be informed and you can then take out the micro SD card and place it in the Raspberry Pi and boot it up. Though it may take a little time on the first go, just be patient and wait. Once completed, set up the Wi-Fi connection by using a mouse and a Keyboard. An alternative is to directly connect the Raspberry Pi to the router via Ethernet cable.
Step 3
The next step is to simply configure LineageOS. It will be just basic settings like date, timezone, country, etc.
Step 4
You now have Android OS running on your Raspberry Pi, but without any Google apps as this is an AOSP version. You need to manually install the apps for which you have the GApps package downloaded to your PC. Copy it to your USB and insert it in your Raspberry Pi.
Step 5
Open the App Drawer on your LineageOS and proceed as such; Device Preferences → About. Scroll down to find Build Number and keep clicking repeatedly which will add Developer Options Menu to the screen before.
Step 6
Exit the About Screen and proceed to Developer Options. Proceed as following from there; Enable Root Access. When a warning tab is displayed, click ok.
Step 7
Enable the terminal app by scrolling down to Local Terminal which will allow you access to Local Shell. Now you can enter commands via the keyboard.
Step 8
Go back to the App Drawer and relocate the Terminal App. To allow the apps permission to access your device, open and click Allow.
Step 9
Enter the commands as such:
su
This is the (superuser) command, a warning box for Privacy guard will appear. Proceed as following; Remember my choice → Allow.
Next, enter the command
rpi4-recovery.sh
This will load the recovery script. Next, type in
reboot
This command will launch the recovery script. Now your Raspberry Pi will boot into TWP recovery console. Click Install and select your USB as the storage device for this (bottom left corner).
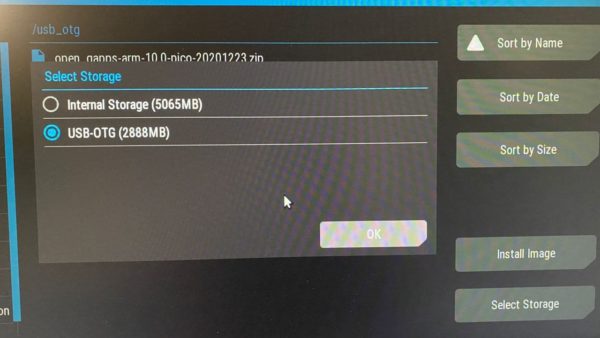
Step 10
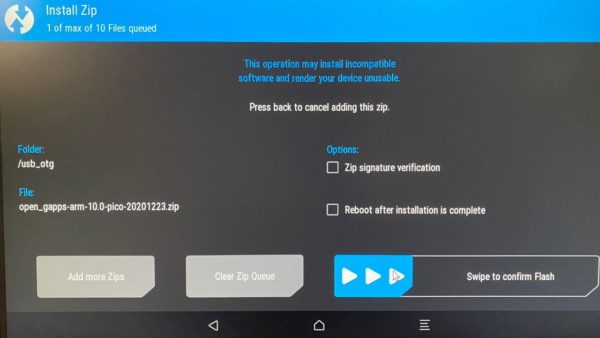
Proceed as following; select GApps→ Install Zip→ Reboot after installation→ Swipe to confirm flash. Now press Wipe Dalvik and then swipe it to confirm.
After clicking the top left icon (it will return you to the main menu.), click Wipe and “Swipe to Factory Reset”. After that, click Reboot → System.
Upon reboot, you will be able to access the Play Store but the LineageOS interface will not appear as Android TV. To change it to appear as Android TV, you will need a Launcher.
Step 11
You can find several launchers in the Play Store. Simply search, sign-in, and install. Install all the apps you would like from the Play Store afterwards.
Step 12
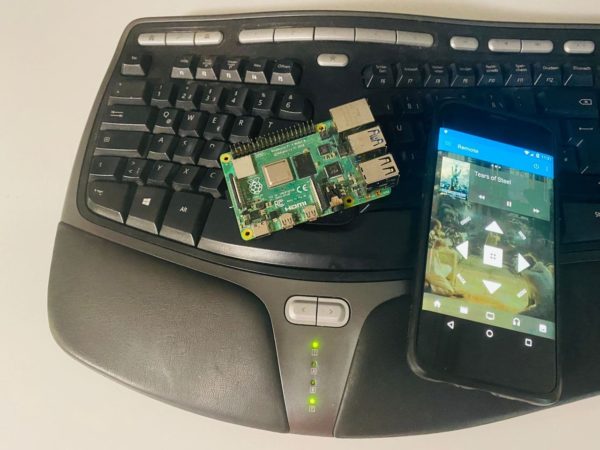
If you want to switch for something more convenient to control your Raspberry Pi Android TV, there are many options available online. Look online for mini keyboards with touchpads for android TV box and Raspberry Pi and plenty will pop up.
Now that you have your Raspberry Pi Android TV all set up, you can use the controller to browse/control it as you would for an actual Android TV. You can enjoy a variety of apps as well as install emulators to play games. The whole system will perform identical to an Android TV.
Android Box on a Raspberry Pi – Conclusion
And there you go. Now you have your LineageOS powered Raspberry Pi all set up to serve as your very own Android TV box. Cheap, affordable, convenient, and best of all you can tell all your friends how you did it all yourself. Just make sure you follow all steps wholeheartedly and use A+ quality components (micro SD card, power supply for your Pi, etc.).

15 Comments
Hi i came to step 7 local localterminal , but where I can found Local Shell.
thanks for answer,
Rien
Hi, I found it already, but now i cant make the choise for the USB drive. Is there a limit for the capacity?
Thanks Rien
You could also copy the file to your sd card instead of using a USB stick
Thanks, it works with a smaller one, but after ervoor there is only the half cirkel wth the ball moving from right tot legt.
This was bad readable from my phone.
After reboot the pi hang on the screen with a half circle and a ball moving from right to left en nothing further. the installing seems ok but but with not the good result.
Rien
After trying two times I have the same result, after reboot the pi hang on startup. I have used the right
software so far as I can see. all thing going as described, but not with the good result.
Suggestions?
Thanks Rien.
Make sure you have downloaded the correct gapps file (tvstock)
I also have the same experience…
After reboot the pi hang on the screen with a half circle and a ball moving from right to left en nothing further. i have tryed several times, but with the same result..
please help
I am on step 5. Cannot find any “Device Preferences → About. Scroll down to find Build Number”. What I am doing wrong?
RPI4 , OS installed, USB with proposed soft. visible…
I am always ending up on content page
Hey,
I am stuck on the same problem.
Were you able to solve that? Could you tell me please?
Thanks.
Hello all, I have same trouble. I double check which Gapps I downloaded. I have “tvstock” version…. Suggestions?
I managed to update the eeprom and boot from USB 3.0 SSD… It’s very nice. But seems to stuck with apps not available for ARM32 Binder64 architecture. Can’t find Firefox. Will try again.
Hi, Having problems with steps 9 and 10. On rpi-recovery.sh I get error message, ‘inaccessible or not found’ why is this happening, please?
Jagath
Hello,
Have successfully completed this install and all works great but no sound from the jack socket?
Am I missing some simple fix? I have Set full volume with F12.
John……
Hello Have installed the software and all is good but for no audio from rpi jack. I believe audio defaults to hdmi.
How do I access Terminal from the Lineage os screen which shows Google play store and Apps etc.
John,,,,