
In the age of the Internet of Things, more and more devices are connected. This is also suitable for your own Raspberry Pi home automation. However, each device uses a different transmission protocol, which can make controlling them quite uncomfortable. Fortunately, there is a remedy for this: The Smart Home System OpenHAB offers many existing packages, with which all devices from well-known manufacturers can be controlled using one interface. And even for components that are not yet supported by default, we can simply write our own plugins.
The main advantage of this is that we can monitor and control all connected devices via a single control panel, be it inside or outside.
In order to be able to use OpenHAB and thus take the first step for our Raspberry Pi home automation, we begin with the installation, setup and configuration of OpenHAB in this tutorial before we connect further modules in the following tutorial parts.
Required Hardware Parts for Raspberry Pi Home Automation
As already said, pretty much all devices and sensors can be used with OpenHAB, including many that we have already used in previous tutorials. In addition, the following components are essential:
- Raspberry Pi (model 3B preferred)
- micro SD card (minimum 16GB, recommended 32GB)
- Power plug (micro USB)
- possibly a LAN cable
- optimal: Raspberry Pi housing
To give you an outlook on the possibilities and further tutorials, here are just a few more devices, protocols and services that are supported:
- Amazon Echo
- Amazon Dash Buttons
- Bluetooth
- IFTTT
- KODI Media Center
- Philips Hue Light
- Sonos HiFi systems
- Belkin WeMo Switches
- and much more
The protocols of all new Internet of Things devices (or which are advertised for use in smart home applications) are supported by OpenHAB and more and more are being added.
Install OpenHAB on the Raspberry Pi
There are basically two ways to install OpenHAB. The first (somewhat more complicated) method would be to extend an existing Raspbian system with all packages. The other, more convenient solution is to take a Raspbian system with preinstalled packages, which we also do in this tutorial.
First, we load the latest image on the project page, which has the name “openhabianpi-raspbian -….. xy”. Save the file.
If your micro SD card is not yet in the card reader of your PC/Mac, insert it. If your SD card is not yet formatted, I recommend the SD Formatter tool. Damit kannst du einfach deine (micro) SD Karten mit zwei Klicks löschen und anschließend weiter verwenden.
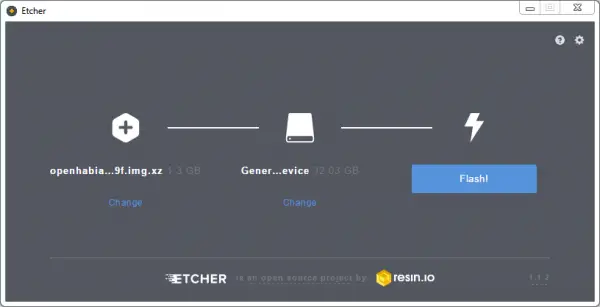
We now need a tool that can write “.xy” files to an SD card. For this I use Etcher, which is available for all common operating systems. Download and install it. Then select the currently loaded file and press “Flash!”.
The process takes a few minutes. In the meantime, you can already connect an Ethernet cable to the Pi. If you cannot establish an Ethernet connection, you can also enter the WiFi data right away.
After the image has been written to the SD card, open the directory in File Explorer. There is a file called “openhabian.conf” which has to be opened with a text editor. Below are two commented lines (with hash/hash tag). Remove the hashtags at the beginning and enter the name and password of your WiFi network and then save the file:
#wifi_ssid="My Wi-Fi SSID"
#wifi_psk="password123"
Now insert the micro SD card into the Pi and connect the power. You should not disconnect the power supply for the next 45 to 60 minutes, as all necessary updates and configuration files will be loaded! Only after all points are finished (installation steps are displayed, so you can restart if necessary.
If everything went well and your Raspberry Pi is connected to the network, you can now open the page in a browser: http://openhabianpi:8080
The setup menu (step by step instructions below in the article) is displayed.
Update OpenHAB via SSH access
You can either enter the commands directly using the keyboard on the Pi, or via SSH. Choose your SSH client (like Putty) and enter the following hostname:
openhabianpi
The default username is openhabian and the password is also openhabian. You could also change this in the configuration file beforehand.
If the update process is not yet finished, this will be displayed. Otherwise, or as soon as this process is finished, the output will look like this:

Here we call the following:
sudo openhabian-config
If you have changed the password, enter the current one as confirmation, otherwise the default password: openhabian
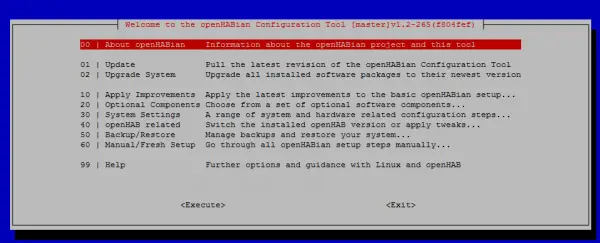
First we select “01 | Update” and then “02 | Update System”. Under “30 | System Settings” you can change further settings such as the host name, the time zone (the default is already Berlin), passwords, ports and your WiFi network.
With “Optional Components” you can add some more packages like Node-RED and many more be installed, which includes you can easily create your own IoT applications without having to program much. If necessary, I can go into this in another tutorial.
Raspberry Pi Home Automation: OpenHAB User Interface
Of course, we also want a user interface or a graphical user interface for our Raspberry Pi home automation, from which we can control our later components – from smartphones, tablets, touch screens or PCs. Therefore, we are setting this up now.
First, we open http://openhabianpi:8080/start/index on a browser in the same network:
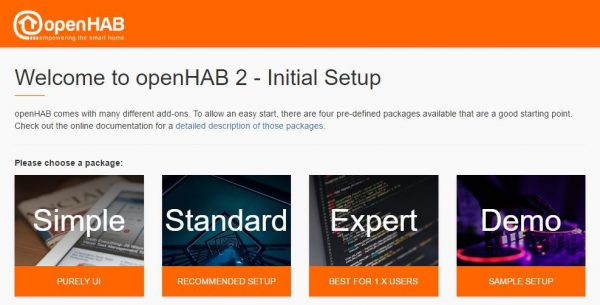
Here we choose “Standard”, which pre-installs some themes. Later, more can be added manually.
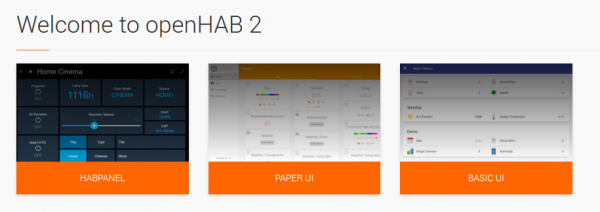
After a few moments, we can now determine the appearance of the user interface. HABPanel, Paper UI and Basic UI. You can change the selection later. For example, I like the Paper UI.
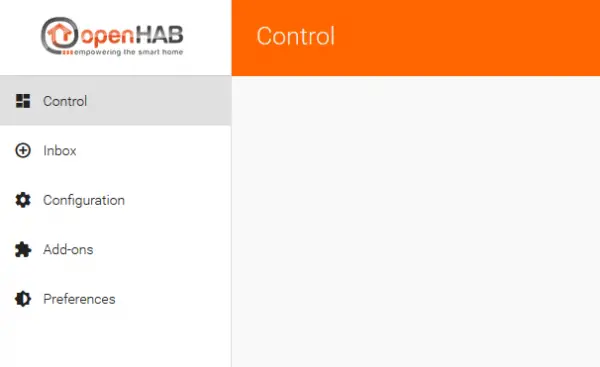
 On the left side, you will find the menu. That selection can be made here. Since we have not installed anything yet, the control menu is also empty. Under Configuration we can make settings and install new packages for our Smart Home under Add-ons.
Install OpenHAB add-ons on the Raspberry Pi
In order to be able to use certain modules such as Phillips Hue Light or Z-Wave, the necessary files must first be installed. In this example, we start with network binding, which checks whether a device is currently in the local network. This can be used to trigger certain actions as soon as you are away, for example.
We switch to “Add-Ons” on the left and then to the “Bindings” tab. Here we are looking for the package to be installed, in our case “Network Binding”. After clicking on “Install” the process may take a few minutes.
As soon as everything has been installed, we navigate back to the “Inbox” in the left bar. A click on the big plus (+) shows the installed bindings, including our network binding. If we select this, the devices are searched for in our network.
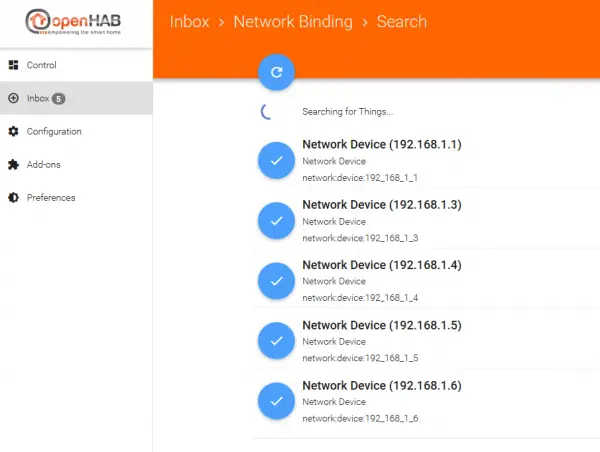
If you are unsure which internal IP address your smartphone has, you can either look in your router (192.168.1.1) or directly in the settings of your device.
With a click on the blue tick, we can add devices and name them accordingly. Other devices can also be ignored or deleted from the list (ignoring them only temporarily does not show them, deleting them completely makes them disappear until you search again).
We now switch to Configuration> Things. Select the device you just added. Here you will find the two items “Online” and “Time”. We select these two checkboxes:
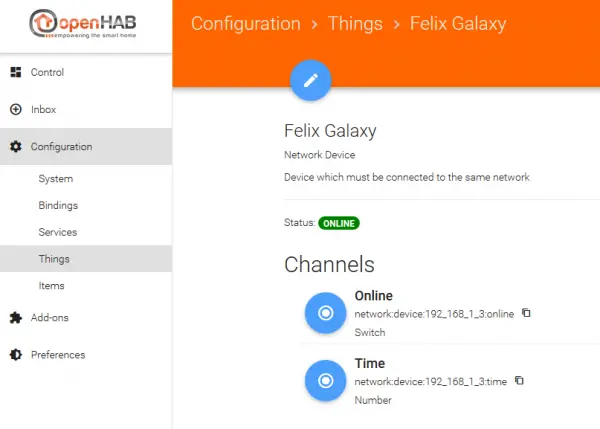
By clicking on the pin button above, certain settings (IP address etc.) can be changed. Other devices have different items that can be activated as needed.
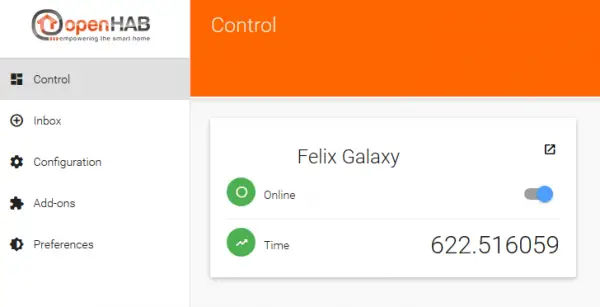
If we now switch under “Control” in the left panel, we see the activated device. Below that are the activated items. In our case, this is simply a boolean value or a number, but could also be temperature values and the like include.
In further tutorials, we will install and configure other things.
Create Your Own OpenHAB Things and Items – Display CPU Temperature
Finally, I would like to show how easy it is to create your own modules. However, this step is optional and can be skipped if necessary.
OpenHAB knows two types of objects: Things and Items. Put simply, a thing is displayed as a tile in the control panel and can have several items (values, buttons, etc.). In a small example we will display the CPU temperature:
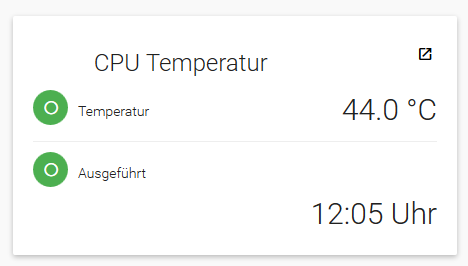
In this example, we will create a thing with two items (temperature and time when it was last queried).
Since we will execute shell commands for this, an add-on must first be installed for this. Search under Add-Ons -> Bindings for Exec Binding (Doku) and install it.
Then connect to the Raspberry Pi via SSH. First we create a script that reads out the CPU temperature. This could also be a Python script, Java or C ++ program.
sudo nano /etc/openhab2/scripts/cpu_temp.sh
It gets the following content:
|
1 2 3 4 |
#! /bin/bash INPUT=$(/bin/cat /sys/class/thermal/thermal_zone0/temp) TEMP=$(echo "scale=3; $INPUT / 1000" | bc) echo $TEMP |
Save it with CTRL + O and exit the Nano Editor with CTRL + X.
We now grant the necessary rights:
chmod +x /etc/openhab2/scripts/cpu_temp.sh
As a test, you could already run it, which should show the temperature: bash/etc/openhab2/scripts/cpu_temp.sh
It continues with the creation of our things with the following content:
sudo nano /etc/openhab2/things/cpu_temp.things
|
1 |
Thing exec:command:cpu_temp "CPU Temperatur" [command="bash /etc/openhab2/scripts/cpu_temp.sh", transform="REGEX((.*?))"] |
After saving and closing the editor we create the items:
sudo nano /etc/openhab2/items/cpu_temp.items
Here we insert the following two items:
|
1 2 |
String CPUTEMPRaw "Temperature [%.1f °C]" (All) {channel="exec:command:cpu_temp:output"} DateTime CPUTEMPLastExecution "Executed[%1$tH:%1$tM Uhr]" {channel="exec:command:cpu_temp:lastexecution"} |
Further information on the details of the two (Things and Items) can be found on the documentation pages.
After you navigate back to the control panel, you will then see the view as shown above.
Access the Panel Outside of Your Own Network
You can also access the control panel from your smartphone or tablet using the internal network name (http://openhabianpi:8080). Otherwise there are also apps for Android devices and iOS iPhones or iPads.
However, you also want to go outside – e.g. mobile or from the workplace – accessing your Smart Home control panel is not possible without precautions. The following is necessary for this:
- On the one hand, if you don’t have a static IP address, you need an account with a dDNS service such as NoIP or DynDNS.
- Furthermore, the port (8080 for us) in your router must be activated under “Port Forwarding” for the internal IP address of the Raspberry Pi.
- In addition, the dDNS service must be notified when the global IP address is changed. Either your router offers this option (Fritz boxes or similar have the appropriate settings) or you can take this step on your Raspberry Pi. A tutorial on this is available here.
Please note, however, that the control panel is not password-protected and you easily take a security risk. I, therefore, advise against making the panel accessible from outside, unless you have taken appropriate precautions and are sure of your cause.
Which devices would you like to control with OpenHAB and would like to see a tutorial for?