
Robots are a very popular entry-level project for the Raspberry Pi because you can learn a lot with them, have fun and add a lot of additional hardware. For example, a robot can automatically follow lines, recognize and follow faces, measure distances and thereby drive autonomously. Or we can just control a robot manually, like a remote-controlled car.
The PiCar-X Kit offers all these functions (and a little more) and can also be expanded manually. This Raspberry Pi robot kit with 4 wheels is particularly suitable for beginners, as it does not require as much programming knowledge as our completely self-made robot.
Required Hardware Parts for the Robot Car
The robot set already has almost everything, but not everything. You need the following parts to be able to use the PiCar-X:
- PiCar-X Robot Kit (alternatively directly from China)
- Raspberry Pi (at least version 3)
- SD card with at least 8 GB
- 2x 3.7V battery (type 18650), with charger, if necessary
Other hardware parts that can be used are the following:
- Solar panel (5V voltage or more, I recommend at least 4-5 watts)
- Xbox controller (or similar) for remote control
Of course, you can also implement other ideas, as the board allows extensions. So the I2C bus is available, as well as the unused GPIOs. The USB ports are also still free.
Setup – Instructions for Assembly and Start
Let’s start with building the robot. A printed manual is included with the kit, but the assembly goes much faster if you follow this video:
For me, the entire construction took about an hour. Children could need a little longer here. However, some screws are very small, which is why a helping hand from an adult is also useful. Overall, however, the construction is not difficult and is fun. Don’t be surprised if there are some screws left over.
The following features are included in the PiCar-X:
- Controllable via web interface (smartphone, tablet, etc.)
- Stable metal body
- Rear axle drive with two motors
- two front tires that are steered by means of a servo motor
- Ultrasonic distance sensor, type HC-SR04
- Official Raspberry Pi camera module, which can be rotated in all directions
- Sensor for recognizing lines
- Speaker
- Detects the charge status of the batteries
All modules are connected to a specially developed Raspberry Pi HAT, which is why the cabling is very simple.
What Software do I Need for the Robot?
After we have completely set up the robot, we take care of the software. To do this, we flash a modified Raspberry Pi OS version with Ezblock onto the SD card. We can download the latest version here. Then we use balenaEtcher to write the image to the SD card
I also recommend configuring the Wi-Fi directly, as described in detail here. After you have inserted the SD card into the Raspberry Pi, you can start the robot.
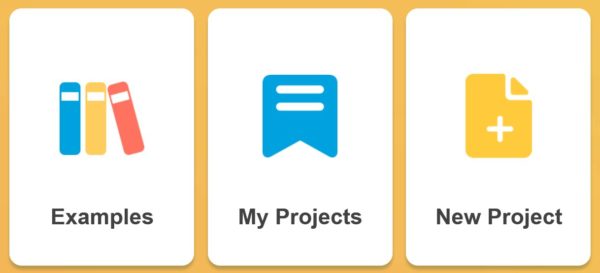
We now switch to the Ezblock Studio web editor. You can register in order to save specially created code blocks. First select “Examples”.
Then you will be asked which product you have. Choose PiCar-X.
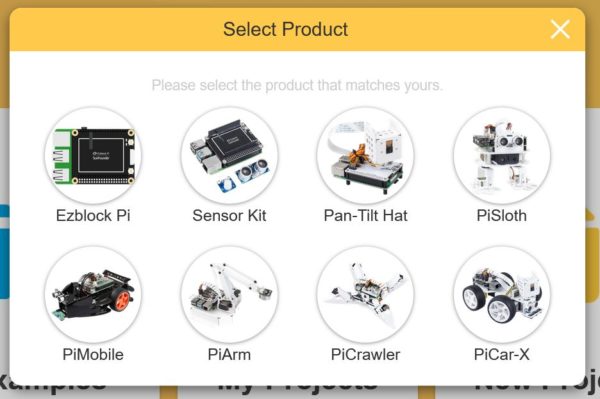
You will then see a large selection of examples that you can try out.
First Start – Drive Robots
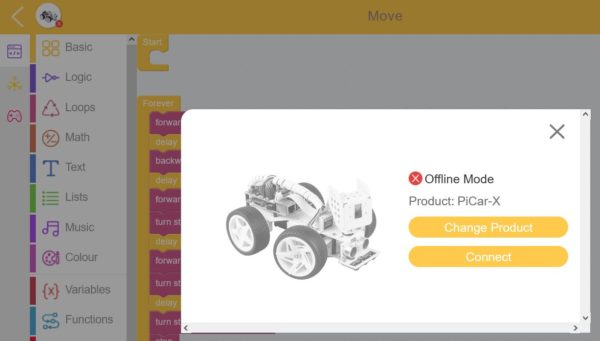
The process is the same for each example, so I’ll start with the simplest one. Select the “Remote Control” sample project. Then you have to connect to the Raspberry Pi. For this, it is important that the Pi is connected to the same network.
Click the profile picture on the top left and then click Connect.
Here you can either enter the local IP address (192.168.x.x) or, if you don’t know it, simply enter the host name (raspberrypi).
Then you can press the play button at the bottom right and the program starts. You will see a joystick with which you can easily control the robot.
Further Examples
Since this example is very simple, there are other projects for inspiration:
- Move: Here, we let it perform the five actions of “forward”, “backward”, “turn left”, “turn right”, and “stop” in order.
- Remote Control: Let us control the PiCar-X with a tablet.
- Ultrasonic Sensor Test: Here we use Ultrasonic module to read the distance (unit: cm).
- Grayscale Sensor Test: Here we use Grayscale module to read the grayscale value.
- Color Detection: PiCar-X is a camera Robot used to detect a specific color or face numbers, the position and size of the captured image.
- Human Face Detection: In addition to color detection, PiCar-X also provides face detection.
- Sound Effect: PiCar-X can make voice. You can enter text to make it speak, or make specific sound effects.
- Background Music: Use a Switch here to control the playing or stopping of background music.
- Say Hello: Remotely control PiCar’s movement, and it will always look ahead. When it sees people, it will nod and say “Hello”.
- Music Car: Next we try to make a music car that walks around your home, plays music and brings you a good mood.
- Cliff Detection: Use the grayscale module to prevent the car from falling off the cliff when it moves freely.
- Minecart: Let’s make a minecart project! Stick a dark-colored tape on the white ground as the straight track, and make the PiCar-X move along the track.
- Minecart Plus: Derailment treatment was added on the basis of Minecart to adapt to the more severe curve following.
- Bullfight: Turn PiCar-X into an angry bull! Prepare a red cloth. When PiCar-X chases after the red cloth, be careful not to be hit by it.
You can view the corresponding modules from each project and transfer them to your own project. There are more introductory videos for the PiCar-X on the SunFounder YouTube channel.
Possible Extensions of the PiCar-X
As mentioned before, the robot kit can also be easily expanded. There are a few add-ons here that I think are particularly useful.
First, there is a solar module. The batteries discharge very quickly, as the Raspberry Pi alone requires at least 5 watts. In addition, there is the consumption of the motors, cameras and other sensors. It is therefore advisable to charge the batteries with a solar cell while driving. This is mounted on top. Ideally, it is no longer necessary to charge the batteries manually.
Another extension is a manual controller. Autonomous driving or controlling via the web interface is quite nice, but a real remote-controlled car needs a remote control. For this we could use an Xbox controller, for example, as we have already done with our self-made robot in the past. Another controller (wireless or wired) can also be used for this.
In addition, there are certainly many other ideas that could easily be implemented. Feel free to leave a comment.
Conclusion on the Raspberry Pi PiCar-X Robot Car
A Raspberry Pi robot is a very exciting project, especially for children and young people. Since beginners in particular have little experience in programming and assembly, a complete set is a great option. By using the programmable blocks, not even a line of code has to be written. If you still prefer to use your own coding, you can do this via Python.
I think it’s a bit of a shame that the 3.7V 18650 batteries are not included, as they are not available in every household and cannot simply be bought in the supermarket. Normal AA batteries would need more space, but this would make getting started even easier.
The only flaw I noticed is the lack of documentation of the HAT at the time of my test. When asked, I was said that it was being worked on. Without documentation, it can be a bit difficult for beginners to be able to use all functions of the board.
How do you like the PiCar-X robot? Do you prefer a handicraft kit or do you prefer to build everything completely yourself (e.g. using a 3D printer)?