")
In this Tutorial, I’ll show you how to easily put an Operating System like Raspbian OS (Wheezy, Jessie, Stretch) or any other related Raspberry Pi OS on the SD Card.
For this you need the following:
- An SD Card with at least 2GB (better 4GB +)
- the Operating System (e.g. from here)
- the Tool SDFormatter
- Win32 Disk Imager
First, everything has to be downloaded and the tools installed. Now open the SDFormatter and select the drive under which the SD Card is. As an option, select “FORMAT SIZE ADJUSTMENT ON”. Then click Format and wait until it’s done.
Attention: All Files on the SD Card will be deleted! If necessary, secure your Data beforehand
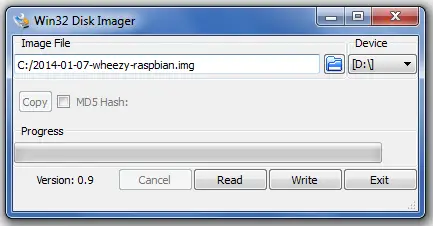
 Now the Card is formatted accordingly and we can transfer the Raspbian image. Start Win32DiskImager and select the image and the drive and press Write. If a warning comes, confirm with Yes.
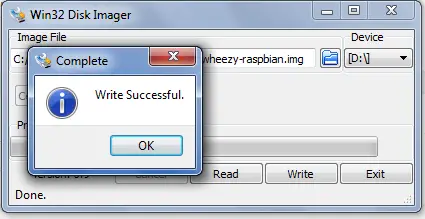 After the writing process is finished, you can remove the SD Card and insert it into the RaspberryPi. After that, the LEDs should flash and start the Pi.
That’s it, if the Pi is in your network, you can also access it directly via SSH. If it does not work as expected, check here if your SD card is supported.
Raspberry Pi SSH and WLAN Activation
Since SSH is not enabled by default, we create an empty text file named “ssh” or “ssh.txt” on the SD card (“boot” directory). This activates SSH. This eliminates the need to manually unlock SSH.
In addition, we can also specify the WLAN Data directly. For this we create a text file with the name “wpa_supplicant.conf” (without the extension .txt!) on the map and write the following content:
ctrl_interface=DIR=/var/run/wpa_supplicant GROUP=netdev
update_config=1
country=«your_ISO-3166-1_two-letter_country_code»

network={
 ssid="DEIN WLAN NAME"
 psk="WLAN PASSWORD"
 key_mgmt=WPA-PSK
}
The Data of the WLAN Network (name and password) must be adjusted accordingly.