
Not only in Hollywood films, fingerprint readers are seen more and more frequently. Such modules are often installed in home surveillance systems and are used for the simple but secure verification of persons. With such a Raspberry Pi Fingerprint Sensor you can also implement some other projects, such as secured locks.
One of the advantages is that passwords and / or number codes can be completely omitted. Although this is still possible, but it’s a lot more comfortable without. This tutorial is about the connection as well as the reading, saving and verifying of imported fingerprints.
Accessories
These sensors were originally developed for the Arduino and can be read via UART. The Raspberry Pi has two pins (pin 8 / GPIO14 and pin 10 / GPIO 15), but they work with 3.3V. Since there are different fingerprint sensors, which do not all work with 3.3V, a USB UART converter is recommended. Some models can be used with both 3.3V and 5V voltage. These are particularly suitable (also in connection with an Arduino).
The following is therefore required:
- Raspberry Pi Fingerprint Sensor (US / UK). Apart from the voltage the models do not differ much.
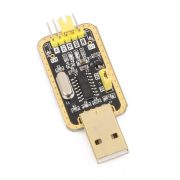
- Serial USB converter (US / UK) with 3.3V and 5V connection
- Female-Female Jumper wires (US / UK), if not included with the USB converter.
- optional: cousing (which can also be 3d-printed)
Note in the article description, what voltage your sensor needs. Mine needs 3.3V input voltage, however, e.g. other models have a voltage between 3.8V and 6V. The voltage is very important for the connection.
Connection of the Raspberry Pi Fingerprint Sensor
The USB adapter is labeled, but the fingerprint sensor cables are not. However, the cables have a clear color, which we can identify and connect to the USB converter. We only need four of the cables (if your fingerprint sensor has more, you can ignore the remaining colors):
- Red: Depending on the accepted voltage of the sensor (3.3V or 5V).
- White: RXD
- Green: TXD
- Black: GND
If your sensor needs a higher voltage than 3.3V (and the maximum value is equal to or greater than 5V), you can connect the red cable to the 5V pin.
To check whether the cabling is correct and whether the sensor is detected, you can open your console and perform the following before and after connecting:
ls /dev/ttyUSB*
If no other serial devices are connected via USB, nothing should be displayed first and afterwards /dev/ttyUSB0. If the name differs (because, for example, other devices are connected), you have to adapt it accordingly in the following steps.
Second variant via GPIO’s
If you have a sensor with 3.3V required input voltage, you can also connect this without USB converter directly to the GPIOs. Theoretically, you can do it also with 5V and a TTL converter, but I will not go into details in this tutorial. One advantage of the USB variant is that it is easier to check whether the sensor has been detected.
Installation of the Raspberry Pi Fingerprint Library
For some commands of the installation, root privileges are required. Therefore we start a terminal session and type the following, which executes all the following commands as root:
sudo bash
Now we add the necessary package sources (the author has also a few other exciting projects):
wget -O - http://apt.pm-codeworks.de/pm-codeworks.de.gpg | apt-key add -
wget http://apt.pm-codeworks.de/pm-codeworks.list -P /etc/apt/sources.list.d/
We then update the available packages and install the Python library:
apt-get update
apt-get install python-fingerprint --yes
If an error has occurred (in particular, that not all dependent packages have been installed), then execute the following:
apt-get -f install
To return to the normal shell (under the Pi user), type exit.
By the way: If you prefer to use a C ++ library, you can look at this one from Adafruit (originally for Arduino). The Python library code is available on Github.
Test code & example scenario
First, we do a small test to see if the sensor is detected and ready for access. To do this, we run one of the sample files:
First, we do a small test to see if the sensor is detected and ready for access. To do this, we run one of the sample files:
python2 /usr/share/doc/python-fingerprint/examples/example_index.pyA total of up to 1000 different fingerprints can be stored. A finger can also be used several times for example. It can be stored in different positions so that they are detected more quickly / more clearly. The following should appear, which allows you to display the positions under which an imprint is stored by selecting a page (0-3).
|
1 2 |
Currently stored templates: 0 Please enter the index page (0, 1, 2, 3) you want to see: |
If the error message “Exception message: The fingerprint sensor port “/dev/ttyUSB0″ was not found!” appears, something is wrong with the cabling or the sensor. Check it again.
Save and read out
Attached are sample files for storing a new fingerprint, reading out and deleting stored fingerprints. Let’s begin by recording a finger. Call the following:
python2 /usr/share/doc/python-fingerprint/examples/example_enroll.pyPut your finger on the glass surface, wait for the instruction in the terminal and remove your finger as soon as it is written there. Afterwards you have to put your finger a second time for the verification and the imprint is stored in the next number.
Let us also see whether our finger is recognized. So remove your finger from the sensor and call the following script:
python2 /usr/share/doc/python-fingerprint/examples/example_search.pyPut your finger on it again. If the fingerprint on the Raspberry Pi is detected, a message like this appears:
Currently stored templates: 2
Waiting for finger...
Found template at position #1
The accuracy score is: 63
SHA-2 hash of template: 3aa1b01149abf0a7ad0d7803eaba65c22ba084009700c3c7f5f4ecc38f020851
In this case, an accuracy value is also specified (the higher, the better).
In this directory, there are also other scripts with which you can delete stored impressions or even load them as a picture. With ls /usr/share/docs/python-fingerprint/ you can display all of those files.
I have made a small video as a pre-taste:
76 Comments
Can you PLEASE do a video tutorial. I have been trying to complete this tutorial for weeks and I am about to give up… When I run the python code I get the Error “The fingerprint sensor could not be initilaized. Exception Message: The received packet do not begin with a valid header.”
I have checked the wiring numerous times and I am at a loss
You could try a previous version from Github or contact the author directly?
I have the same problem, have u been able to solve it yet?
Try putting the fingerpint reader on a different voltage, switching the TX and RX, and/or building the package from here: https://github.com/bastianraschke/pyfingerprint/blob/Development/README.md
Worked for me!
I solved this, by wiring the tx and rx pins properly.
Hi, I don’t understand why in all fingerprint there some limit of memory store, so I thought the fingerprint is just like sensor so whenever you touch it, it will give you some code(hash,guid, some unique value), so you can store in database or some where else, so you can compare it second time, so why we need to use fingerprint’s memory, please correct me if I’m wrong
You probably could, but that’s how the author created his library – with limiations.
Did you get any results? i want to save the fingerprints also in a database but i dont know how
Check out SQLAlchemy for Python, and look at storing your image as a “BLOB” data type.
I tried it with .pdf and .jpg, and it worked fine.
yep.. wrong. The storage is IN the sensor itself.
When you enroll, the hashes are stored INSIDE the sensor. When checking, it just informs in what template was the fingerprint found. As such, the capacity is defined by the sensor’s flash size.
How we can automate calling py files ? The users won’t be calling any files in the real life
You could use crontab or a init.d daemon.
Is it possible to get the name of the person in to the system? I want to build a door unlocker with a personal message like “Hallo Dora” or somethink like that. Is that possible?
Greetings
In the original library, there is no such opportunity, but as the code is available on Github, you can fork and adapt it.
Hello @Timo, have you found something for your door unlocker? I’m searching something like that.
thanks
Hi Timo, i am reading your message 4 years after yu posted it, i was actually making something u were making, a raspberry pi fingerprint sensor door unlocker, i would appreciate all the help and recommendations you might have, i am still in the research stage and havent purchased any equipemt
would you please tell me what I have to do with the following line?
“python2 /usr/share/doc/python-fingerprint/examples/example_index.py”
should I write it in terminal or what?
can you please send me source code in python
It is on Github
Thanks for the tutorial, Exception message : The received packet do not begin with a valid header, I had switch Tx and Rx header with no luck (/dev/ttyUSB0 detected, via using a TTL to usb adapter). The sensor works fine in windows with the provided windows only software. Maybe the ZFM-70 is not compatible with this library. Do you know by any chance how to manipulate the py files to be able to communicate with Z-70 or any github that have Z-70 driver written already (cant find it) Thanks in advance
Initially I got the error: Exception message : The received packet do not begin with a valid header, after switching RXD to Green & TXD to white, it started working.
Hi,
Good to know it worked for you…I am still struggling can you help me?
Regards,
Kiran
Greetings,
I have ZFM 20 sensor whenever i try to put it in 5V TTL pin it restarts the PI, when i put it in 3.3V it doesn’t recognize the USB.
Could you pls help.
Thank you!
Use a MCP3008…
sure thank you . i will try doing that. Do you know if the same is possible in java?
Should be, but I have not seen an implementation yet.
Greetings,
Thanks for your quick responses. I implemented it in python and works great. Thank you
If i have to delete the entries, how do i do it? I see that in my case files are under doc not docs
ls /usr/share/docs/python-fingerprint/
Could you please help me with how to remove the entry. and can i use the same details in store them using java.
Thank you! 🙂
Correction – I see that in my case files are under doc not docs
“ls /usr/share/doc/python-fingerprint/”
Any way I could send the stored fingerprint to a database?
Yes, just print the data and save it anywhere you like.
hi, right now is it saving it in the fingerprint sensor?
Could you please help me with my earlier response?
Thanks
Yes, but as I remember, the library has a function to print the data. This could be used as an export.
Hi,
I have been trying to integrate Fingerprint sensor GT (511C1R) with the Raspberry Pi3, however, I still see this exception “The received packet does not begin with a valid header!” I am trying to connect it to the UBS/TTL but no luck. tried it on the SDK on windows it works but on Raspberry Pi it doesn’t. I would really appreciate if anyone could help me with this.
I have tried all basic troubleshooting methods but nothing really takes this exception off the screen
Regards,
Kiran
hello I also have that problem with the same
if you could solve it
i am trying it with r305 fr raspberry pi , it is not working i am getting error as sensor could not be initialised ,pls provide me a solution
Can you show me a diagram that connects the specific legs?
You have to use the colors of the wires.
Hi Felix! First of all, I want to thank you for writing this article. Now, here’s my question: I’m planning to use the “UART Fingerprint Reader STM32F205 TFS-D400”. I’m a bit masochistic and I like to struggle with low level programming, thus, my idea is to make my own lib. Do you know if all “uart fp readers” implements the same protocol? If the answer is yes, have you idea where can I find the specs for such protocol? Thank you very much in advance! Best regards!
Hello, I am using R305 with RPi3. I have stored few fingerprints and My problem is, sometimes sensor recognizes the fingers and sometimes not. Why is this happening, can someone tell me?
hey, i am working with r305 and rpi3 . But i am getting error
“The fingerprint sensor could not be initialized!
Exception message: The received packet do not begin with a valid header!”
did you get any problem like this? If yes, how you solved it.
What is the fingerprint module has 3.3V to 6.0V range. Do I need to use the USB TTL to connect to the pi? If not, how are the connections to be made?
Thanks
Greetings
Would like to know what the accuracy score is out of? I have manged to get the fingerprint sensor and code working (many thanks for the help). I get accuracy scores of 167 etc… Therefore i would like to know what the score it out of? (cant be a percentage)
did anyone tried this with raspberry pi zero w ??
because i am able to enroll it without any issues but when I try to run example_downloadImage code i get the following error
“Operation failed!
Exception message: The received packet is corrupted (the checksum is wrong)!
”
but i dont get any of this error if i am using raspberry pi 3 b+ …!!!
i design web-based Electronic voting system in which storing fingerprint into database and also retrieving data through fingerprint but i am getting stuck and don’t know how to resolve this problem if any suggestion kindly help me……
CAN SIR YOU PLEASE TELL ME HOW TO TAKE FINGERPRINT DATA IN A MYSQL DB COULD YOU PLEASE HELP ME IN DETAIL PLEASE…URGENT?
Hello @Felix
Thanks for this great library and working as expected but I am looking for, How can I store multiple fingerprints from the same user like right-hand-thumb and left-hand-thumb.
As I know that we can do this kind of work as well as, we can store up to 10 fingerprints for the same user in this kind of devices.
https://www.realtimebiometrics.com/product-detail.php?id=30&title=Realtime%20T52
This is for python2, How can we use it python3.6??? is anybody worked on python3.6 with finger print module??
There is a library for C# Windows 10 for the fingerprint sensor?
Hi all,
My requirement is adding finger print with corresponding user ID.
When finger is detected at the time we should get the LCD message with user ID.
How to Store finger template with corresponding ID
Thanks in advance
Hi,
I tried to install the fingerprint library for raspberry pi ,by following the above mentioned instructions.But as soon as I started rooting and entering this url -> wget -O – http://apt.pm-codeworks.de/pm-codeworks.de.gpg | apt-key add – It shows me an error ->No such file or directory. please help in fixing this issue.
Hi there!
Great guide! Already tried to accomplish this, also used a code matrix for additional possibilities to enter the door.
I have bought this fingerprint-sensor:
https://www.amazon.de/gp/product/028492038X/ref=ppx_yo_dt_b_search_asin_title?ie=UTF8&psc=1
Im having issues with the Exception message: The received packet do not begin with a valid header!
Already tried to switch RX and TX as mentioned above, but didn’t trie 3,3V as the specs from this fingerprint only says 3,6V DC!
Im only facing this problem when I entered a valid finger and when waiting again for a finger it always gives me the valid header Error Message!
Any suggestions?
Thanks guys!
Is it possible you need to initialize the serial interface parameters? An example of these might be
“9600 bits/sec, no parity, 2 stop bits”, etc. Does the fingerprint reader documentation discuss anything like that, e.g. what it’s expecting? It seems like the code seems data coming in, but can’t decode it into the right binary / ascii characters. Having an incorrectly initialized serial interface could be a reason for this. I’ve interfaced RPI with a geiger counter and a radio gateway, and both required this.
Not sure what your reader expects but you could try some common values and see what happens.
Would there theoretically be a way to attach a name or id to a fingerprint so that whenever a finger is recognized, it would say their name on the lcd? I need this because I’m trying to create an attendance system and I need the fingerprint when recognized to say that the one person is present. Any help?
This only works if the fingerprint reader use serial to USB. I have a USB-ready device, and this does not work whatsoever.
R307 fingerprint scanning not working in one attempt. after multiple attempt it detect finger.
how to solve this problem ?
glaksinyy8v@mail.ru
Hello,
I’m using python 3 on raspberry pi 4 and fingerprint R307 sensor.
I would like to store into fingerprint sensor a template I’ve in DB for future search, using “finger_search()” function of sensor.
I try to save data in this way:
data = [5, 1, …]
finger.send_fpdata(data, “char”, 1)
but when I run print(finger.count_templates()) to check the save, the result is 0 and the template isn’t saved
Is there anyone who could help me
Thanks
Did you manage to find a solution
Thanks
Can anyone share the C library for R305 fingerprint module interface to Raspberry PI?
I get error as modulenotfound how to import fingerprint module in code part
Please Tell me Hardware Requirements with LCD Please