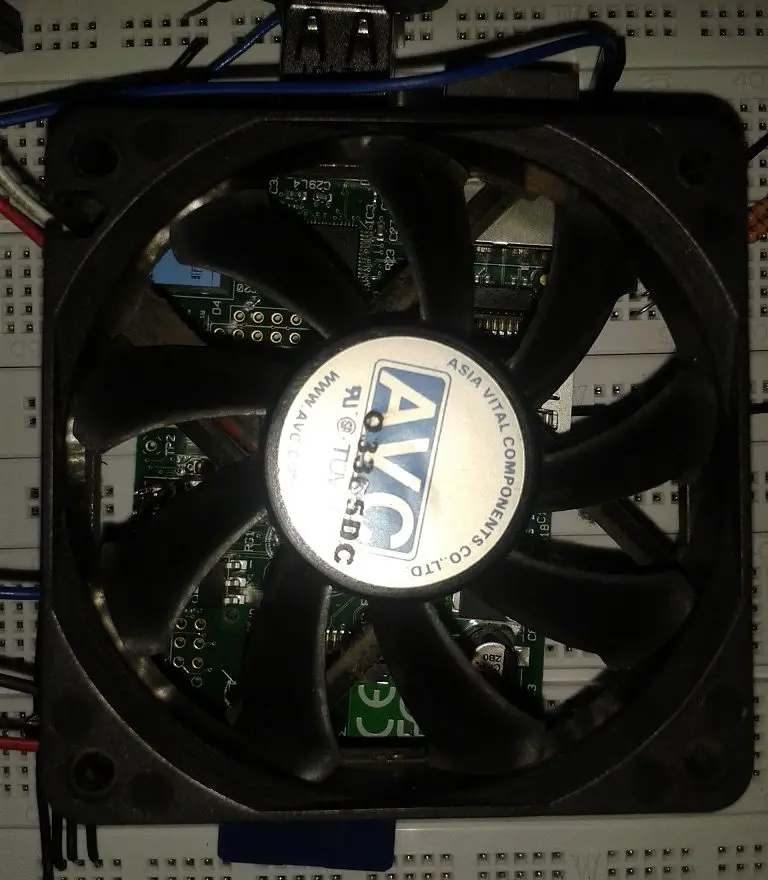
Who has his Raspberry Pi running as a Server, etc., will quickly realize that the little giant can become very hot. To a certain extent, one can surely ignore this, but if the Pi is running day and night, you should pay attention to the temperature (especially in a housing). Since I also had this problem, I took it as a project to keep the case and the CPU cool.
Accessories
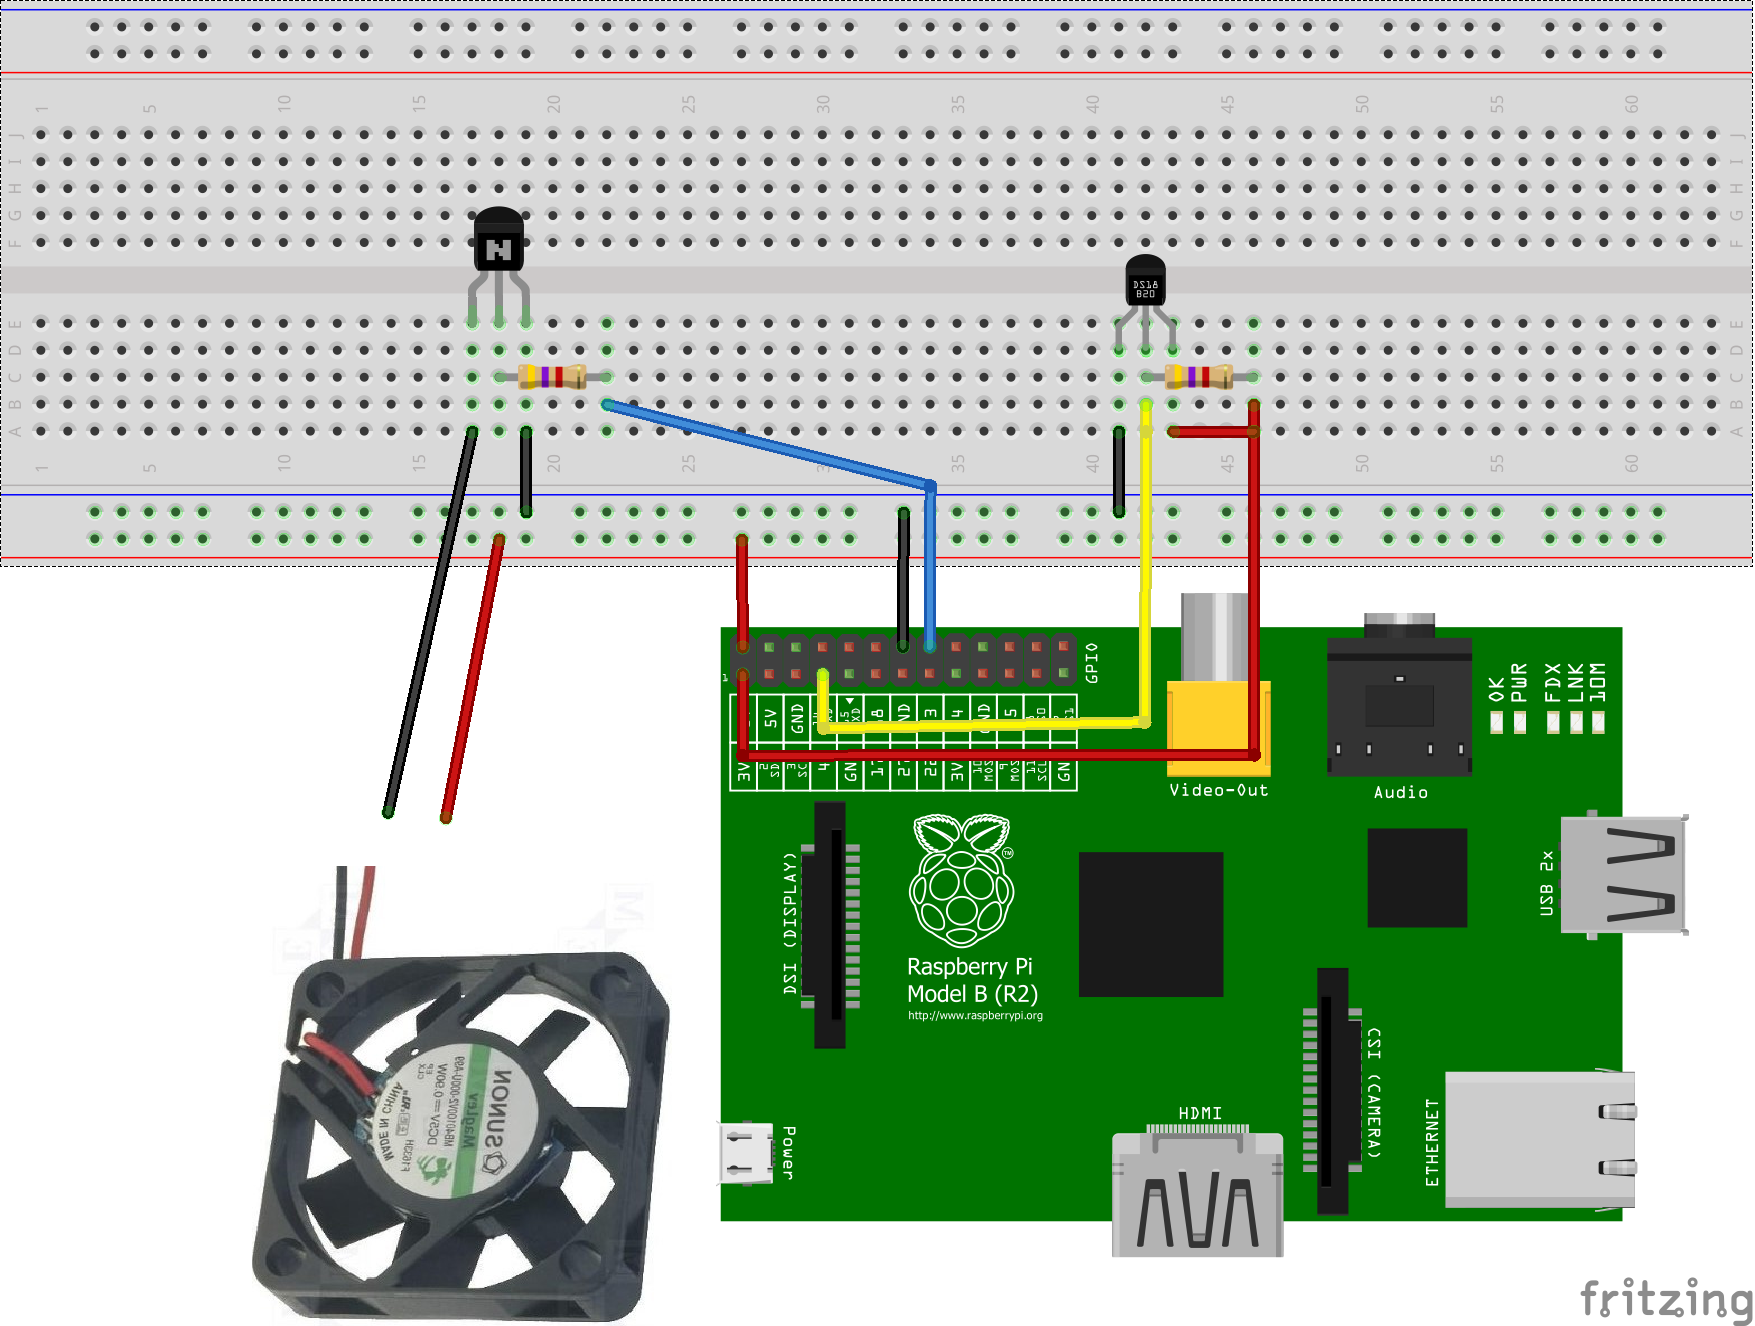
I took a 5V fan and a DS18B20 temperature Sensor. The Transistor installed is a BC547. If you do not have a temperature sensor or you do not want to measure it, you can still use the Script with a small adjustment.
Setup
As Resistors, I have taken 4.7k Ohms each. The output pin for the Transistor is pin 23, although any other GPIO pin that does not have an assigned function can be taken.
Important: The temperature Sensor is connected to 3.3V, whereas the Cooler is connected to 5V.
Script
In order to make the work as easy as possible, I have already prefabricated a script that you only need to adapt.
wget https://tutorials-raspberrypi.de/wp-content/uploads/2014/04/cooler_skript.zip
and unpack:
unzip cooler_skript.zip
Well, then we’ll edit the script:
sudo nano cooler_skript.py
Here, lines 19 to 23 are important and possibly adaptable.
|
19 20 21 22 23 24 |
IMPULS_PIN = 23 SLEEP_TIME = 30 MAX_CPU_TEMP = 40 MAX_SENSOR_TEMP = 30 SENSOR_ID = '' |
Now, IMPULS_PIN simply indicates the GPIO pin, which is used to drive the transistor.
SLEEP_TIME indicates all how many seconds the temperature should be checked. I do not recommend a too small number to give the Pi more calculation time for other applications.
MAX_CPU_TEMP and MAX_SENSOR_TEMP indicate the respective temperatures at which the fan should start to rotate. It does not matter what is achieved first; as soon as one has been reached it starts to turn. If the cooler is always turning, set MAX_CPU_TEMP = 0.
Now to the sensor ID: How to get this out, I have already shown here. If you do not have a sensor, just leave it that way. For me it is e.g. the ID 10-000802b4ba0e:
|
23 |
SENSOR_ID = '10-000802b4ba0e' |
So far so good. Basically, we are already done. With
sudo python cooler_skript.py
the Script can already be started. If you want to have the values displayed on every check, you can delete the # in lines 59 and 60 of the Script.
Automatic starting
If you want to start the Script automatically, you can take a look at this Tutorial. Optimally you move the script to /usr/local/bin/
sudo cp cooler_skript.py /usr/local/bin/cooler_skript.py
Then you just have to adjust the names, as in line 8:
|
1 |
python /usr/local/bin/cooler_skript.py |
Overclocking
Now that we have made sure that the Pi is always cool enough, we can also overclock:
sudo raspi-config
Under point 7 Overclock you can set the clock rate. For example, I have set Medium or High as needed. You can adjust this depending of the Application (in the case of computationally intensive usage, a higher clock rate makes more sense and brings speed at the same time).


1 Comment
molliegrunwald@gmail.com