")
The most common controller of multi-line character displays is the HD44780. There are several Raspberry Pi LCD display sizes (8×2, 16×2, 20×4, etc.) that run with it. In this tutorial, I will show how to use a 16×2 character display and also run a test script.
A few words said in advance: In this tutorial, all pins are addressed directly, which occupies quite a few GPIOs. Another method is the connection via I2C.
Required Hardware Parts
The following parts are required:
- Display with a HD44780 controller
- Jumper Cable
- A resistor or alternatively a potentiometer (to control the backlight)
- Breadboard
Setup
In this case, I refer to the pin numbering (GPIO.BOARD), not to the GPIO numbers:
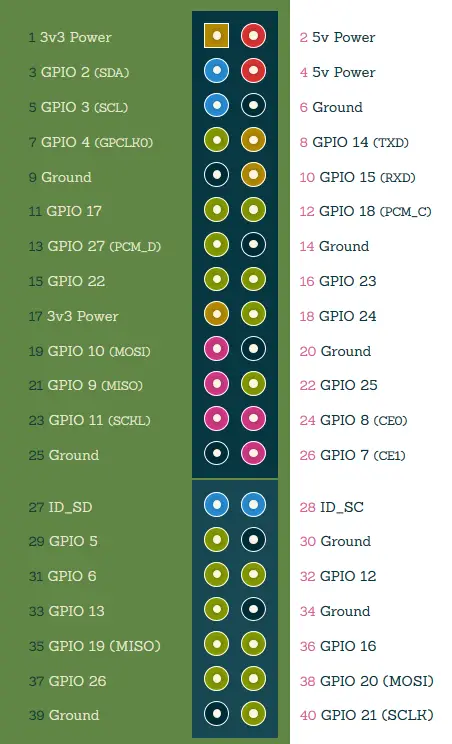
| LCD Pin | to RPi GPIO | Description |
|---|---|---|
| 1. VSS | Pin 6 (GND) | Supply Voltage (ground) |
| 2. VDD | Pin 2 (5V) | Supply Voltage 5V |
| 3. V0 | Pin 6 (GND) | Contrast Voltage |
| 4. RS | Pin 7 (GPIO4) | Register Selection (0: Command Register, 1: Data Register) |
| 5. RW | Pin 6 (GND) | Read/Write (0: Write Modus, 1: Read Modus) |
| 6. E | Pin 11 (GPIO17) | Clock Edge |
| 7. D0 | – | Data Line 0 |
| 8. D1 | – | Data Line 1 |
| 9. D2 | – | Data Line 2 |
| 10. D3 | – | Data Line 3 |
| 11. D4 | Pin 12 (GPIO18) | Data Line 4 |
| 12. D5 | Pin 15 (GPIO22) | Data Line 5 |
| 13. D6 | Pin 16 (GPIO23) | Data Line 6 |
| 14. D7 | Pin 18 (GPIO24) | Data Line 7 |
| 15. A | Pin 2 (5V) (mit Poti) | Backlight Anode |
| 16. K | Pin 6 (GND) | Backlight Cathode |
Schematically, the whole thing looks like this:
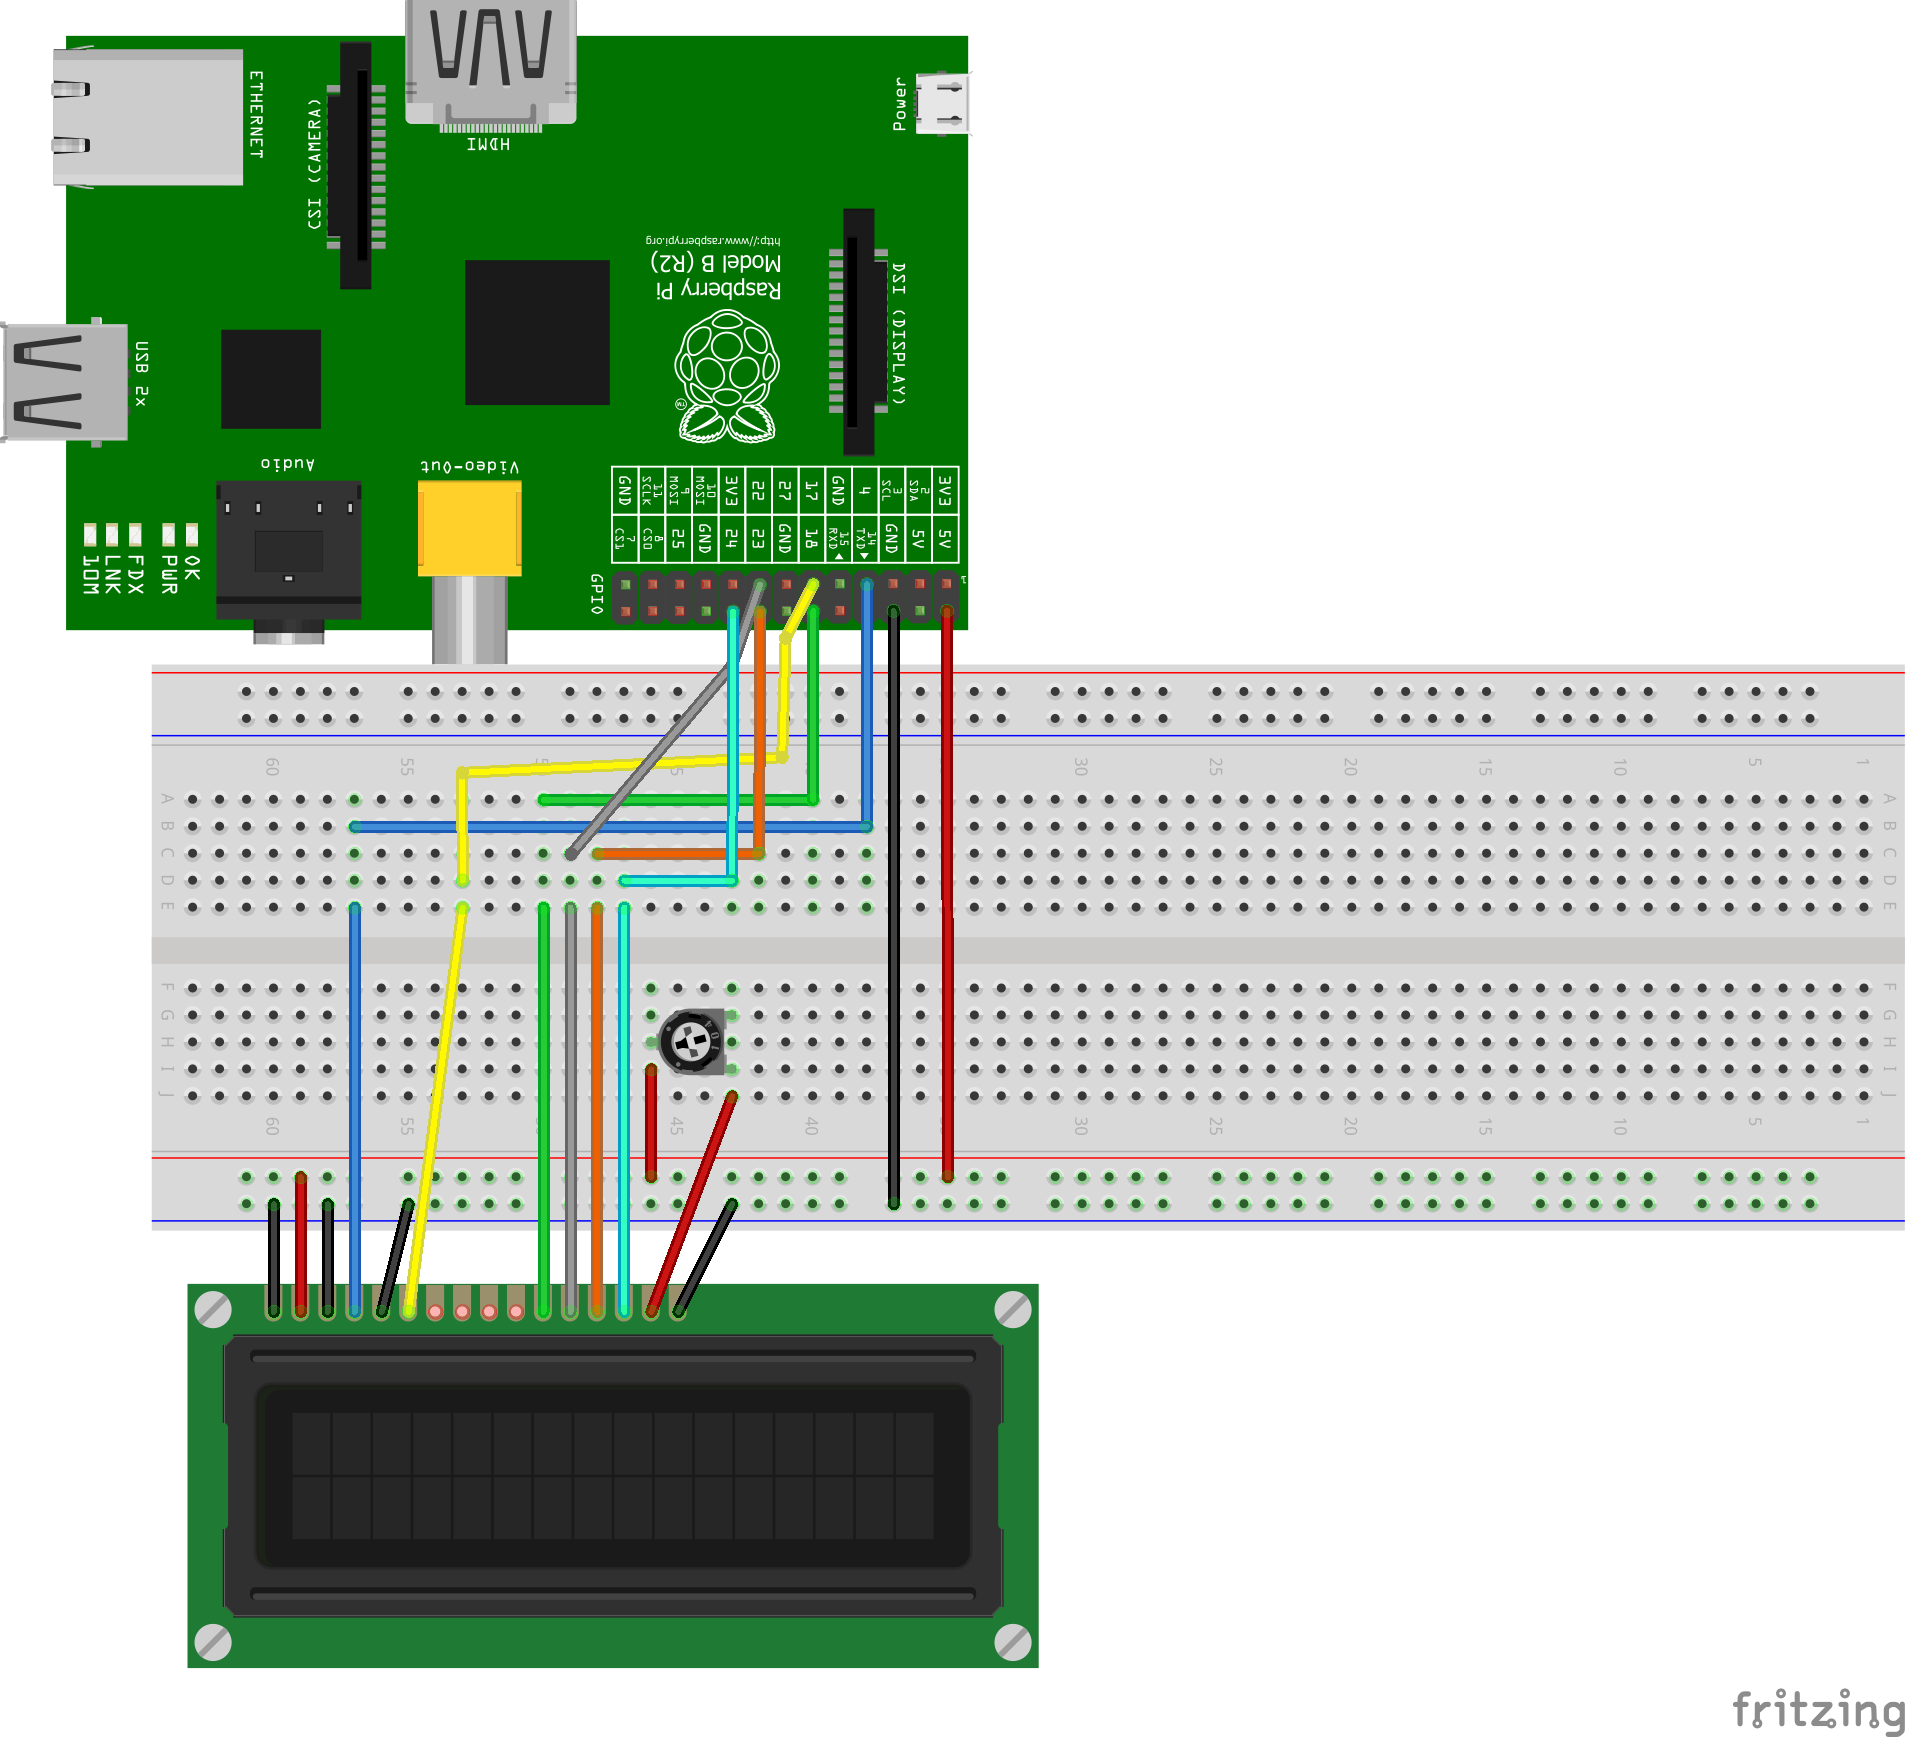
The backlight can be adjusted by turning the potentiometer. Some displays cannot stand 5V for the backlight, so you should either look at the datasheet or at least always connect a 470Ω – 510Ω resistor.
Testing the Raspberry Pi LCD Display
You can either view the script I used here or just download it and try.
wget http://www.tutorials-raspberrypi.de/wp-content/uploads/scripts/hd44780_test.py
chmod +x hd44780_test.py
python hd44780_test.py
If you have chosen a different display or pin assignment, do not forget to adapt the script.
Through the simple control, you can create different scripts, which, for example, show the status of the Pi.
3 Comments
I would lik to follow these raspberry pi tutorials but there’s just too much advertising !!
Peter,
I used an ad-blocker I have NO ads on this page at if they stop me form looking at them via ad-blocker detection I just will not look at them I white list no site at all.
If you have contrast issues or need to edit the code for a 20×4 screen i’ve made a youtube clip to fix some issues i had after following the tutorial. https://www.youtube.com/watch?v=geEA-5f74Gk