
The Raspberry Pi usually needs a micro SD card on which the operating system is located. The disadvantage is, on the one hand, that SD cards break faster and, on the other hand, they usually have less storage space than a hard drive. In this tutorial, we will take a closer look at the Raspberry Pi USB Boot.
Since the Raspberry Pi 4 it is even easier than before to make the SD card obsolete. All we need is a USB stick or an (external) hard drive.
Required Hardware Parts
- Raspberry Pi 4
- 2-5 External hard disk / SSD (alternatively: a large USB stick)
- 5V power supply with at least 3A
Of course, we could still use an SD card and an external device, but in many cases, we need a larger root directory. Therefore, a sufficiently large hard disk makes sense in any case – not to mention the failure rates of the SD cards.
In my first test, my power supply had too little power, which is why the Pi could not boot properly. After that I used a stronger power supply, and it worked.
Method 1: Update the existing Raspberry Pi OS and transfer it to the SSD
If you have already set up your operating system and now want to transfer it completely, there is an easy way to do this. But first, we have to update the package sources and the kernel:
sudo apt-get update
sudo apt-get full-upgrade
sudo rpi-update
sudo rpi-eeprom-update
Then we connect the USB stick or the hard drive to the Raspberry (before we do a backup if necessary). When flashing, all data is overwritten, so data backup is important! I used the USB Image Tool (for Windows), which creates a complete backup as an .img file. The only drawback is that the image file is as large as the entire volume, not just as large as the sum of all the files. You can then write the backup to the stick again.
The Win32DiskImager tool has a similar function
Before we transfer the operating system, let’s take a look at the file below /boot/cmdline.txt an.
cat /boot/cmdline.txt
This should look like this (it is important that there is no absolute path).
console=serial0,115200 console=tty1 root=PARTUUID=c29633fc-02 rootfstype=ext4 elevator=deadline fsck.repair=yes rootwait quiet splash plymouth.ignore-serial-consoles
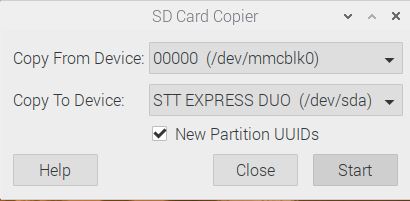
On the Raspberry Pi we now click the start menu> “Accessories” and select the “SD Card Copier“. Here we choose our root partition and the hard drive to which the image should be transferred.
After everything has been successfully transferred, we can shut down the Pi and remove the SD card.
Method 2: Flash a Fresh Raspberry Pi OS and Activate USB Boot
Another method is that we download a current image of the Raspberry Pi OS (formerly called Raspbian OS). Updates are no longer necessary here.
If necessary, make a backup of your hard drive / USB stick first, as this method will also overwrite all data.
Then we need Balena Etcher. With this, we can write the Raspberry Pi OS image to the USB stick or hard drive. The process is described in more detail here. You can already pre-configure SSH and the Wi-Fi connection.
Again, you should check the cmdline.txt (see above).
Before we start, we remove the SD card from the Raspberry Pi (if still present) and connect the SSD / USB stick. It takes a while to start up, but then the Raspberry Pi should have started normally.
Conclusion on the USB Boot on the Raspberry Pi:
In principle, I really like the possibility of finally using permanent hard drives as a system memory. Especially in continuous operation (OpenHAB sends its regards), SD cards break after not too much usage. Unless you have regularly backed up all important files, this is a disaster. In such projects, I will certainly use a hard drive instead of an SD card in the future (not even an SSD), since flash memory is too fragile in my opinion.
Nevertheless, you have to look carefully which hard drive has what kind of performance because you don’t want too great of a speed loss through USB. Even if the USB 3.0 interface allows at least higher data transfer rates.
PS: Experience values are welcome to be posted as a comment!
7 Comments
Using a USB stick to make a bootable device, how large should this one be ?
At least 8GB.
Why sudo rpi-update? This should not be run as part of standard maintenance.
According to the online info at raspberrypi.org, this should not be run unless absolutely necessary, or unless you’re to to do so, as it upgrades to a pre-release kernel, and could result in a non-running Pi.
In fact, rpi-update is exactly what made my Pi 4b unbootable (saying “Firmware not found”). After struggling for a week, it was resolved with RPi Imager. I made and booted a flash reset SD (and got solid green screen) then made a fresh image to boot from SD.
rpi-update, bad advice in general. Brick your Pi chance if you ignore the warnings. REMOVE THIS LINE!
Still advising Balena Etcher? The Raspberry Pi supplied Imager program is capable, small and does not have spyware.
SSD is fine, MTBF is not as bad as you suggest here.
Here is my problem with this all. When Rpi installer asks for a target, it will only accept a raw device, ie. the whole disk, not just a partition, you cannot designate a partition. When it finishes, it expands the file system to the whole disc.
Why is this a problem? I like to have all of my “home” files on a separate partition, which allows for simpler system updates without risking my personal files. The other reason, is that I like to use a swap partition, rather than a swap file, primarily for performance reasons.
I normally run 4 primary partitions on a linux system, 1 for /, 1 for swap, 1 for /usr/local, and the last for /home.
I have tried to resize the /rootfs partition once, that didn’t work.
For now, I’m just using the SSD for storage and swap, and boot off the SD, I’d like to ditch the SD…