
The official Raspberry Pi camera module has the advantage that it doesn’t need any USB ports or GPIO pins and can be used directly via the CSI port. It is available with and without an infrared filter, which for example can be of advantage when shooting at night.
This tutorial shows how to set up, install, and take pictures or videos.
Required Hardware Parts
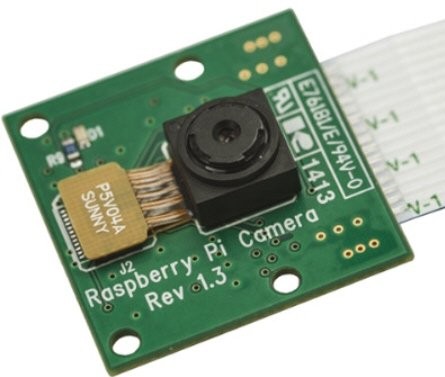
At the moment there are two different camera modules: the standard version and one without an infrared filter (NoIR). This makes them ideal for infrared imaging or low light applications. Otherwise, both cameras have 5 megapixels and can record 1080p videos at 30 frames per second.
- Raspberry Pi model B
- Raspberry Pi camera module
- alternatively: NoIR Raspberry Pi camera module
- if necessary, a longer ribbon cable
Setup
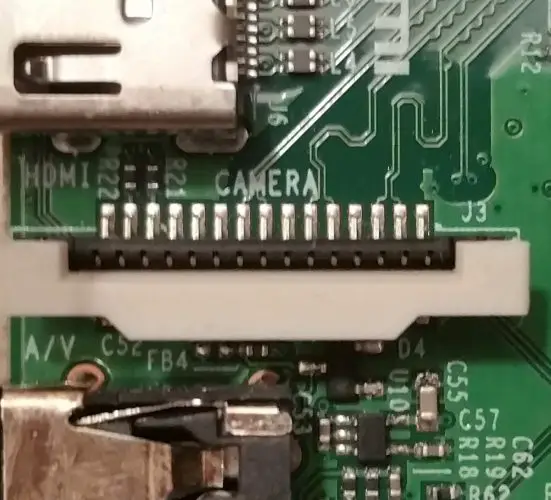
Except for the Raspberry Pi Zero and the Compute Model, all versions have two ports on the board: DSI (for the official touch screen) and CSI (Camera Serial Interface) for the cameras. For new models, the ports are labelled, the CSI port is closer to the USB port.
To connect the camera properly, first, you have to loosen the clipper on the Pi (best with two fingers at the same time). Then you can connect the ribbon cable. In this case, the side of the cable on which the contacts are free must be on the opposite side of the clipper (see the picture below, where the contacts are also visible).
If the length of the “ribbon cable” is not enough, there are also longer ones yor can buy.
Installation
Depending on how long your operating system (Raspbian/Jessie) has not been updated, some new packages may need to be loaded:
sudo apt-get update && sudo apt-get upgrade
Then we activate the camera module by means of
sudo raspi-config
and select “Enable Camera” -> Enable.
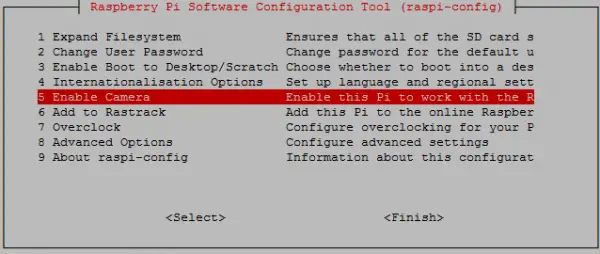
After that, you have to restart.
Now we can record. To get general information about the parameters of the program, you can do the following:
raspistill
For example, to take a simple photo (via the console), enter the following command, which will shortly open a window (if you are connected to SSH, X server should be activated, otherwise remote would also be an option).
raspistill -o ~/img.jpg
Where -o specifies the output path + name. Of course, you can specify additional parameters, such as. -vf for the vertical flip.
To make videos, you can use the raspivid command. Again, you get all the possible options when entering the command without parameters. Here again, a name including the file ending (and if necessary the path) must be specified as well as the length of the video in milliseconds. The following example would take a 10-second video and save it in the home directory.
raspivid -t 10000 -o test_vid.h264
One more important note: the camera does not have a built-in microphone, so you should not be surprised why no sound is playing.
You can display your recorded files via the console as follows (you may still need to install the image viewer using sudo apt-get -y install fim):
fim -a img.jpg
omxplayer test_vid.h264
All of these commands can also be nicely integrated into Python or Bash scripts.
The complete documentation for the camera module can be found here.
1 Comment
good camera