 with MAX7219 / MAX7221 and Raspberry Pi")
The most common form of 7-segment displays are “Common Cathode”, for which et al. the microchips MAX7219 and MAX7221 are intended. There are also “Common Anode”, which are usually a lot cheaper. However, these are not directly compatible with such a microchip. How it all works is shown in this tutorial. Anyone who wants to know more about anodes or the differences can do it here.
Accessories
Inspired by this article, I came up with the idea to make anode displays compatible with the Pi. For that we need:
- 1-8 Common Anode 7-segment displays (for example, these here)
- MAX7219 LED Display Driver (or MAX7221)
- if necessary soldering tools and solder
Connection
Let’s take a look at the datasheet of the IC first.
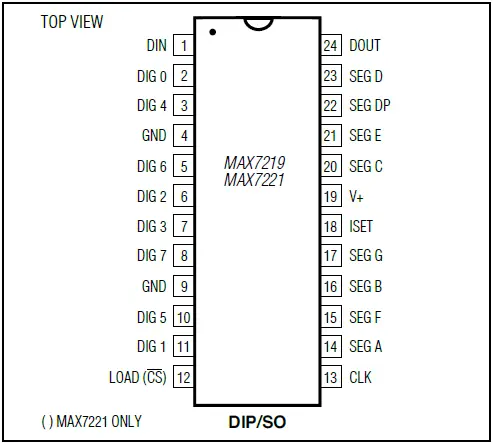
The connection with the Raspberry Pi looks like this:
- RPi Pin 2 (5V) => Pin 19 (V+)
- RPi Pin 2 (5V) with 10k ohm resistor => Pin 18 (ISET)
- RPi Pin 6 (GND) => Pin 4 and Pin 9 (GND)
- RPi Pin 19 => Pin 1 (DIN)
- RPi Pin 23 => Pin 13 (CLK)
- RPi Pin 24 => Pin 12 (LOAD)
Now it goes to the connections between the 7-segment display and the MAX7219. In addition, the structure of such a display In addition, the structure of such a display (to make sure the pins are the same, you can test each pin on two 1.5V batteries in series, V+ on the positive pole and the respective pin on the negative pole, which V + pin you connect does not matter):
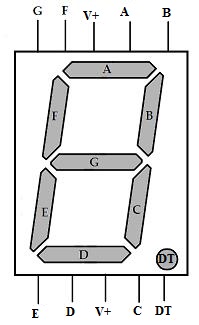
Usually, for a cathode display it would be DIG 0 – DIG 7 for each of the V+ of a display (therefore also maximally 8 segments per MAx7219) and SEG A to SEG DP connected parallel to the respective connections of the segment display (SEG A to all pin A’s of the segments, etc.).But since anodes are now polarized the other way round, we also have to swap the connections:
- DIG 0 => Connections A (parallel to all)
- …
- DIG 7 => Connections DP (parallel to all)
- SEG A => V + the segment on the far right
- SEG B => V + the second segment from the right
- …
- SEG DP => V + the leftmost segment (only for 8 segments)
If you have less than 8 segments, you will go from right to left all through and some SEG pins will be empty. For example. I have only 4 segments connected to SEG A – SEG D.
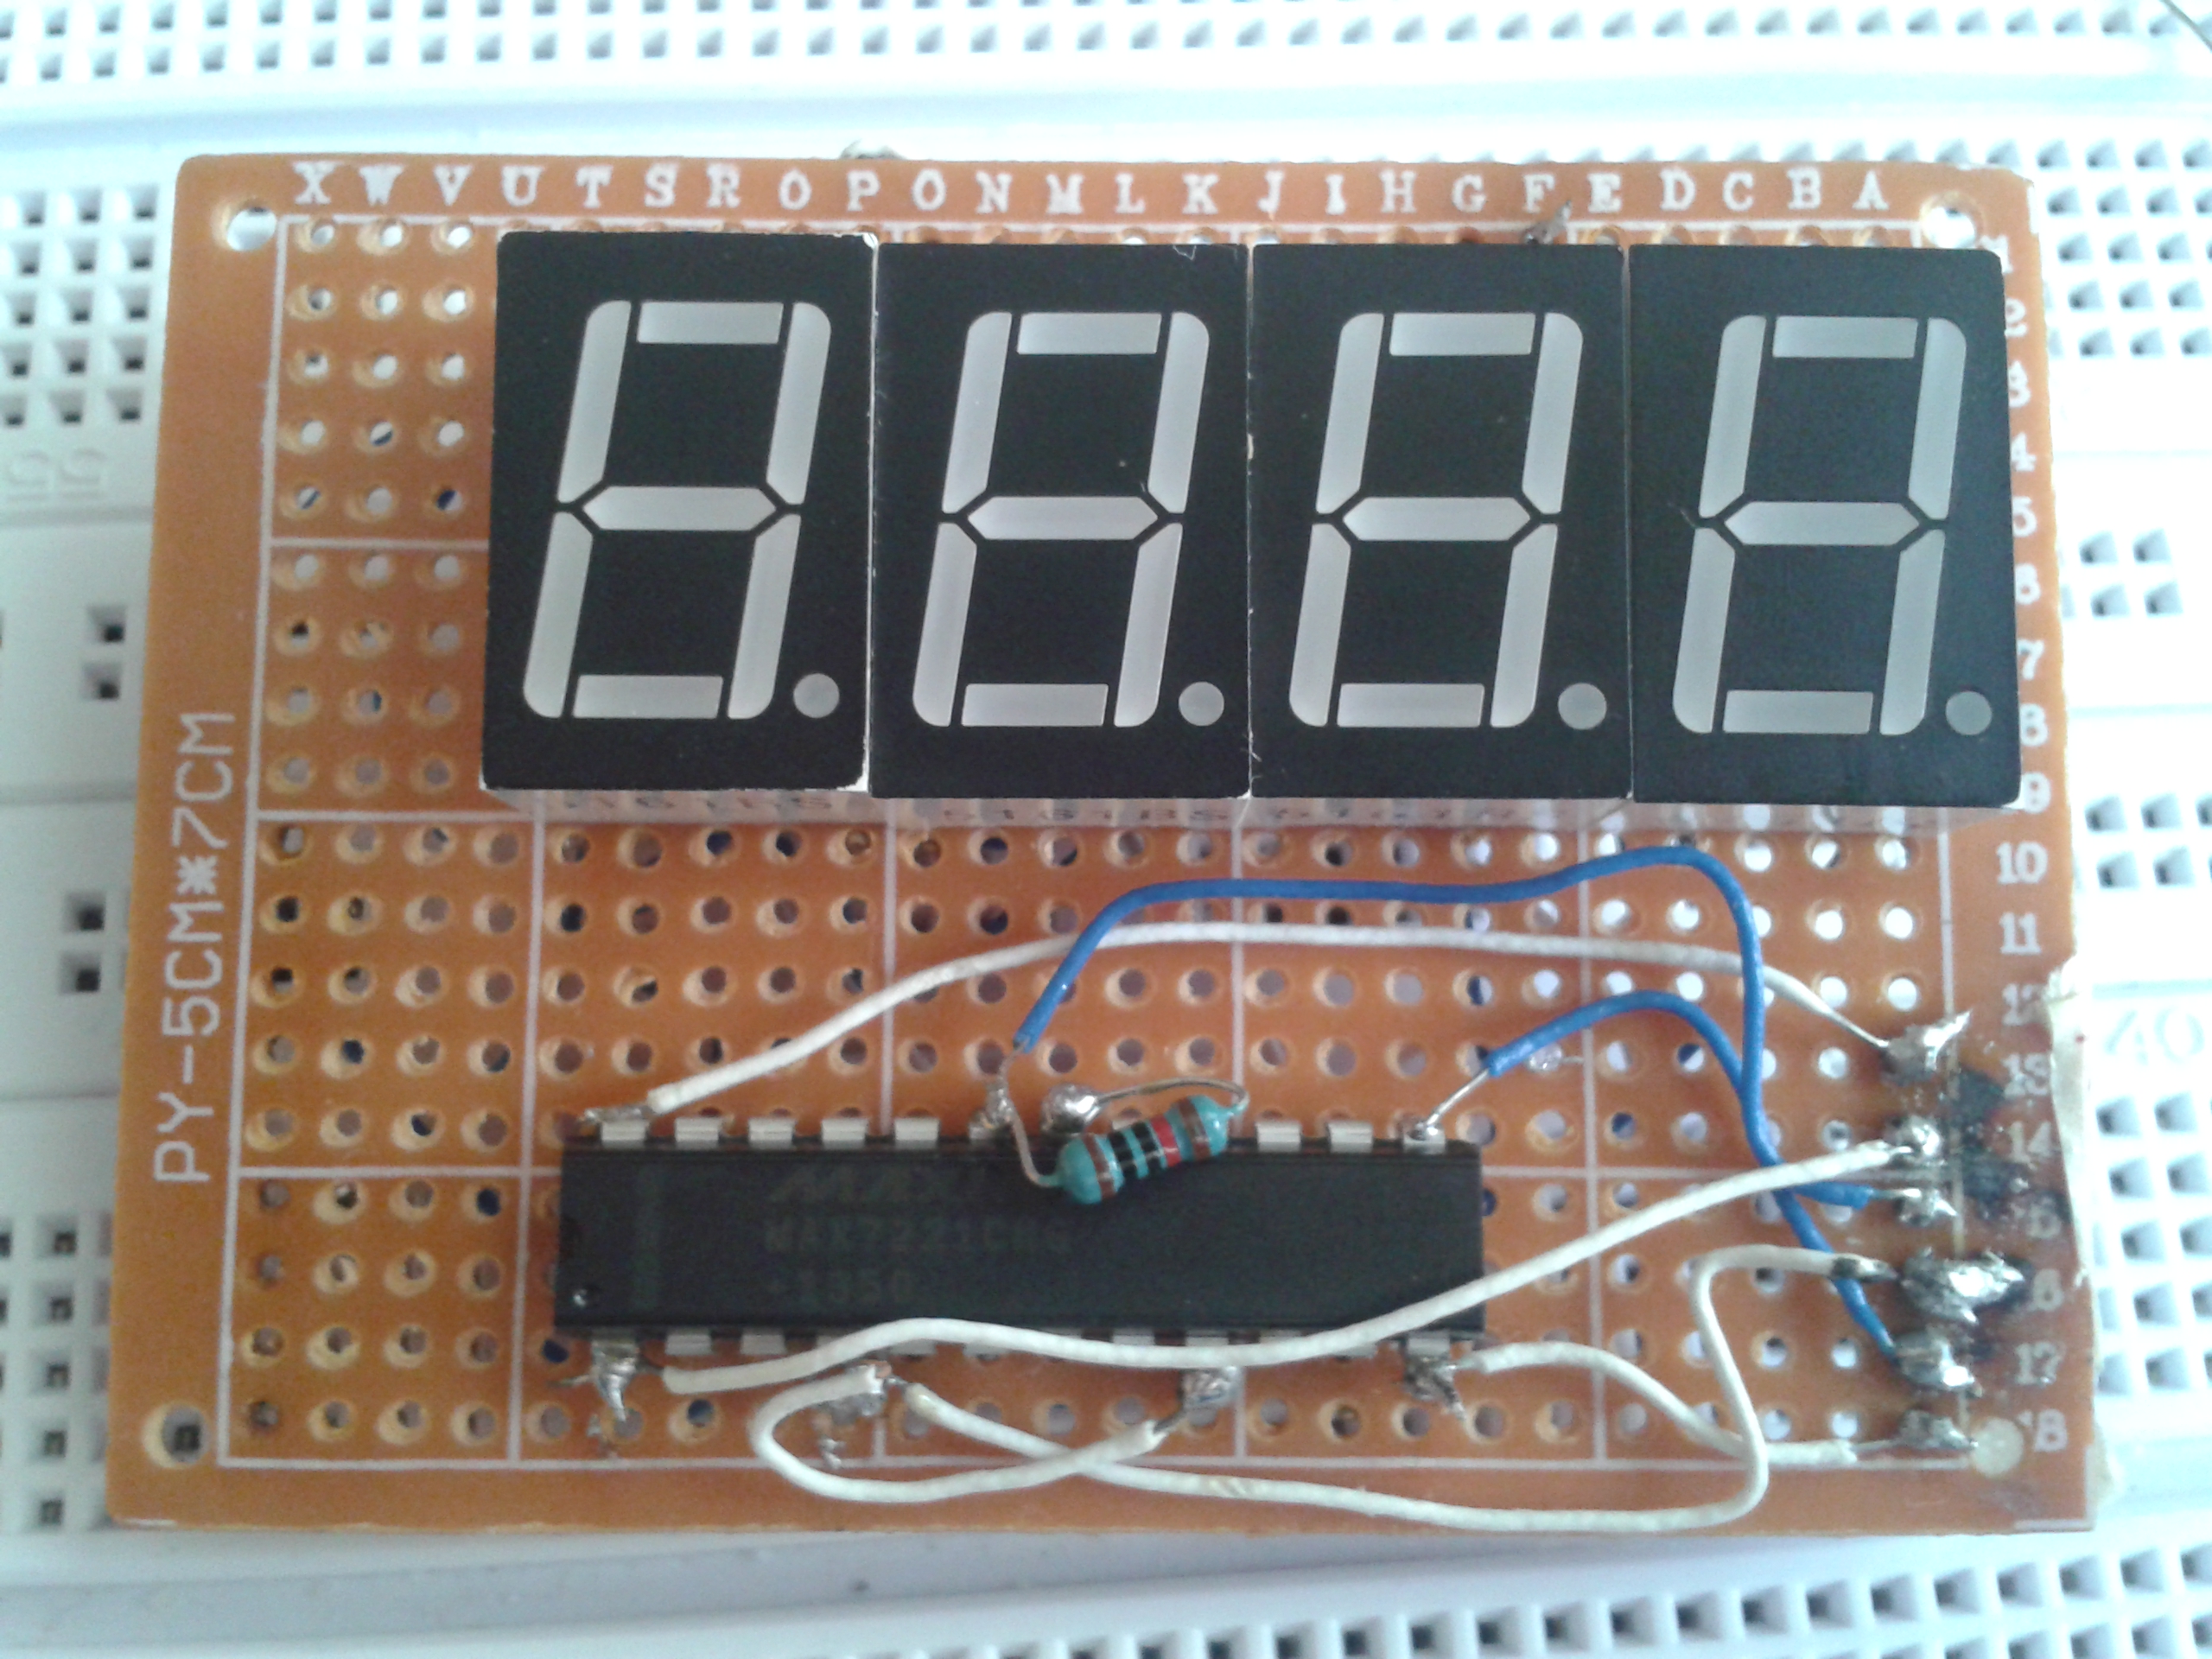
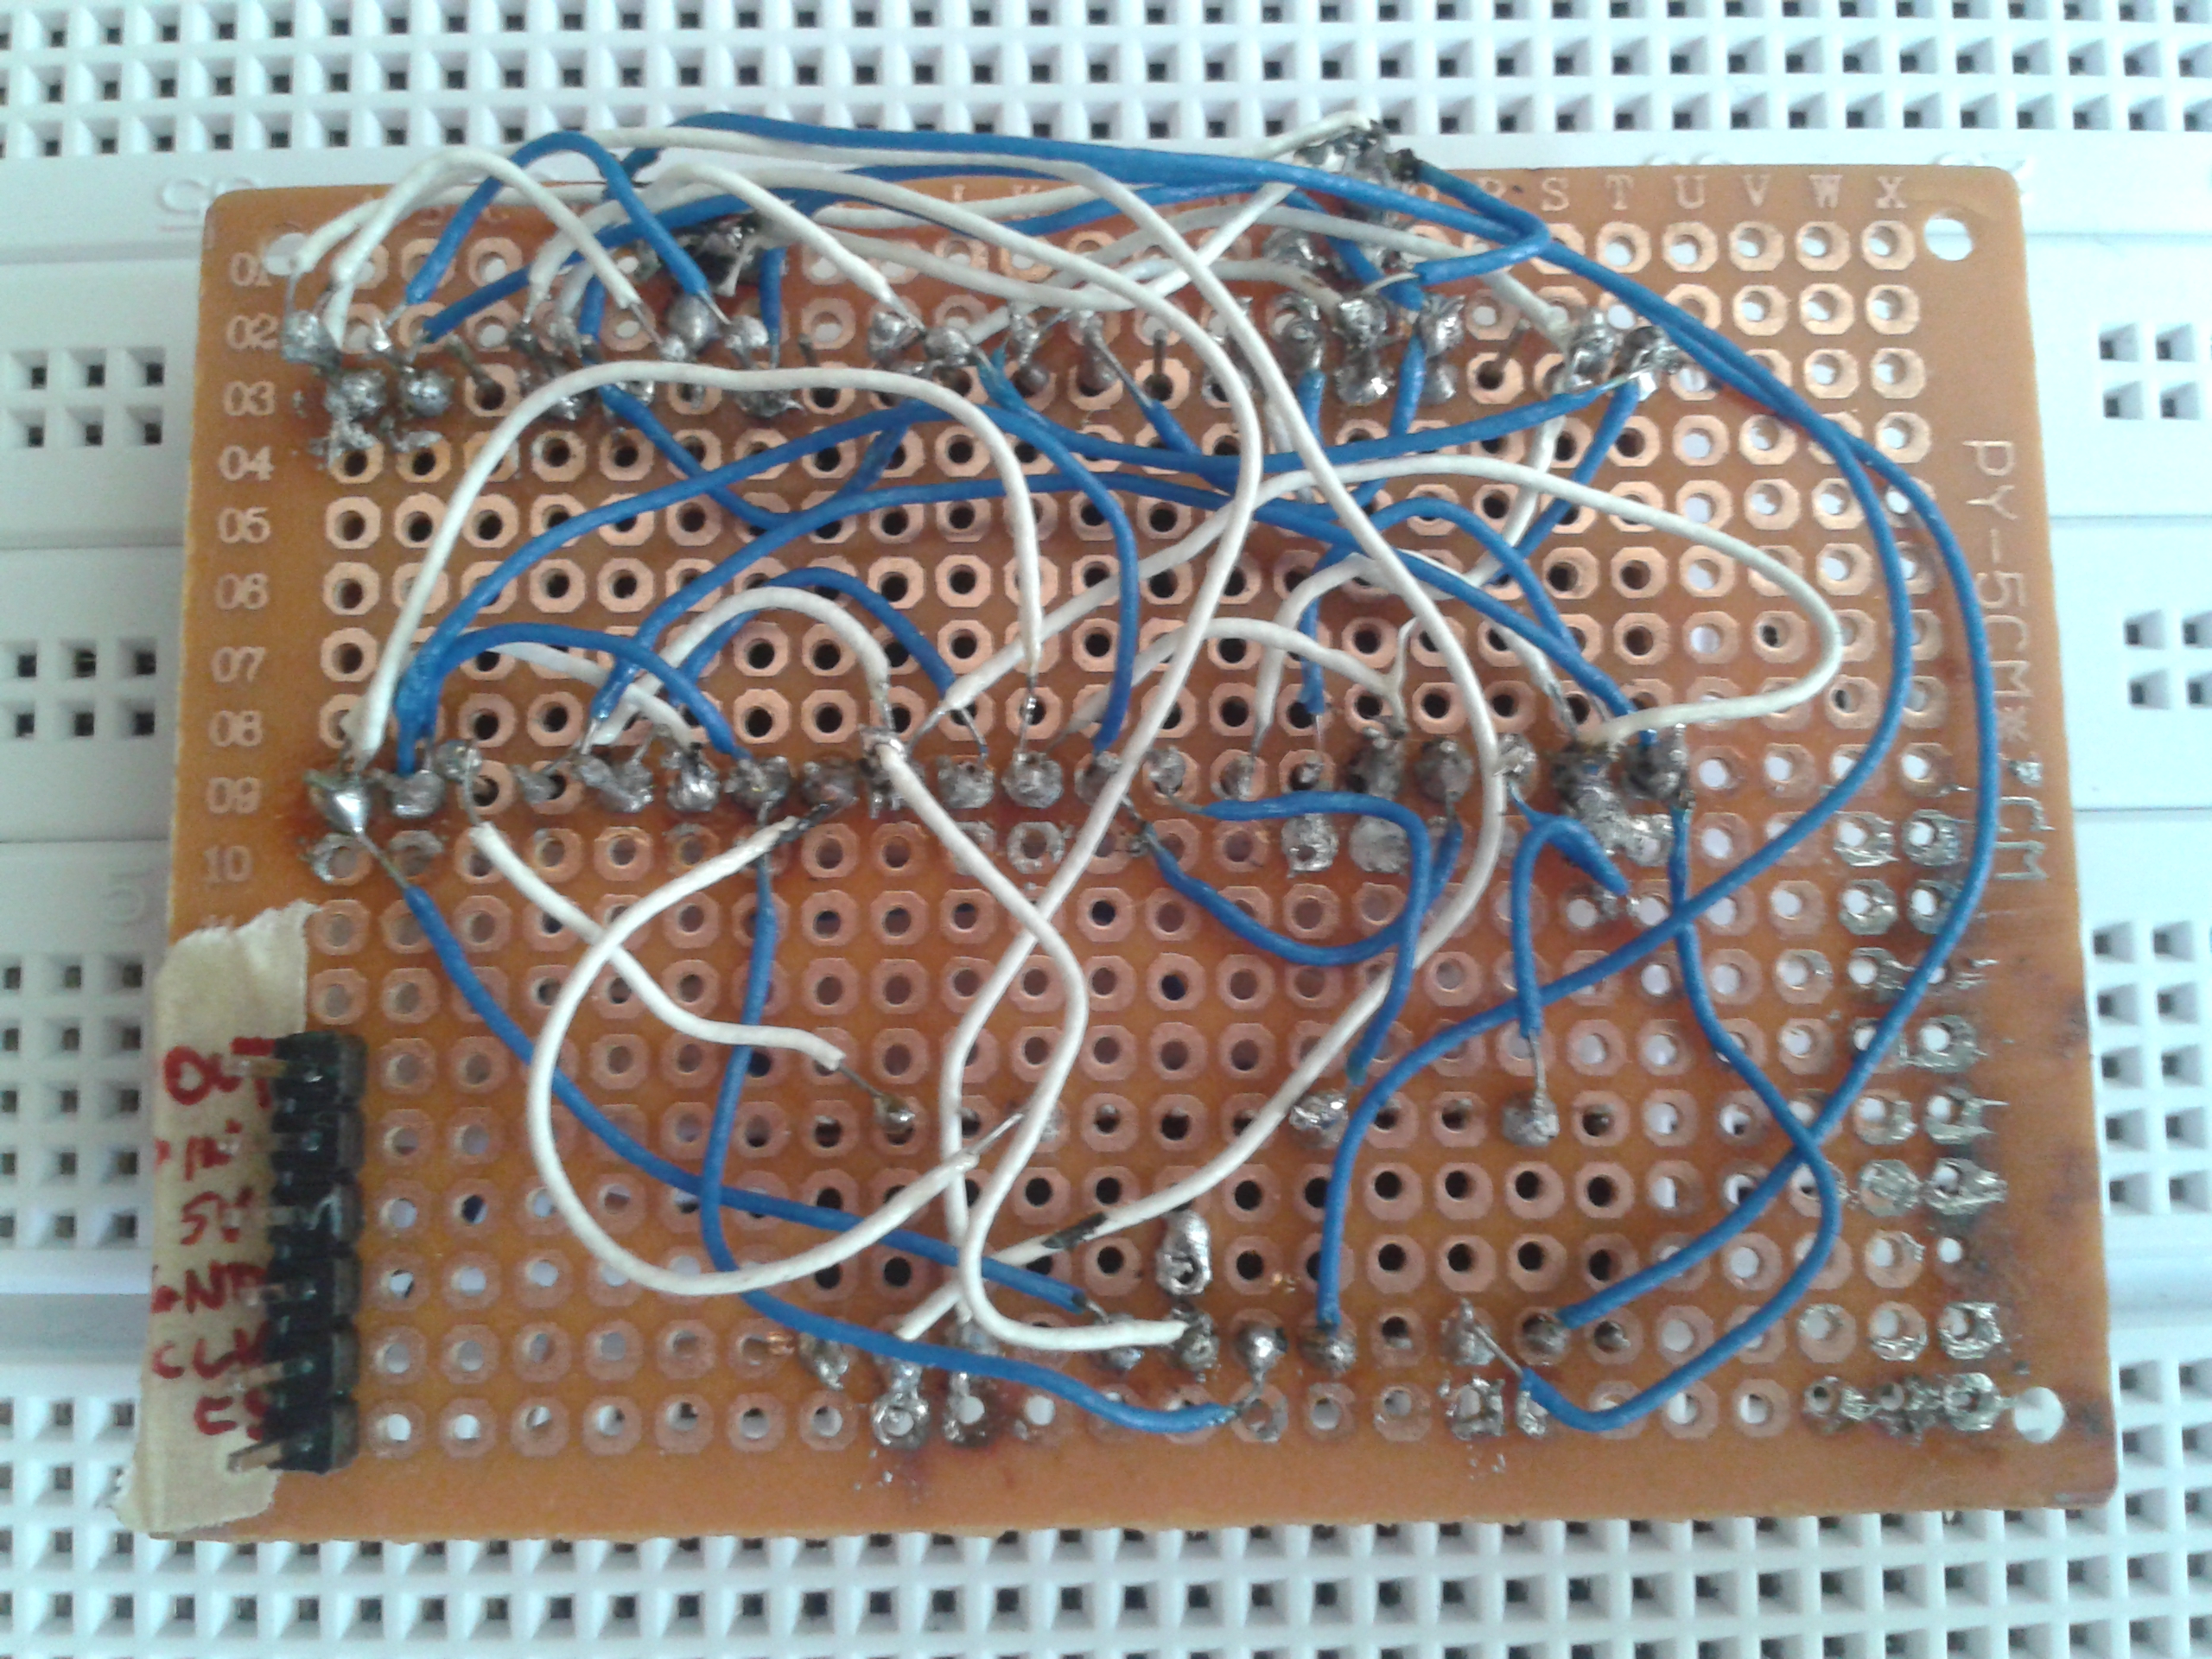
Soldered to a breadboard it looks like this:
Control
First of all, we install a library for the MAX7219 / 7221 so that we can control it more easily. If you have already done this (for example because of the LED dot matrix) you can, of course, skip it.
git clone https://github.com/rm-hull/max7219.git && cd max721After the installation
sudo python setup.py installYou can already test the displays. Inspired by this article I wrote a script for the Pi:
sudo nano examples/segment.py
|
1 2 3 4 5 6 7 8 9 10 11 12 13 14 15 16 17 18 19 20 21 22 23 24 25 26 27 28 29 30 31 32 33 34 35 36 37 38 39 40 41 42 43 44 45 46 47 48 49 50 51 52 53 54 55 56 57 58 59 60 61 62 63 64 65 66 67 68 69 70 71 72 73 74 75 76 77 78 79 80 81 82 83 |
#!/usr/bin/env python import max7219.led as segment #saves the values of all segment displays (max 8) digValues = [0b00000000, 0b00000000, 0b00000000, 0b00000000, 0b00000000, 0b00000000, 0b00000000, 0b00000000] def display(dig, value): values = {} values['0'] = 0b01111110 values['1'] = 0b00001100 values['2'] = 0b10110110 values['3'] = 0b10011110 values['4'] = 0b11001100 values['5'] = 0b11011010 values['6'] = 0b11111010 values['7'] = 0b00001110 values['8'] = 0b11111110 values['9'] = 0b11011110 values[-1] = 0b00000000 #empty sign values[' '] = 0b00000000 values['A'] = 0b11101110 values['b'] = 0b11111000 values['C'] = 0b01110010 values['d'] = 0b10111100 values['E'] = 0b11110010 values['F'] = 0b11100010 values['G'] = 0b01111010 values['H'] = 0b11101100 values['I'] = 0b01100000 values['J'] = 0b00011100 values['K'] = 0b11101010 values['L'] = 0b01110000 values['O'] = 0b01111110 values['P'] = 0b11100110 values['q'] = 0b11001110 values['r'] = 0b10100000 values['S'] = 0b11011010 values['t'] = 0b11110000 values['U'] = 0b01111100 values['-'] = 0b10000000 values['_'] = 0b00010000 bPosition = 0b00000001 if dig < 1: bPosition = bPosition<<dig-1 #go through all segment displays for x in range(8): if (values[value]) & (1 << x) : digValues[x] |= bPosition else: digValues[x] = (0b11111111 ^ bPosition) & digValues[x] #Senden segment.send_byte(x, digValues[x]) def showvalue(value): n = [char for char in str(value)] #fill all unused ads with the empty character n = ([-1]*8 + n)[-8:] n.reverse() index = 7 for i in n: display(index, i) index = index -1 def main(): segment.init() segment.clear() while True: x = str(raw_input('Bitte Wert eingeben: ')) showvalue(x) if __name__ == "__main__": main() |
As you can see I have already predefined all numbers and some letters. Some letters (for example M, N, X, Y, … can not be displayed correctly on a 7-segment display, so they are missing). You can also define combinations for other characters, but be careful to start from the back (for example, only segment G would be 0b10000000, segment A would equal 0b00000010, and so on).
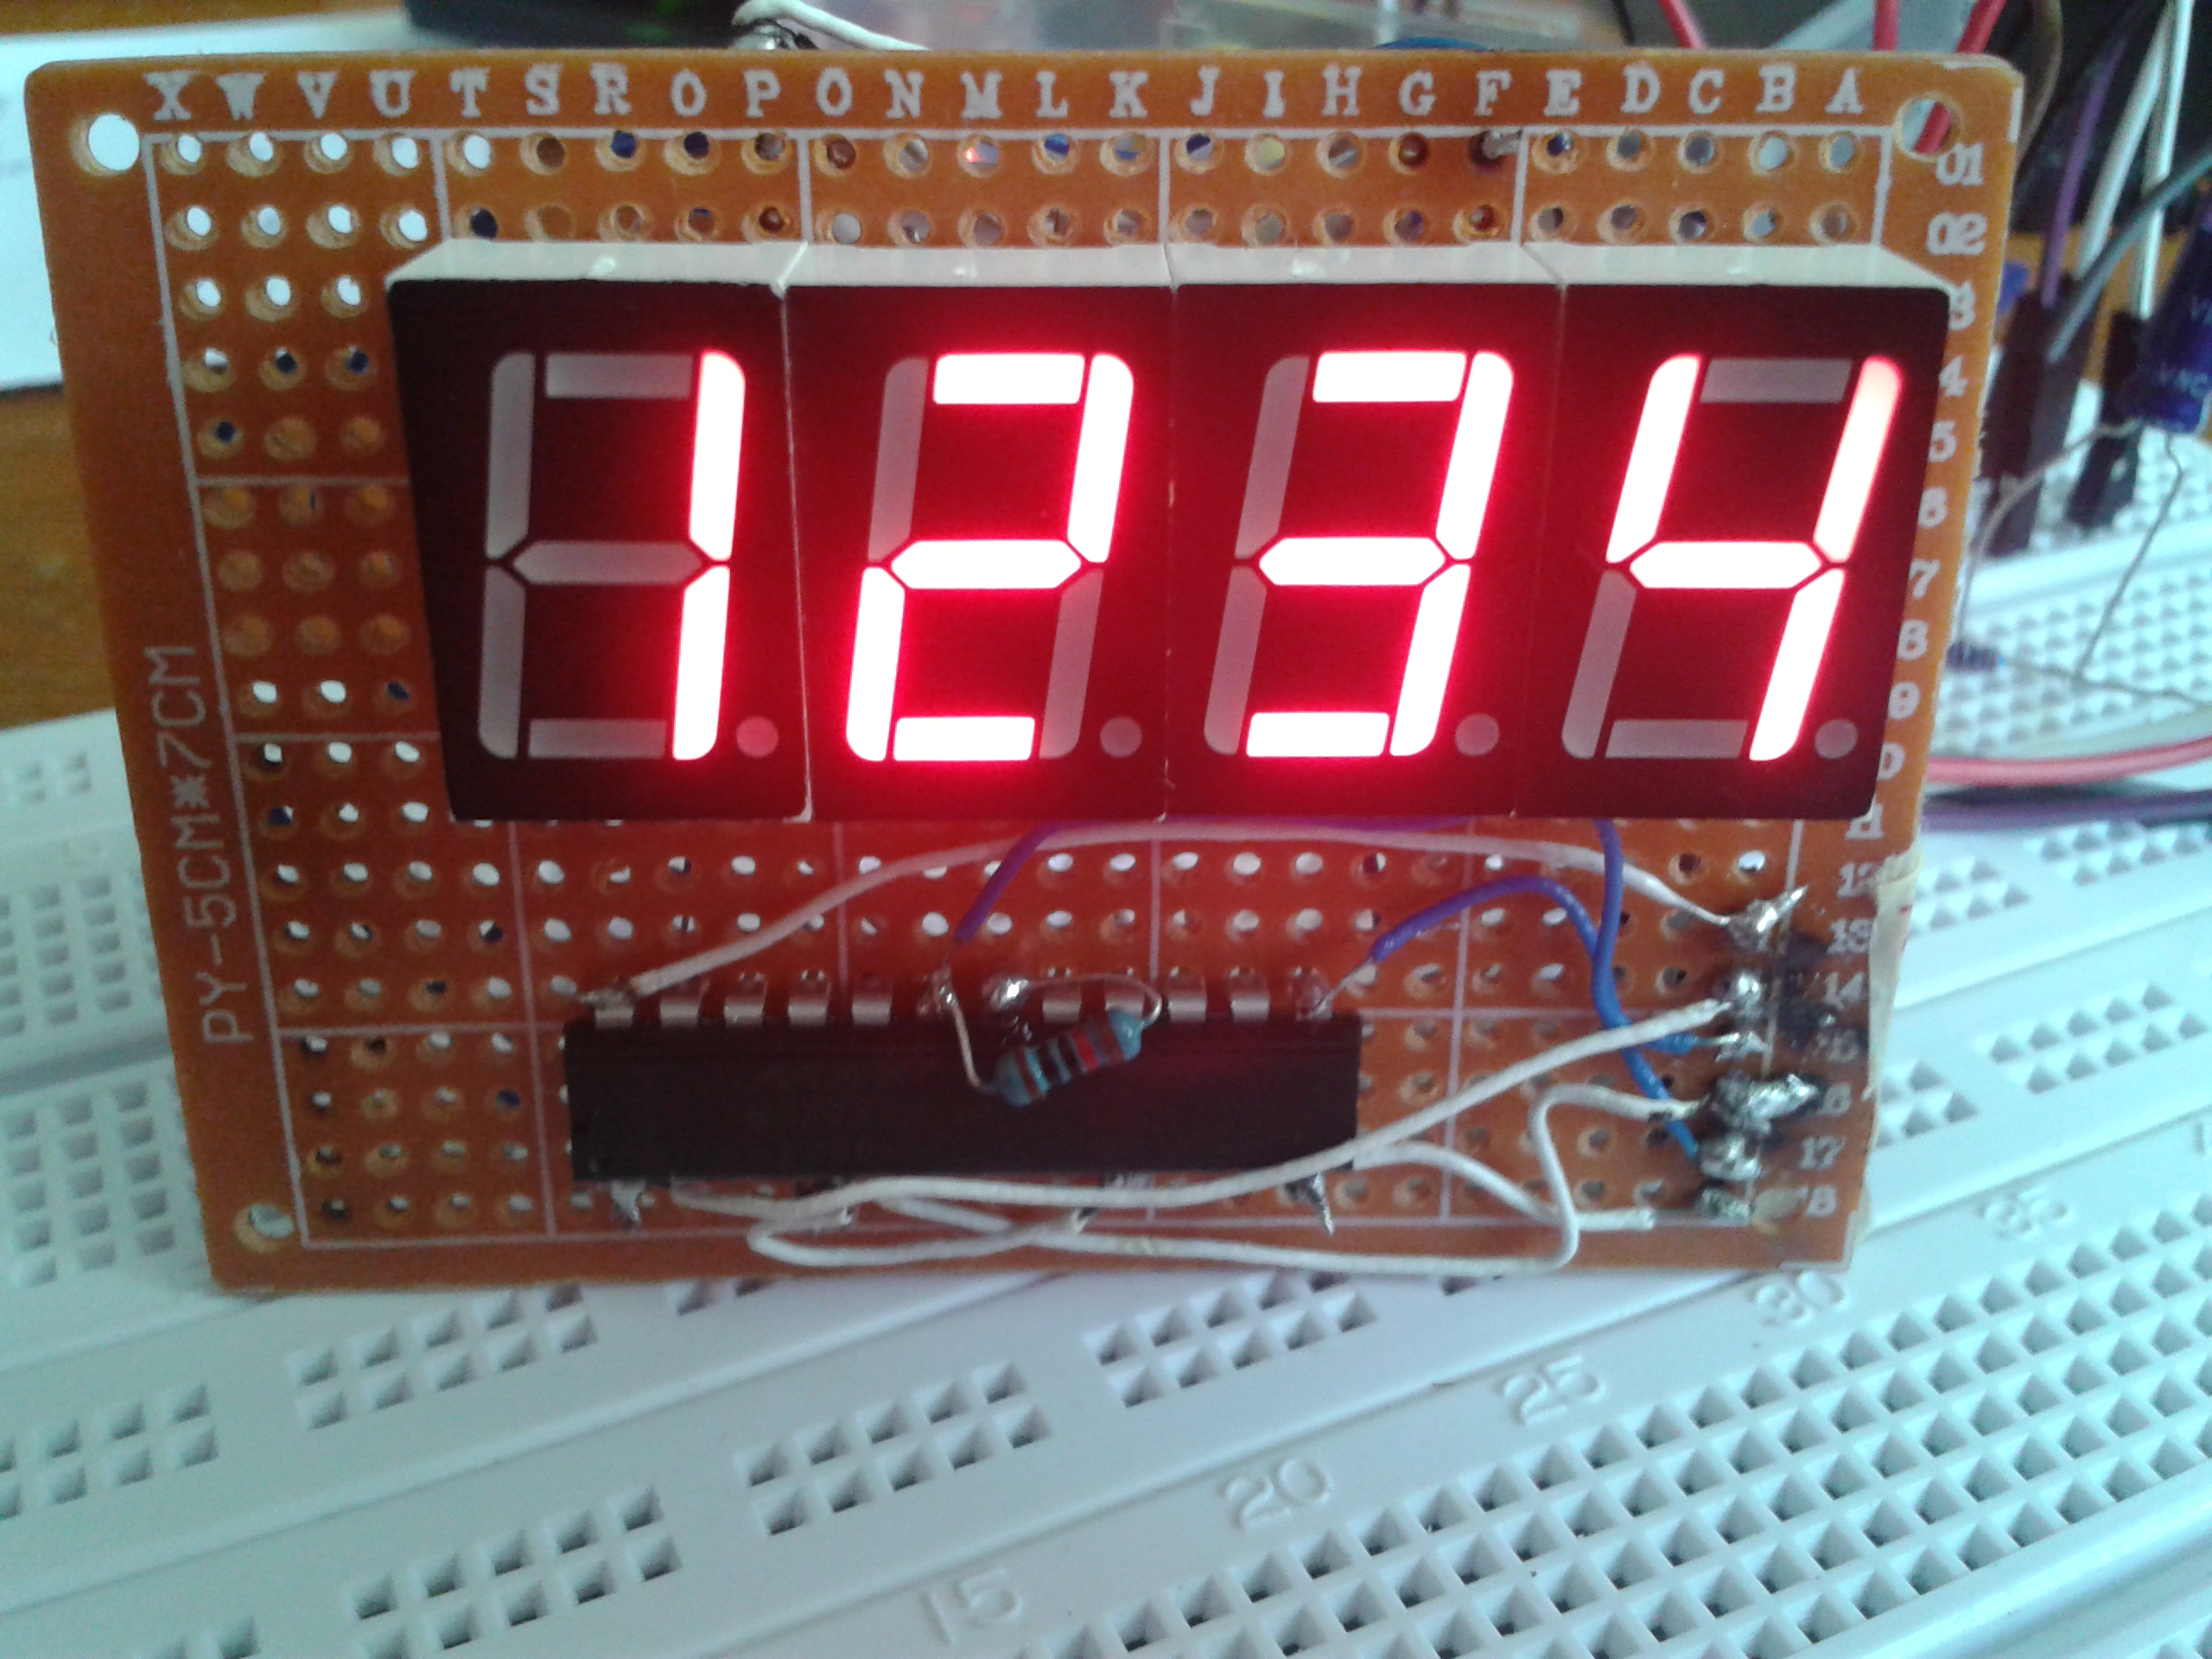
Here are two pictures with input “1234” and “StOP” (pay attention to upper / lower case, because I did not define all letters).

Have fun with it!
4 Comments
Hey,
Can you help me in getting through with Max7219 and Common Anode interface with raspberry pi ?
you can not connect common anode display to MAX 7219 directly, it required to invert logic an both end at segment and digit selection, what he is showing in picture is wrong it must be common cathode display.
nov 2019 – doesn’t work. Luma not recognized, install script doesn’t complete ( typos in routine) Another out of date article for Python, and another reason I hate this open source dross.
you can not connect common anode display to MAX 7219 directly, it required to invert logic an both end at segment and digit selection, what he is showing in picture is wrong it must be common cathode display.