
With the release of the Raspberry Pi 2, Microsoft had announced they will provide a version of Windows 10 for the Pi. This has happened now. According to Microsoft, this is only possible with the PC version of Win 10, but it also works on Windows 8.1, as I show in this tutorial.
Windows 10 IoT is not a classic Windows version, but an embedded developer version running on both display and non-display devices. “IoT” stands for “Internet of Things” and describes the increasingly common devices with Internet access (no computers) – in some coffee machines.
Required Hardware Parts
- Raspberry Pi
- microSD card (at least 8GB, optimal Class10)
- optimal: CardReader (often Windows 8.1 /10 does not recognize the microSD cards of the internal CardReader)
- Ethernet cable (allegedly also works with a wireless stick, I tried two, none of which was detected)
Download image and install software
First, you have to download the ISO file (around 500MB), which is here: http://go.microsoft.com/fwlink/?LinkId=616847
You have to mount this file (IOT Core RPi.ISO) (Win 8.1/10 does it automatically with a double-click). Inside is the installer Windows_10_IoT_Core_RPi2.msi, which you perform and follow the steps. After installation, you can unmount the ISO file.
Now you have to search for and open IoTCoreImageHelper.exe via the Windows Start Search. There you select the SD card and the path to flash.ffu (this is located under C:\Program Files (x86)\Microsoft IoT\FFU\RaspberryPi2)
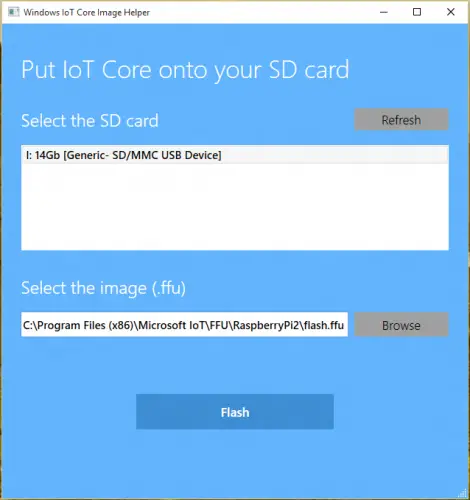
After flashing, you can remove the SD card. It is strongly recommended to do this by using the “Safely Remove Hardware” tool (in the taskbar, at the bottom right).
Windows 10 IoT booting
After the microSD card is in the Pi and the monitor, network cable and mouse are connected, you can start it. After a short setup you will be shown the language options, after which you will be on the main screen:
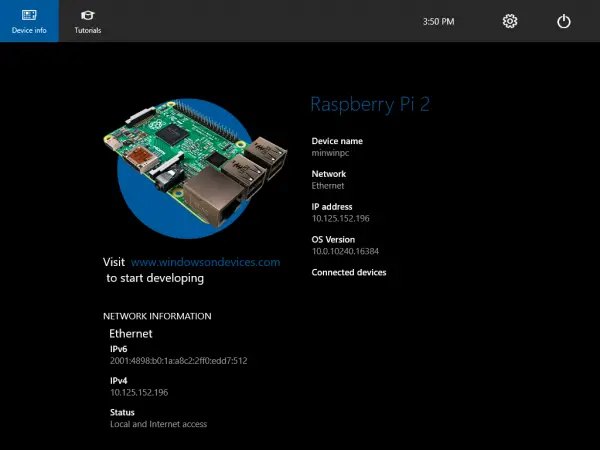
Your PC should be on the same network as the Pi. At the top of Tutorials are a few short introductions to Windows IoT and a sample tool how to make an LED blink. Since this Windows version, as I said, has no other graphical interface, it is completely controlled by Visual Studio. The easiest way is to follow the indicated steps on the Pi.
According to Microsoft, every Windows 10 app that is compiled for ARM platforms will also be usable on Windows IoT and vice versa. Keep in mind that most devices do not have GPIOs, so the benefits are rather dubious. However, the speech recognition from Microsoft could be interesting in any case. Microsoft presented some sample projects here.
1 Comment
What a helpful tutorial to the point.
You might be interested in the course about Windows 10 IoT Core development on the Raspberry Pi that we just published. It is free until the end of March at
https://www.udemy.com/getting-started-with-windows-10-iot-core-development/?couponCode=WINDOWS_IOT_INTRO
Cheers!