As already announced at some point, there will be additional tutorials on how to use an Arduino on the side of the Raspberry Pi. The Arduino is a small microcontroller, which is very cheap to have but allows many additional features to the Pi. In combination, the two offer even more options than the Raspberry can offer alone.
This first part is about the inital setup of an Arduino, so we’ll let it communicate with the Pi in the next steps.
First of all, I would like to introduce some common Arduino models:
Arduino Uno
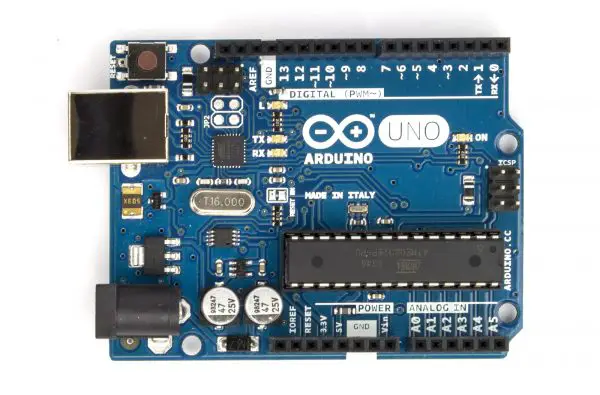
The Arduino Uno is one of the most commonly used Arduinos. In addition to 14 digital I/O pins, it also has 6 analog input pins. The code is played via USB (type A), which also allows the power supply to take place. Alternatively, an external power source can be connected to the associated port.
Overall, the Arduino Uno has 32KB of Flash memory that should be enough for your code (and embedded libraries), which is enough for most applications.
There are many interesting attachable Shields, be it the USB, Ethernet or LCD (everyone should decide for themselves if they are worth the money because a Raspberry Pi 2 Model B with better equipment can be found for a similar price or even cheaper).
The Arduino Uno is available for around 20 $ here.
Arduino Mega
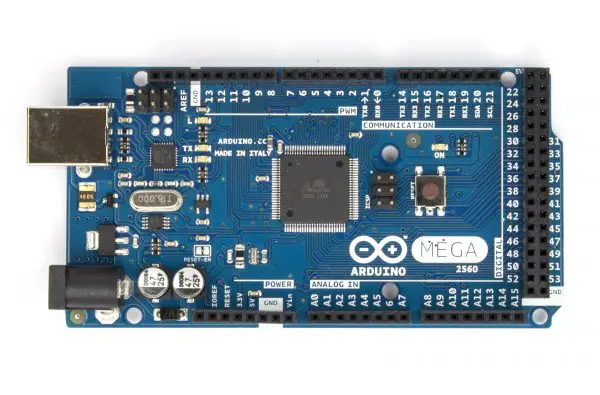
Another Arduino model is the Arduino Mega, whose speciality are the many I / O pins: It has a total of 54 digital and 16 analogue input/output pins to offer.
It also offers 256KB of flash memory, which is eight times as much as the Arduino Uno. Oher specifications are quite similar to those of the Uno, so the Mega can be powered via USB or externally and there are also various Shields for this model.
The SainSmart Mega2560 model costs around 18 $.
Arduino Nano
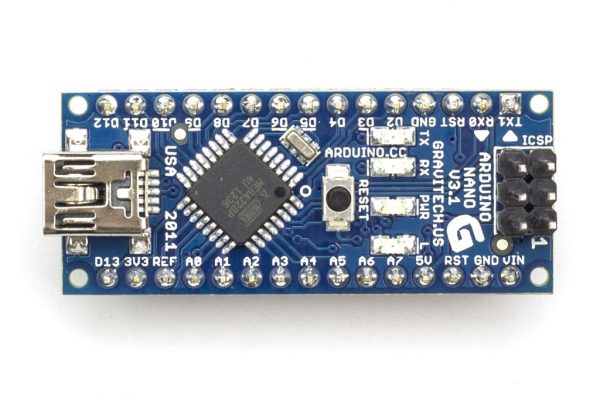
The Arduino Nano is one of the smallest models in the series and measures just 4.5cm x 1.8cm. Smaller is only the Arduino Mini (which, however, has no USB port).
The Nano model has a USB port (type: mini), which serves for communication, as well as power supply. It also has 14 digital and 8 analogue I / O pins, which is enough for small applications. Depending on the model, it has 16KB (Atmega168) or 32KB (Atmega328) flash memory.
In the tutorials, I mainly use this model because it is small and cheap.
One version of the Arduino Nano is available here for just under 9 $.
First Steps
First, you need the Arduino IDE, which you can download here for Windows, Mac and Linux.
After installation, you can open the IDE and connect your Arduino via USB, which should be recognized. For the first test, you only need one LED and one resistor (330Ω or 470Ω). Connect the LED with the positive (longer) wire to pin 13 and the other end to the GND via the resistor.
Now select in the Arduino IDE: File -> Examples -> 01.Basics -> Blink
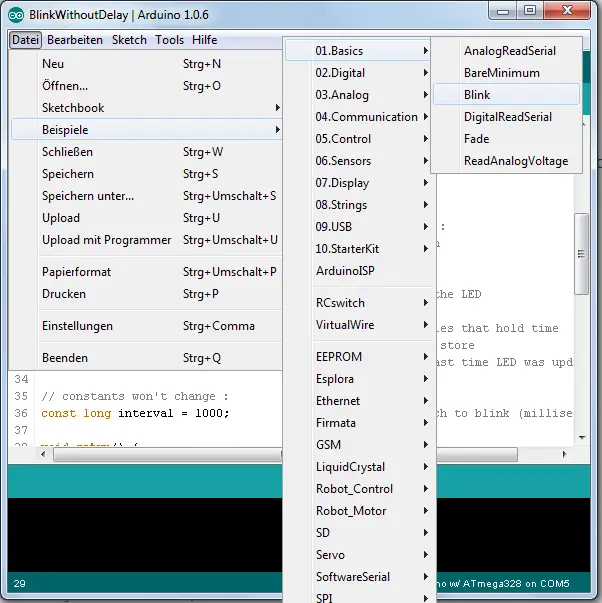
Here you will find many useful, commented examples if you want to look up the code for later projects.
Just a few short words about the setup: Each program must have the following two functions:
setup() – This function is called when starting the Arduino and is intended for initialization.
loop() – As long as the Arduino is on, this function is called consecutively.
Now click on the check on the top left, which compiles the code. If it fails, the compiler will tell you. If everything is working fine, you’ll get the size of the compiled code and then load it on the Arduino by clicking on the arrow next to the check.

That is it. The LED should start flashing. By the way, you can reboot the Arduino at any time by pressing the button on it.
PS: If you are looking for books about Arduino that will show you the first steps of using it and make the start easier, I recommend one of these.

6 Comments
Why don’t you write this in German.
I think he is doing a good job,.
So stop behave like a idiot.
It’s called the WORLD Wide Web for a reason.
When someone for whom English is not their first language endeavours to write an article for us, you should simply say: “thank you for the article.”
The language is absolutely fine.
Thank you for your article. I am looking forward to your future tutorials.
Wishing you all the best.
vielen danke für zur arbeit
muchos gracias por tú trabajo
Cheers, keep it up.
for myself, who speaks ONLY english, it works wonderfully. the unprovoked attacker is obviously:
a-liberal
b-a russian troll
c-both
well done. thank you