Small internet radio stations seem to be very popular at the moment. They are being installed more often in the bathroom, kitchen or living room because on the one hand they have more programs than the old-fashioned radios and on the other hand the sound quality is getting better and better.
But what these Internet radio stations can do, the Pi has been doing for a long time! In this part, I want to show you how to make your Spotify playlist, radio stations through TuneIn or just your favourite songs and albums.
Preparation
You should have at least the Raspberry Pi Model B. Depending on the sound requirements, you can connect normal speakers with AUX cables. However, the quality will not be too good, so I would recommend getting a USB sound card which are available for little money. If you really want the best possible sound, you should take a look at this module: It is called Hifiberry and can be put on the GPIOs of the Pi’s. However, everyone should decide for themselves whether this investment is worthwhile. In my opinion, a good USB sound card is always sufficient for everyday use.
However, what I find very useful is a small WLAN stick, especially so that the Pi can be operated with a socket at almost any location.
The image for the SD card is on the PiMusicBox page. I have created a tutorial on how to properly put an image on the SD card (instead of Raspbian OS you use this image). Your SD card must have at least 1GB of storage space (everything will be deleted), if you want to store your own music on it, it should have more storage space.
First Start
When starting it for the first time, a cable connection is required. A WLAN connection is also possible without any problems. To do this, we call musicbox.local (if that doesn’t work, look in your router for the IP and put it in your browser) as soon as the Raspberry is started. On the left in the tab under Settings and then Network you can enter the name of your WLAN and the password. If you want to install additional services, it would make sense to activate SSH (the user name is root and the password musicbox). If you want to load your own music on the Pi, change the network name (standard from Windows Vista is WORKGROUP). This way you can easily transfer your music later in Windows File Explorer.
Under the areas below you can enter your login data for the services you want to use (such as Spotify Premium) or you can also switch services on or off in general.
After an automatic restart after pressing “Update settings” below, the Pi should be connected to your WiFi network and you can disconnect the Ethernet cable.
Playing Music
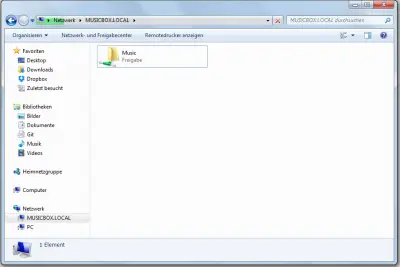
 If you want to transfer your own music, open Windows Explorer (Windows Key + E) and click on Network on the left side. If the network name you defined in the settings is the same as that of your PC, there should now be an entry called “MUSICBOX.LOCAL”. If you click on it, a folder “Music” is included, in which you can copy your music or create new folders (e.g. albums/ artists/genres) and copy them there.
Back in the browser under “Browse” and then “Local media” you can select your music. If the music is not displayed, a restart will help, because all files are scanned when starting.
Under the other menu items you can add internet radios, search TuneIn or listen to your own playlist. The site is also easily accessible from your smartphone (of course, only locally), so you can easily select your music.
If there is no sound at the beginning, although the music is obviously playing, go to the settings under Sound and select your output medium (USB sound card, etc.).

