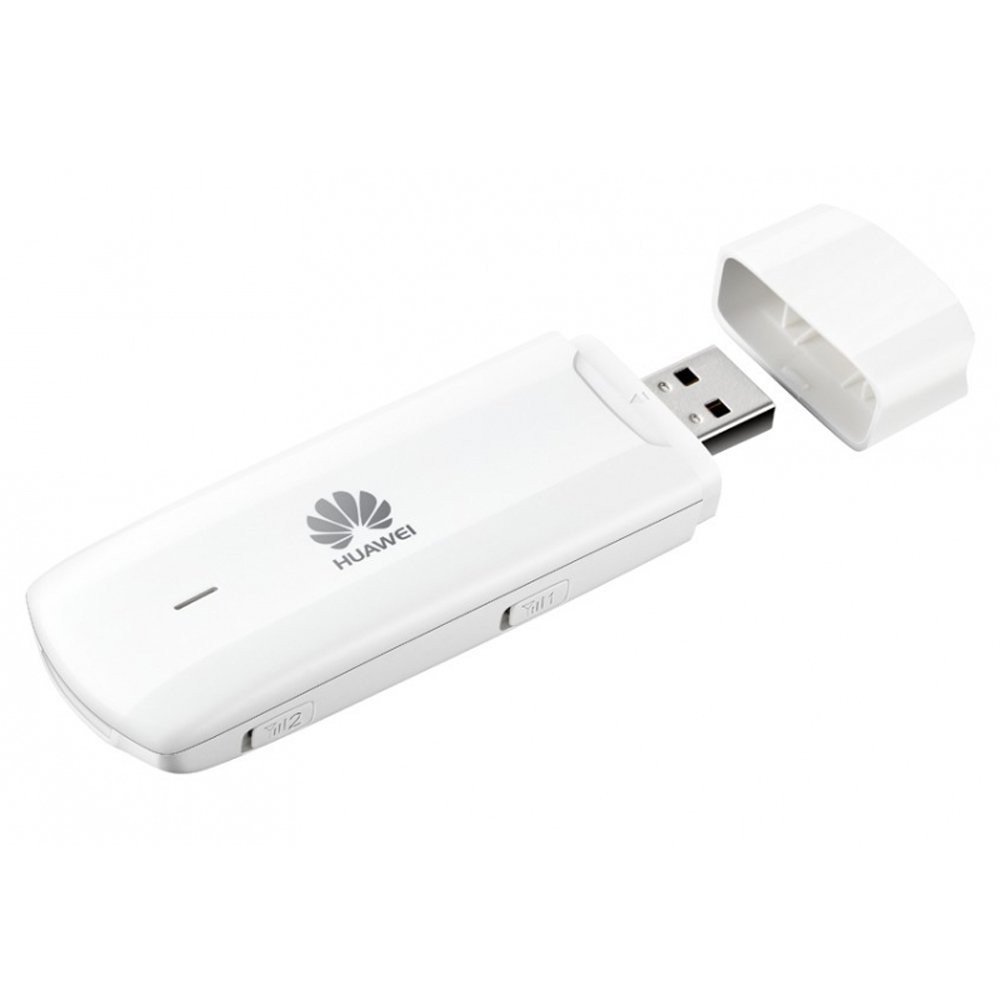
The Raspberry Pi can be connected to the Internet very quickly and easily via the local network. But what if you also need a mobile Internet connection outside your own WLAN? There are GSM modules / Surfsticks (mostly from Huawei), which can be connected via USB. Sometimes are such GSM modules, which support 3G, UMTS and sometimes even LTE, given free with a mobile phone contract which includes an Internet option.
This tutorial shows how to connect Raspberry Pi to the internet using GSM modules.
Required Hardware Parts
The procedure is the same for the vast majority of Huawei Internet Sticks, but I only tested it with two models:
- Huawei E303 Stick, which is very common.
- Huawei E3531s Stick, which I got with a contract that included data volume.
- In addition, there are some LTE Surf Sticks, which can be used in a corresponding contract. With both GSM sticks that I’ve tested, the maximum connection is HSDPA +, which is usually sufficient on the go.
You also need a SIM Card for the Raspberry Pi, preferably with a flat rate. Of course, the traffic should not be too low depending on requirements.
As soon as your Raspberry Pi is first connected to the Internet, it is also possible to receive SMS online and to remotely control the Pi (similar to the Telegram app).
Set up Surf Stick on the Raspberry Pi
lsusb
If there is not something like Bus 001 Device 008: ID 12d1:1f01 Huawei Technologies Co., Ltd. standing, the GSM module on the Raspberry Pi has not yet been recognized. So we need to install appropriate drivers.
If the stick is already recognized, you can skip this step.
sudo apt-get install usb-modeswitch --yes
If we execute lsusb again, the Raspberry Pi should recognize the GSM module. If not, remove the stick from the USB port and reconnect it. One line should show the following:
Bus 001 Device 008: ID 12d1:1f01 Huawei Technologies Co., Ltd.
After the Internet Stick is recognized, the Pi needs to be restarted.
sudo reboot
Now we can look at all the network interfaces, where the device usb0 has been detected (in some it is also called wwan0 or eth1).
ifconfig -a
This leads to the following output (possibly different if no WLAN adapter / Ethernet is connected):
eth0      Link encap:Ethernet  HWaddr b8:27:eb:28:72:f7
          inet addr:192.168.1.77  Bcast:192.168.1.255  Mask:255.255.255.0
          UP BROADCAST RUNNING MULTICAST  MTU:1500  Metric:1
          RX packets:154 errors:0 dropped:0 overruns:0 frame:0
          TX packets:127 errors:0 dropped:0 overruns:0 carrier:0
          collisions:0 txqueuelen:1000
          RX bytes:14085 (13.7 KiB)  TX bytes:19919 (19.4 KiB)

lo        Link encap:Local Loopback
          inet addr:127.0.0.1  Mask:255.0.0.0
          UP LOOPBACK RUNNING  MTU:65536  Metric:1
          RX packets:8 errors:0 dropped:0 overruns:0 frame:0
          TX packets:8 errors:0 dropped:0 overruns:0 carrier:0
          collisions:0 txqueuelen:0
          RX bytes:1104 (1.0 KiB)  TX bytes:1104 (1.0 KiB)

wlan0     Link encap:Ethernet  HWaddr 7c:dd:90:5f:c9:1f
          UP BROADCAST MULTICAST  MTU:1500  Metric:1
          RX packets:0 errors:0 dropped:0 overruns:0 frame:0
          TX packets:0 errors:0 dropped:0 overruns:0 carrier:0
          collisions:0 txqueuelen:1000
          RX bytes:0 (0.0 B)  TX bytes:0 (0.0 B)

usb0      Link encap:Ethernet  HWaddr b6:c6:c7:f6:25:d6
          inet addr:192.168.8.100  Bcast:192.168.8.255  Mask:255.255.255.0
          UP BROADCAST RUNNING MULTICAST  MTU:1500  Metric:1
          RX packets:49 errors:0 dropped:0 overruns:0 frame:0
          TX packets:21 errors:0 dropped:0 overruns:0 carrier:0
          collisions:0 txqueuelen:1000
          RX bytes:20069 (19.5 KiB)  TX bytes:3887 (3.7 KiB)
Now we need to access the browser of the Raspberry Pi and visit the page for entering the PIN code. If you’re connecting via console, you can either enter startx or log in via the Remote Desktop Connection.
In the browser of the Raspberry Pi we call the address 192.168.1.1. If you are still connected to the local network, you may only see the router panel and not access to the USB surf stick. The easiest way is (if you work directly on the Pi, without RDV or VNC), to briefly disconnect Ethernet cable or Wi-Fi stick and call the page again. With my stick, I was forwarded to the address 192.168.8.1, which also worked with the existing network connection. Maybe it works for you too, it is worth to try it – otherwise, just disconnect from the network.
Depending on the surf stick provider you can get a page like this:
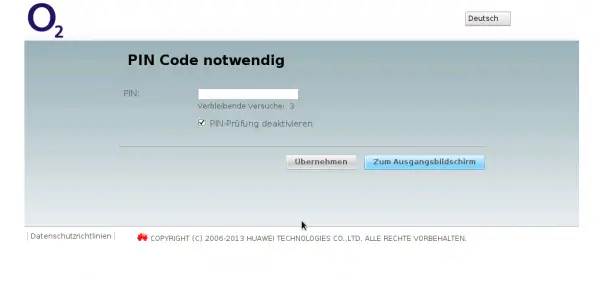
After entering your PIN code and pressing enter, you will be redirected to the main menu.
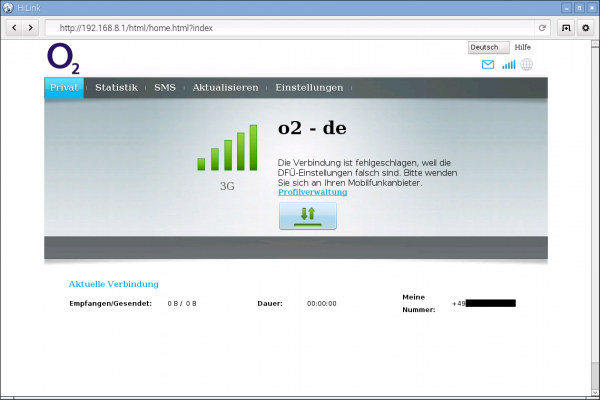
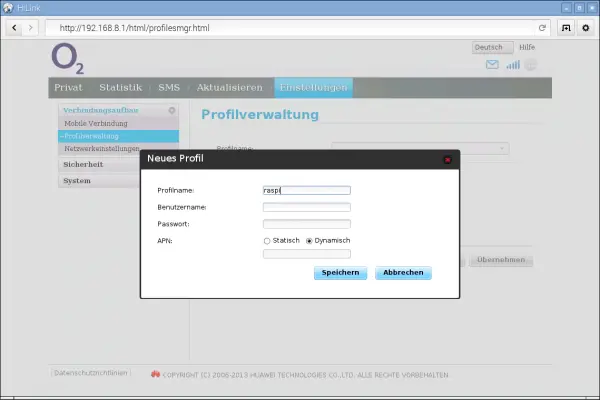
Now we navigate to Settings> Connection> Profile Management.
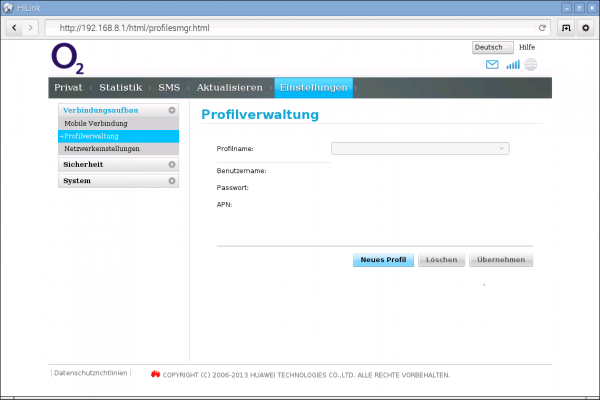
Then we create a new profile. The profile name does not matter (for example “raspi”), username and password are left blank and as APN we select “Dynamic”. Then it is saved.
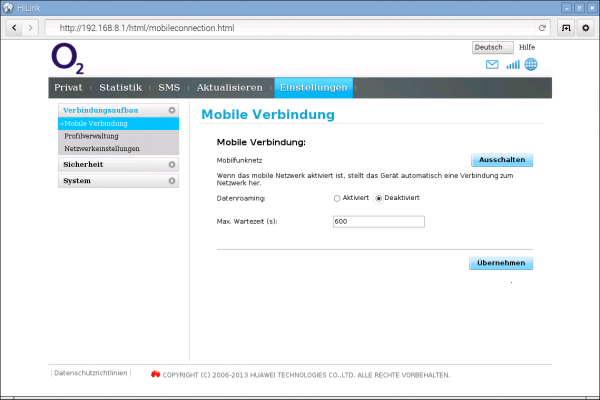
After that being saved, we navigate under Connection> Mobile Connection. If the connection is not activated here, we activate it. For me, it was already activated by default. If you want, you can also enable data roaming here (which can incur higher costs).
You can now try and open any website like Google (preferably tutorials-raspberrypi.com ;-)) to verify that the connection works. Alternatively, you can just try opening a page like google.com and see if it works.
Automatically detect the GSM Module on the Raspberry Pi
So far, so good: but to have our interface load automatically on reboot, we need to edit a file of the operating system, otherwise, the steps from the top would have to be executed each time.
sudo nano /etc/network/interfaces
This file should already contain a few lines. In iface eth0 inet manual we add the following two lines (wwan0 or eth1 instead of usb0, please adjust):
allow-hotplug usb0
iface usb0 inet dhcp
With CTRL + O and CTRL + X, you can save the file and return to the console.
At the next restart, the connection should now be established automatically, if the GSM surf stick with active SIM card is connected via USB.
If you want to be connected again via WLAN / Ethernet, you just need to take these two lines out again (delete or comment out with a rhombus #).
Raspberry Pi as a 3G/ UMTS Router / Access Point?
Maybe you have asked yourself if you can set up a Raspberry Pi WLAN hotspot with the now established mobile internet. The answer is yes, that works! As with an Ethernet / LAN connection, you can create a Raspberry Pi access point. How this works is explained on eLinux.

