
In the first part of the tutorial, I showed how to connect and configure a touchscreen on the Raspberry Pi. In this part, I would like to show some settings that will improve the usage of the display.
Calibration
Calibration is often not too good when it comes to resistive touch displays. Therefore we calibrate again, for which Adafruit has a small program called Xinput-Calibrator.
Let’s start by loading and executing it.
wget http://adafruit-download.s3.amazonaws.com/xinput-calibrator_0.7.5-1_armhf.deb
sudo dpkg -i -B xinput-calibrator_0.7.5-1.deb
Now, if necessary, an older calibration must be deleted so that we can then overwrite our new one.
sudo rm /etc/X11/xorg.conf.d/99-calibration.conf
Then X is started on the screen and then the xinput-calibrator. If you have already started the screen (e.g. in autostart), the first line is not necessary:
FRAMEBUFFER=/dev/fb1 startx &
DISPLAY=:0.0 xinput_calibrator --misclick 0
It should start a new application that looks like this:
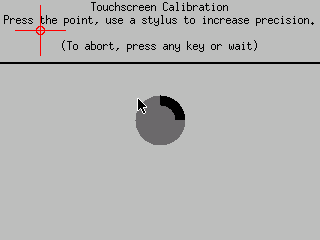 Here you press (preferably with a stylus) on the red crosses (in all four corners). A code like this one should then appear in the console:
Section "InputClass"
        Identifier      "calibration"
        MatchProduct    "ADS7846 Touchscreen"
        Option  "Calibration"   "609 3246 302 2961"
EndSection
We now have to write this into the previously deleted file. You should firstly determine whether the directory exists (I didn’t have it) and create it if necessary:
ls /etc/X11/xorg.conf.d
sudo mkdir /etc/X11/xorg.conf.d
Now the configuration file is created.
sudo nano /etc/X11/xorg.conf.d/99-calibration.conf
Here you just copy the output “code” and save the file (CTRL + O, CTRL + X).
Your calibration is now saved and should take effect after a restart.
Screensaver Deactivation
You may have noticed that the screen turns on the screensaver after a few minutes. This is of course not looking good when the display is used continuously (with a GUI). However, this can also be prevented:
sudo apt-get install x11-xserver-utilsA file is now created in the home directory,
sudo nano ~/.xinitrcwhich has the following content:
xset s off         # screensaver do not activate
xset -dpms         # DPMS (Energy Star) disable features.
xset s noblank     # do not let the video device darken

exec /etc/alternatives/x-session-manager      # start lxde
Every time the desktop is started, this script is called and will prevent the screen from darkening.
Playing Videos
A nice feature is letting videos run on the display. This can be done either by searching the file in the directory or simply starting a player from the console. I will show the latter in brief:
First, you need a player (e.g. the mplayer).
sudo apt-get install -y mplayerIf you have a video on the Pi, you can take it, otherwise simply download a test:
wget http://download.blender.org/peach/bigbuckbunny_movies/big_buck_bunny_480p_surround-fix.aviAnd now you can already play it (you can see additional options here).
mplayer -nolirc -vo fbdev2:/dev/fb1 -vf scale=320:-3 big_buck_bunny_480p_surround-fix.avi