Whoever is aiming for home automation will sooner or later certainly think about the wireless operation. The 433Mhz frequency is ideal for this because there are many cheap transmitters and receivers as well as a wide range of available libraries and scripts.
In this tutorial, I want to show how to use a small handheld transmitter and a receiver to enable/disable GPIOs on the Pi.
Accessories
To build a small test circuit, I used the following components:
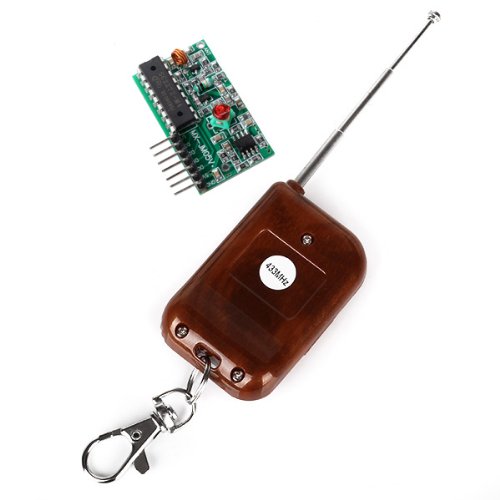
- Wireless remote control clone (or with receiver)
- 433Mhz receiver module
- Transistor LEDs
- 3x 330Ω and 3x 10kΩ resistors
- Jumper cable
If you have a remote control, you can also use it, but then probably the originally intended object will also be activated 😉
With the clones, one should note that they often (not all models) first have to copy a signal to send one.
Setup
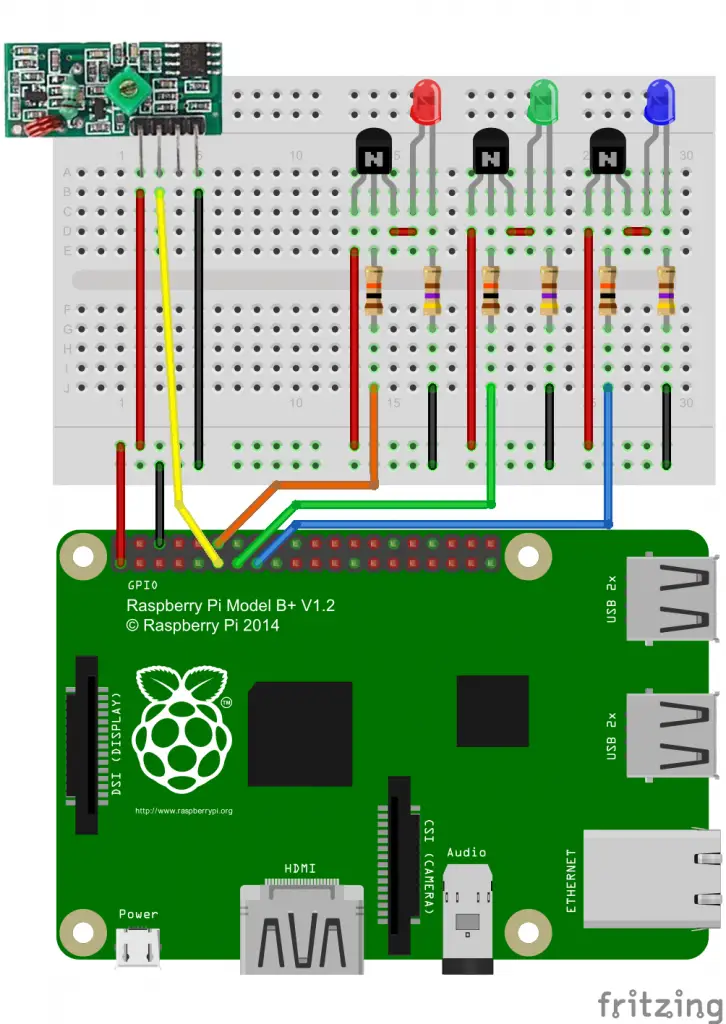
The resistors in front of the transistor bases are 10kΩ large, those in the LEDs 330Ω large.
The setup is for the Raspberry Pi Model B/B+, but is also executable on all other models (if necessary pay attention to WiringPi pin assignment).

Software
As a basis, I have taken this repository, which I have already used in a previous tutorial.
First we should load the code:
wget http://tutorials-raspberrypi.de/wp-content/uploads/scripts/433control.zip
unzip 433control.zip
cd 433control
We compile now to be able to read out the code of the receiver immediately (if you are using a different pin, change the RFSniffer.cpp file and compile afterwards).
make sniff
To read the codes now we start the compiled file
sudo ./sniff
and press the buttons on the remote control.
My codes are: 11734380, 12269868, 12365029 and 11854229. Since you will have other codes, the file RFSniffer.cpp must be edited.
sudo nano RFSniffer.cpp
From line 46 you can find the different codes that are replaced by yours. If you have taken other pins for the LEDs, you can also change this here (Attention: WiringPi assignment).
Next, the file must be compiled:
make RFSniffer
Then it starts:
sudo ./RFSniffer
If you then press the buttons on the remote control, the LEDs should come on. If the LEDs are flickering, this is because the signal is not being transmitted permanently, and as soon as none is received, the LEDs are automatically turned off. Of course, you can customize the code according to your wishes.
Different scenarios are possible here, such as the benefits of home automation.

