
In this tutorial, I want to show you how to set up and use a small infrared light barrier, which gives a signal as soon as the light barrier is interrupted. By traversing both photocells one behind the other, the speed can be measured.
Accessories
- IR Transmitter & Receiver (I use this)
- Jumper cable
- Resistors (470Ω and 10kΩ)
Setup
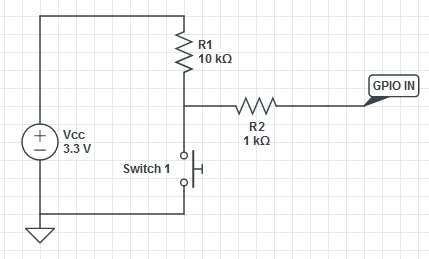
As soon as the light barrier is interrupted, a positive signal should be sent, otherwise a negative (0). I use a pull-up resistor with the IR receiver (black) instead of the switch.
 The two photocells are 10cm apart for me. For the speed to be calculated correctly, you may need to adjust the distance in your script. The actual structure is as follows:
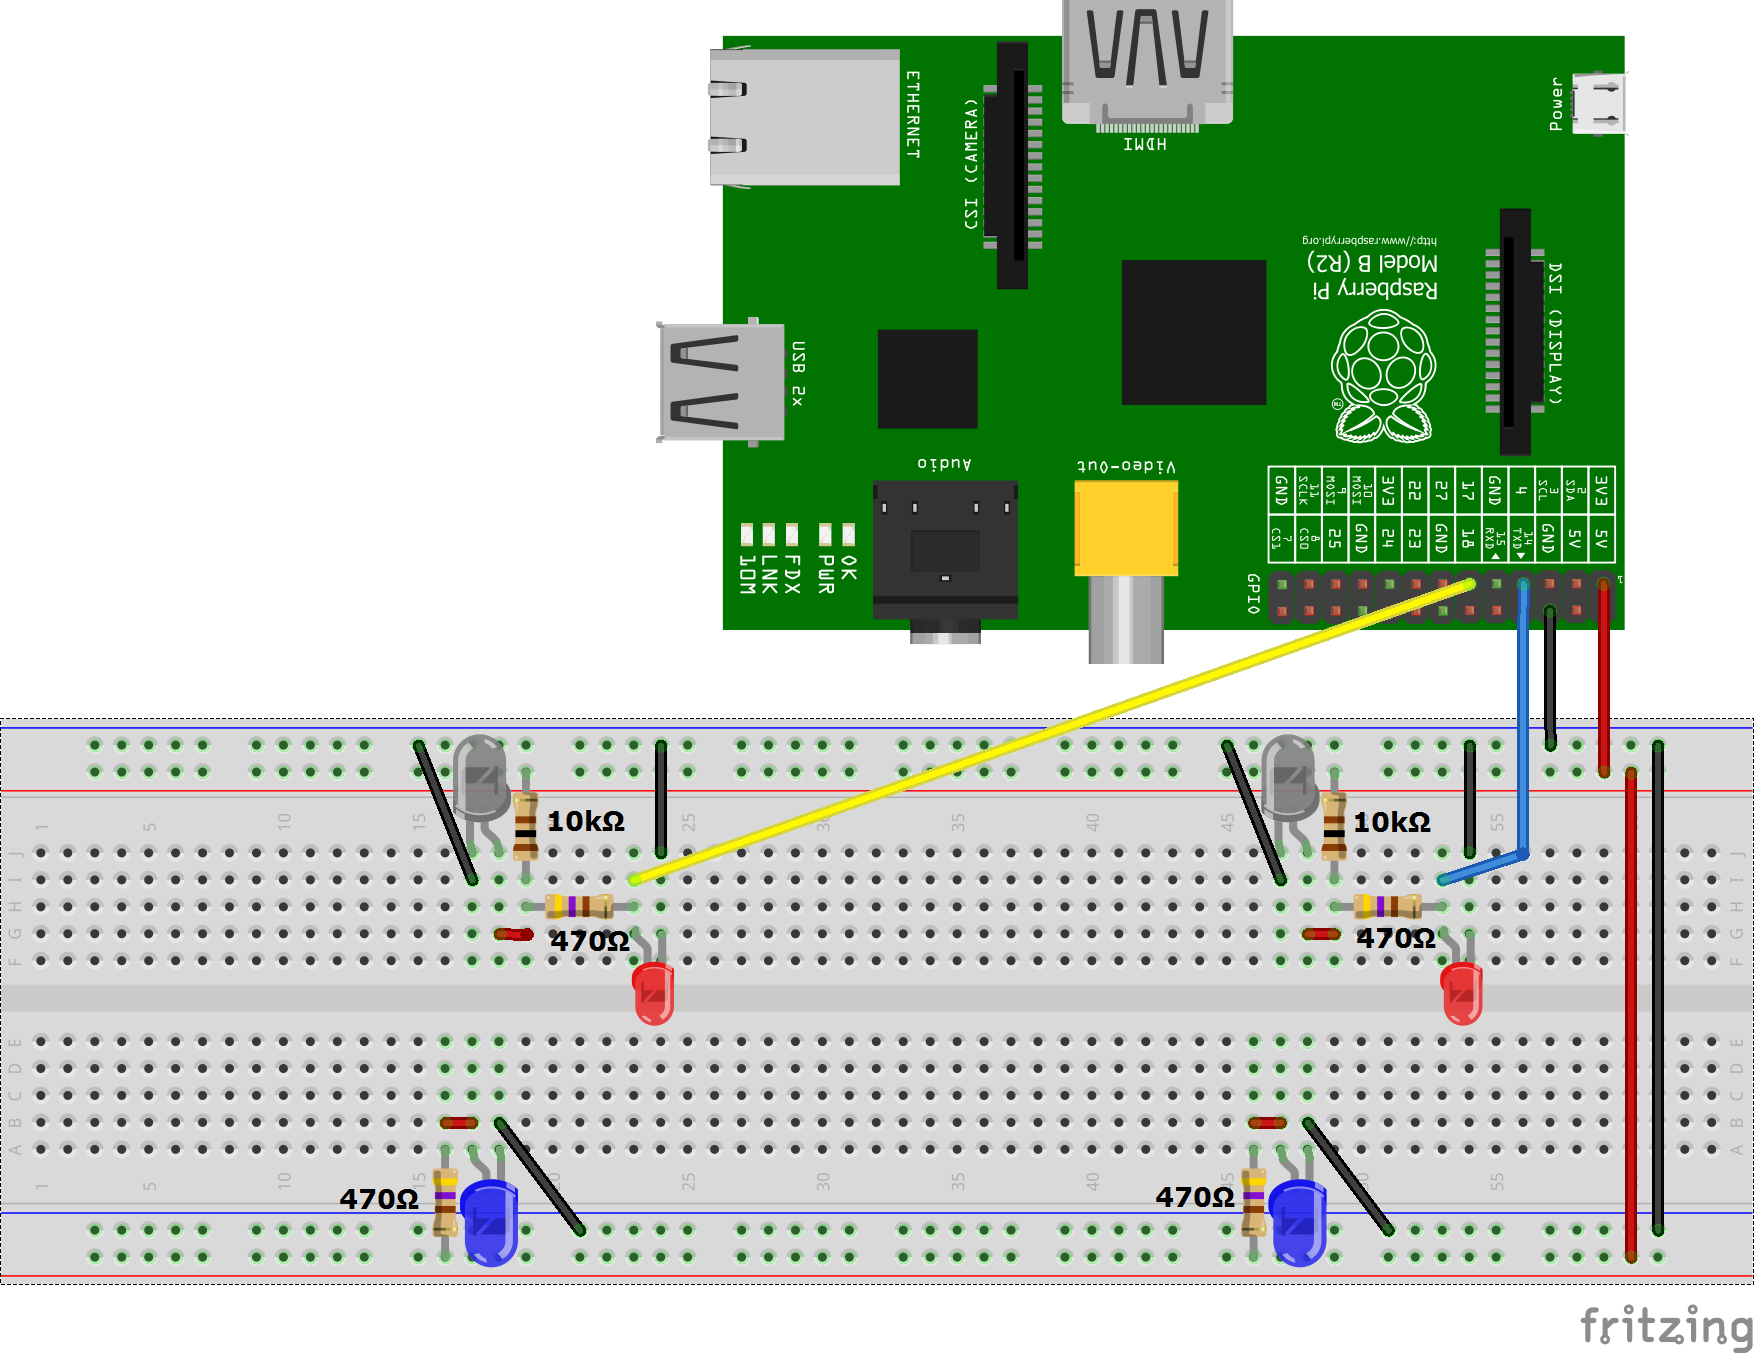 The little red LED is only for testing and can be omitted.
Once you’ve set up the circuit, the LED should light up as soon as the light barrier is closed (for example, fingers in between).
Measure speed
So that the speed can now also be measured, the time is measured, which passes, until both light barriers are run through. If the distance is not exactly 10cm, you should adjust this.
sudo nano distance_test.py
And add the following code
|
1 2 3 4 5 6 7 8 9 10 11 12 13 14 15 16 17 18 19 20 21 22 23 24 25 26 27 28 29 30 31 32 33 34 |
#!/usr/bin/python import time import RPi.GPIO as GPIO GPIO_BEGIN_PIN = 4 GPIO_END_PIN = 17 DISTANCE = 10.0 # (in cm) Anpassen, falls notwendig TIMEOUT = 5 # sek GPIO.setmode(GPIO.BCM) GPIO.setwarnings(False) if __name__ == '__main__': GPIO.setup(GPIO_BEGIN_PIN, GPIO.IN) GPIO.setup(GPIO_END_PIN, GPIO.IN) start_time, end_time = 0, 0 while GPIO.input(GPIO_BEGIN_PIN) == GPIO.LOW: time.sleep(0.001) start_time = time.time() end_time = 0 while GPIO.input(GPIO_END_PIN) == GPIO.LOW and time.time()-start_time < TIMEOUT: time.sleep(0.001) else: if time.time()-start_time >= TIMEOUT: print "Timeout" exit() else: end_time = time.time() speed = DISTANCE / (end_time - start_time) print "Geschwindigkeit: %.2f cm/s" % speed |
Save and exit with CTRL + O and CTRL + X. Now we can start it.
sudo python distance_test.py
If the script does not work properly, it is most likely due to the fact that the photocells do not point exactly to each other and so, some electricity can flow, but this is out of the accepted range and it is not determined whether 0 or 1
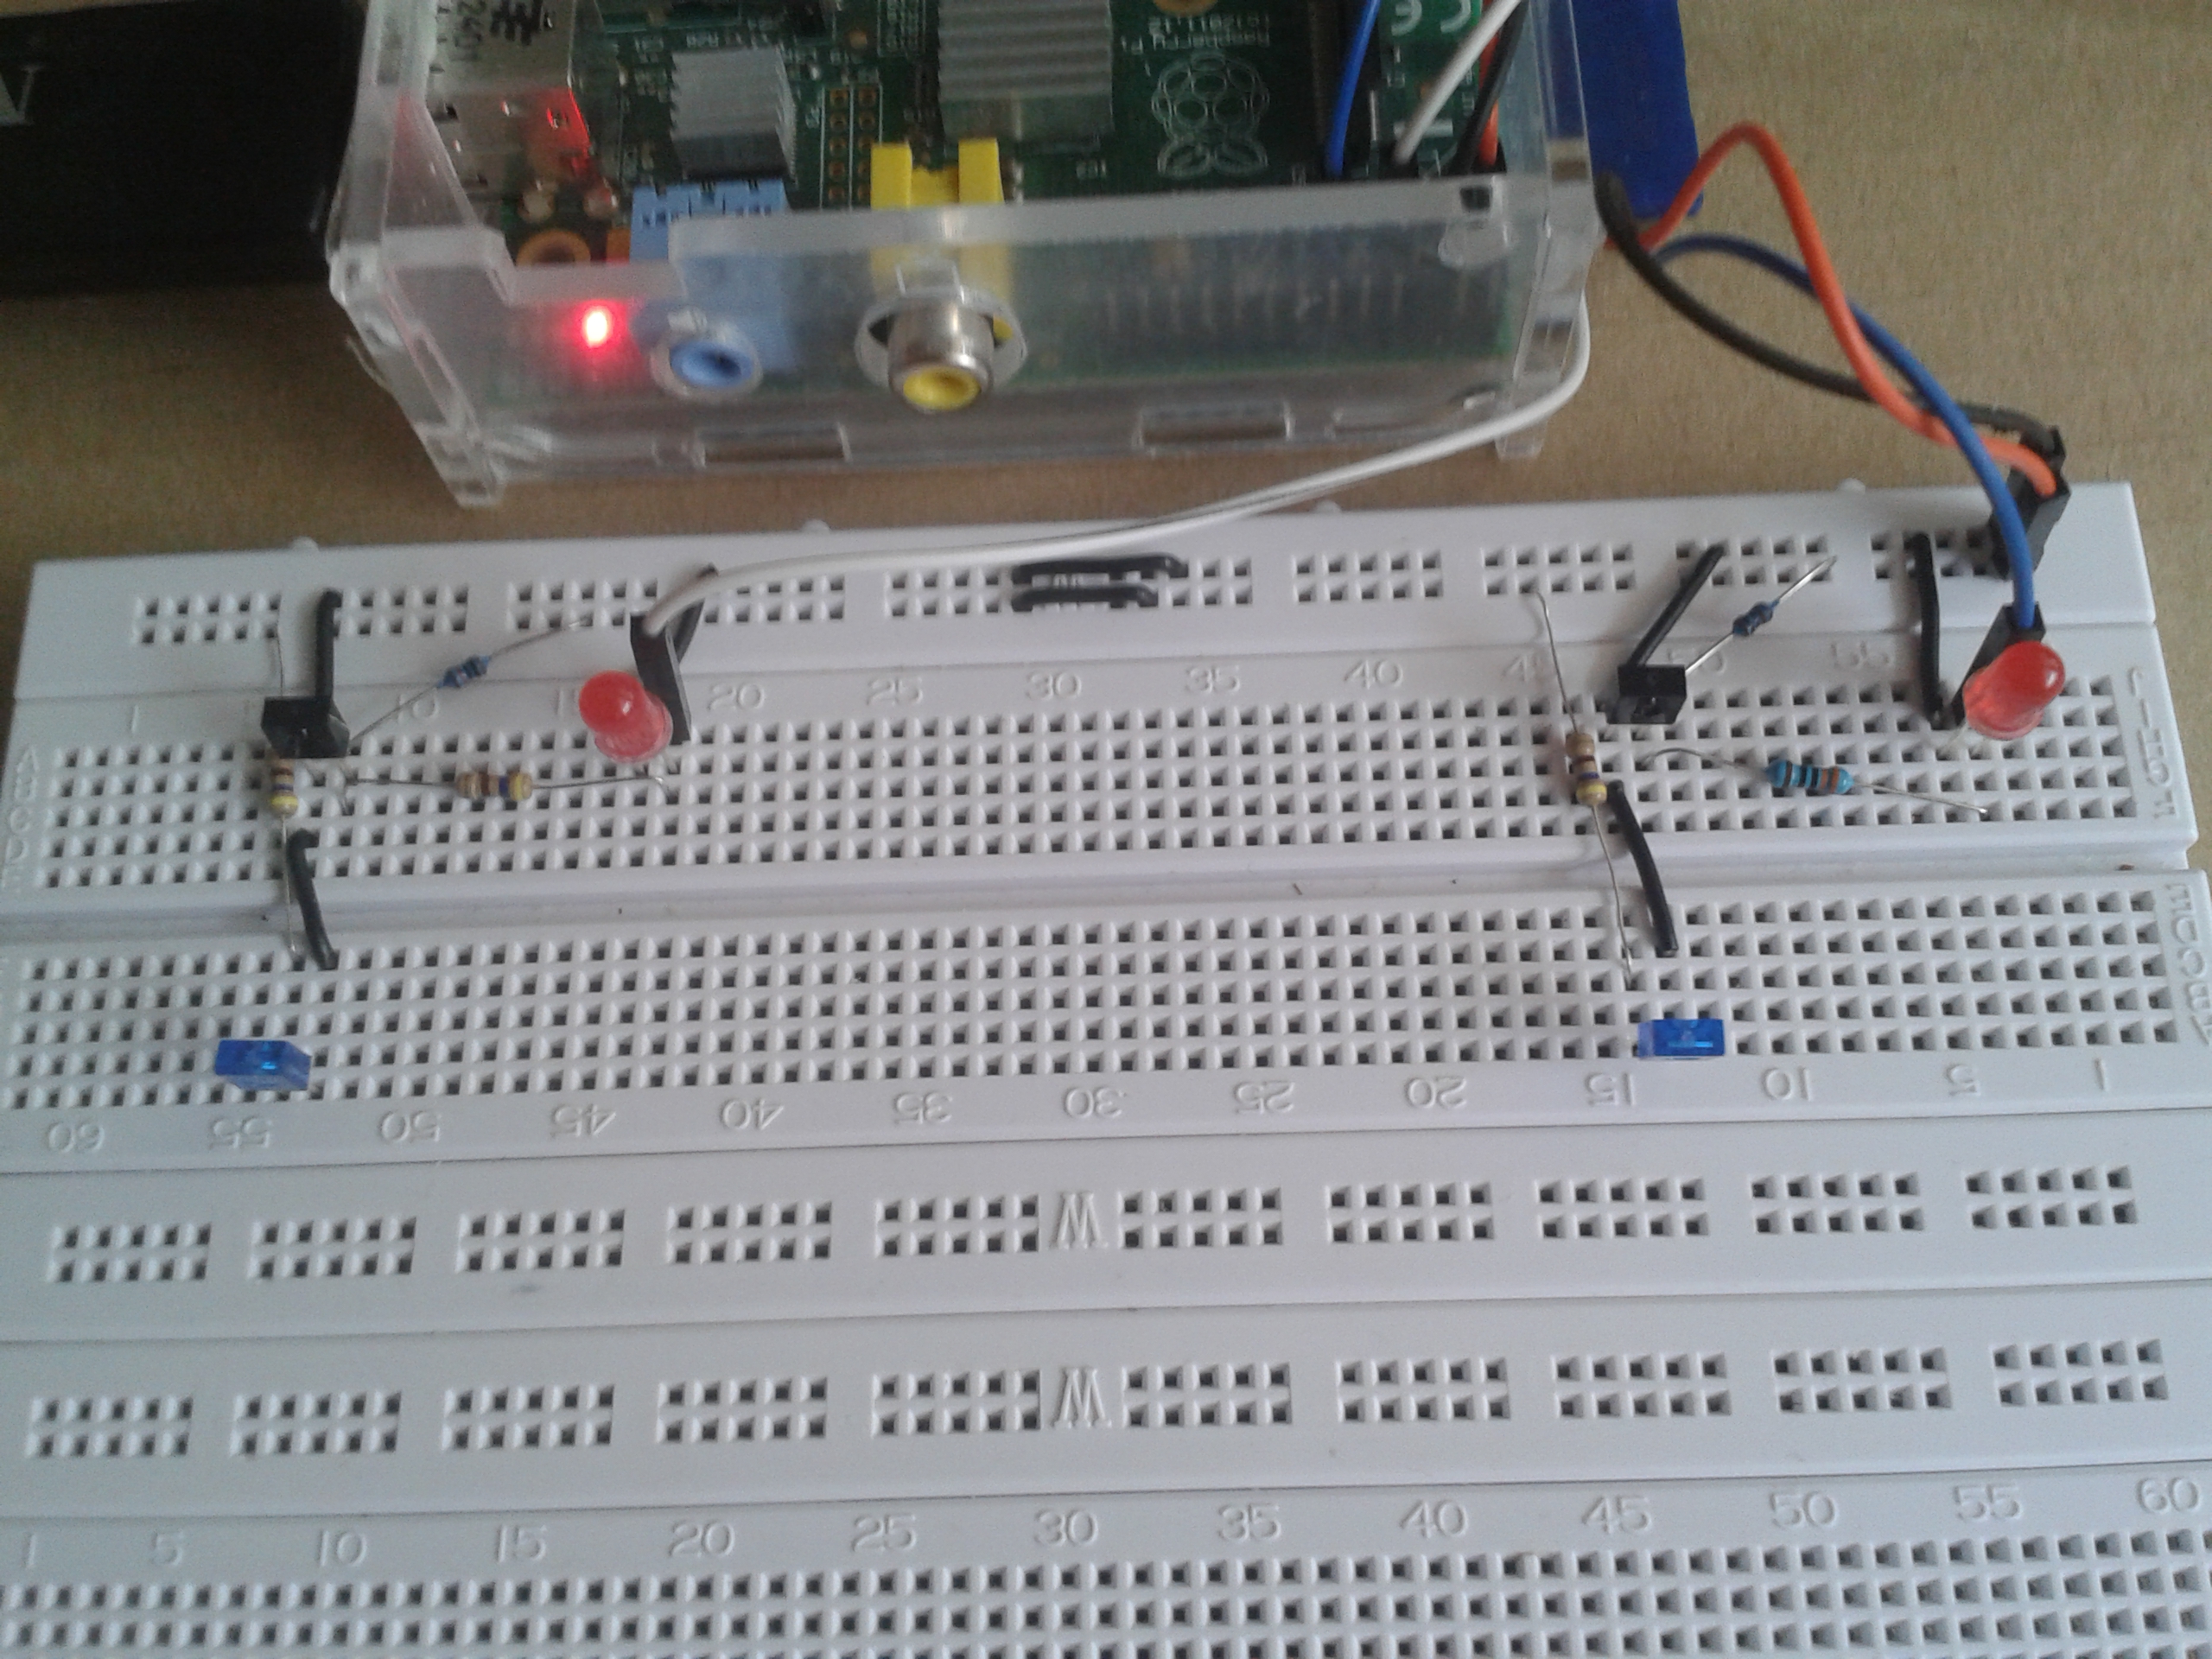
Concluding with another picture of my structure::
1 Comment
Hi there,
I’m thinking of doing this for golf club & swing speed test.
1. You’re link for the IR T & R doesn’t come up with anything. Can you send me what you recommend please?
2. Can this distance be modified so the IR’s are much more than 10cm apart? (I.e. like 50cm).
Do you have any other tips? Thanks