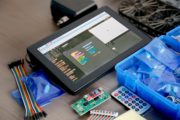
Almost every project is possible with the Raspberry Pi. This includes also a complete Raspberry Pi Tablet that we can use for different applications. Either as a multimedia tablet or as a panel for the smart home. In this article, I’d like to introduce the Sunfounder RasPad – a beginner-friendly 10.1-inch Raspberry Pi tablet that has much integrated.
Sunfounder was kind enough to give me one of the devices to test in advance. In addition to my experience with it, I will show below the device setup and possible projects in which it can be used.
Product Overview – RasPad Tablet
The RasPad Tablet comes in different versions, which are used depending on the application. The Raspberry Pi tablet is everywhere, but the accessories vary:
- Basic version (without Raspberry Pi)
- Standard Kit version (with Raspberry Pi 3B+ and Bluetooth keyboard)
- Beginner Kit version (as standard, incl. sensor kit)
- Kit with uArm Robot + OpenMV vision camera (for controlling a robot arm and camera with the touch screen)
There are other accessories that can be used in conjunction with the Raspberry Pi Tablet:
- Raspberry Pi Camera (also via USB)
- Sensor Hat, Tinker Board
- Beaglebone
- Arduino, ESP8266
- GPIOs (T-Cobbler)

The versions with sensor kits already contain many components. We can read these with the help of the tablet or via SSH. For beginners, a graphical interface is particularly useful as it resembles familiar approaches.
The battery life is 3 hours, which may vary depending on the application (videos, Minecraft) and brightness of the display. The keys with which you can regulate the brightness quickly are practical (regardless of the Raspberry Pi).
A charging cable is included in all versions, but you should pay attention to which power plug is attached. For me this was a US plug and it had to be replaced by an EU power cord.
The product video from Sunfounder already gives a good first insight. I will go into the details a bit more:
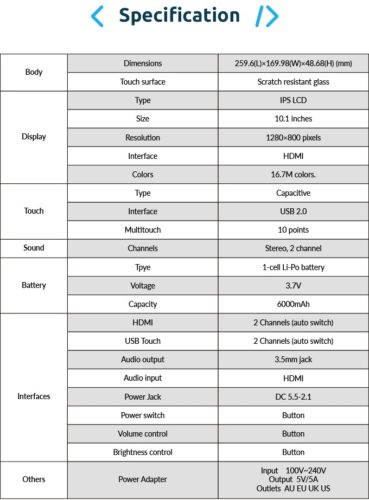
First and foremost, there are the official specifications for the RasPad:
Setup of the Raspberry Pi Tablet
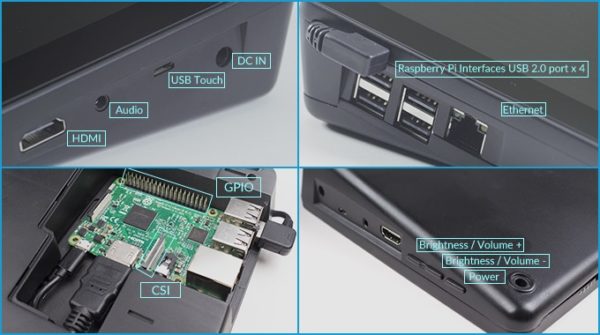
The commissioning of the Raspberry Pi tablet is very easy. On the back there is a slot into which a Raspberry Pi 2/3 Model B (Plus) fits perfectly. The USB ports look out at the side. In addition, HDMI and Micro USB are connected. The flap can be closed so easily. However, the Raspberry Pi does not necessarily have to be supplied with power via the built-in battery. If you have a power bank, you can also supply the Pi with it. Thus, the battery lasts longer for the display.

On the other side of the tablet are ports for external HDMI devices, headphones/audio, USB Touch (micro USB) and the power connector port that charges the battery. There is also an on/off switch at the bottom and buttons for changing the brightness and volume. By default, a speaker is also included. This has in my opinion a good loudness (sound quality is fine), but it is not too loud. Comparable to most standard tablets.
To change the volume via the button, first press the middle (down) button and then up/down. To adjust the brightness, first press the upper button. In both cases, the display will show an indication of the current volume/brightness settings.

The GPIOs of the Raspberry Pi can be fully used. For this purpose it is sufficient to lead a flat cable through the casing. It was thought of enough space for it. It is also possible to use a camera (as a webcam) and various attachable hats.
The Raspberry Pi is started by pressing the on/off switch for 3 seconds. After that it automatically goes into desktop mode. When switching off, however, the following should be noted: After you have shut down the Pi (either via the command line or via the menu), the touch screen must be additionally turned off. Pressing the switch again for 3 seconds causes the blue LEDs to go off. You should always shut down the Pi first. If you only press the power button, only the power connection of the display and accessories will be interrupted. Four blue LEDs indicate the battery status. If charging, they will light up. What bothered me a bit: The status of the LEDs can be determined only on closer inspection, as to neighboring LEDs some light is emitted.
An advantage here and at the same time frequent question from Raspberry Pi beginners (is there a Raspberry Pi power button?) is given. Upon request, I was told that it is possible to replace the battery with a larger model (over 6000mAh, but you should be careful, as it is not recommended).
The fact that a Raspberry Pi is inside, makes the casing of course thicker than in a conventional tablet. On one side it is about 2 cm wide and on the other about 4cm. This creates a certain slope, making work more comfortable. If you want to rotate the picture, you can also set this up and thus the display.
Operation of the Raspad Tablets
The Raspbian operating system unfortunately does not support multi-touch (so far), which is why actions in some programs are not as usual. On the other hand it offers the Chromium Browser Multitouch support! Here is zooming, scrolling, etc. possible with multiple fingers. For example, to simulate a right-click, it is sufficient to press two seconds in the browser to a point. The Chromium Browser is already preinstalled on newer Raspbian versions.
A keyboard can either be connected via USB/via wireless, or we can use the on-screen keyboard: Under Start (top left) -> Accessories -> Keyboard can be opened. You can change the language of the menu under Start -> Settings -> “Raspberry Pi configurations”.
The standard on-screen keyboard is in English and has some annoying points. I therefore prefer an alternative keyboard, which can be easily installed via the terminal (or via SSH):
sudo apt-get install at-spi2-core florence
You will find the keyboard below the start menu -> Accessibility. After minimizing, there is a keyboard icon in the upper right corner of the taskbar, as well as on the left side under the Start menu. Clicking on this icon brings the screen keyboard back to the foreground.
If you want to change the left toolbar, right-click on it -> “Application Launchbar Settings” (this requires a mouse). Corresponding links can be added or removed (e.g. Mathematica or Wolfram)
Rotating the touchscreen display
As mentioned earlier, we can rotate the screen and not just use it while lying down. All we have to do is edit one file from the command line:
sudo nano /boot/config.txt
A 180 ° rotation is possible with this entry (attach to the end of the file):
display_rotate=2
Alternatively, there are the following options:
 display_rotate=0 # Normal
 display_rotate=1 # 90 degrees
 display_rotate=2 # 180 degrees
 display_rotate=3 # 270 degrees
 display_rotate=0x10000 # horizontal flip
 display_rotate=0x20000 # vertical flip
After the reboot (sudo reboot), the changes take effect.
Rapberry Pi Tablet projects
A Raspberry Pi tablet is useful for many applications. In the following I would like to show a few sample projects that are particularly suitable:
The most obvious use is as a normal tablet. The Raspberry Pi can now handle any office task. In addition, the playback of movies and YouTube videos is no problem. Surfing is also fun on a 10 inch display. The OpenSource applications of LibreOffice are already preinstalled on Raspbian and can be started directly. The same applies to the browser. Additional tools such as email clients (Thunderbird) or similar applications can be installed via the package manager.
The great thing about the Raspberry Pi is that changing the SD card allows us to use a completely independent system. We can accordingly have different projects on multiple SD cards ready and change them at will.

Android tablet
Although there is no official Android version of Google for the Raspberry Pi, the University of Aachen has published an Android image for the Raspberry Pi. After downloading and unpacking the image, it will be transferred to an SD card. In my test of the Emteria OS, it has hung quite often, which is why I currently think it is not a viable alternative. Maybe there will be improvements here in the future.
Minecraft and other games
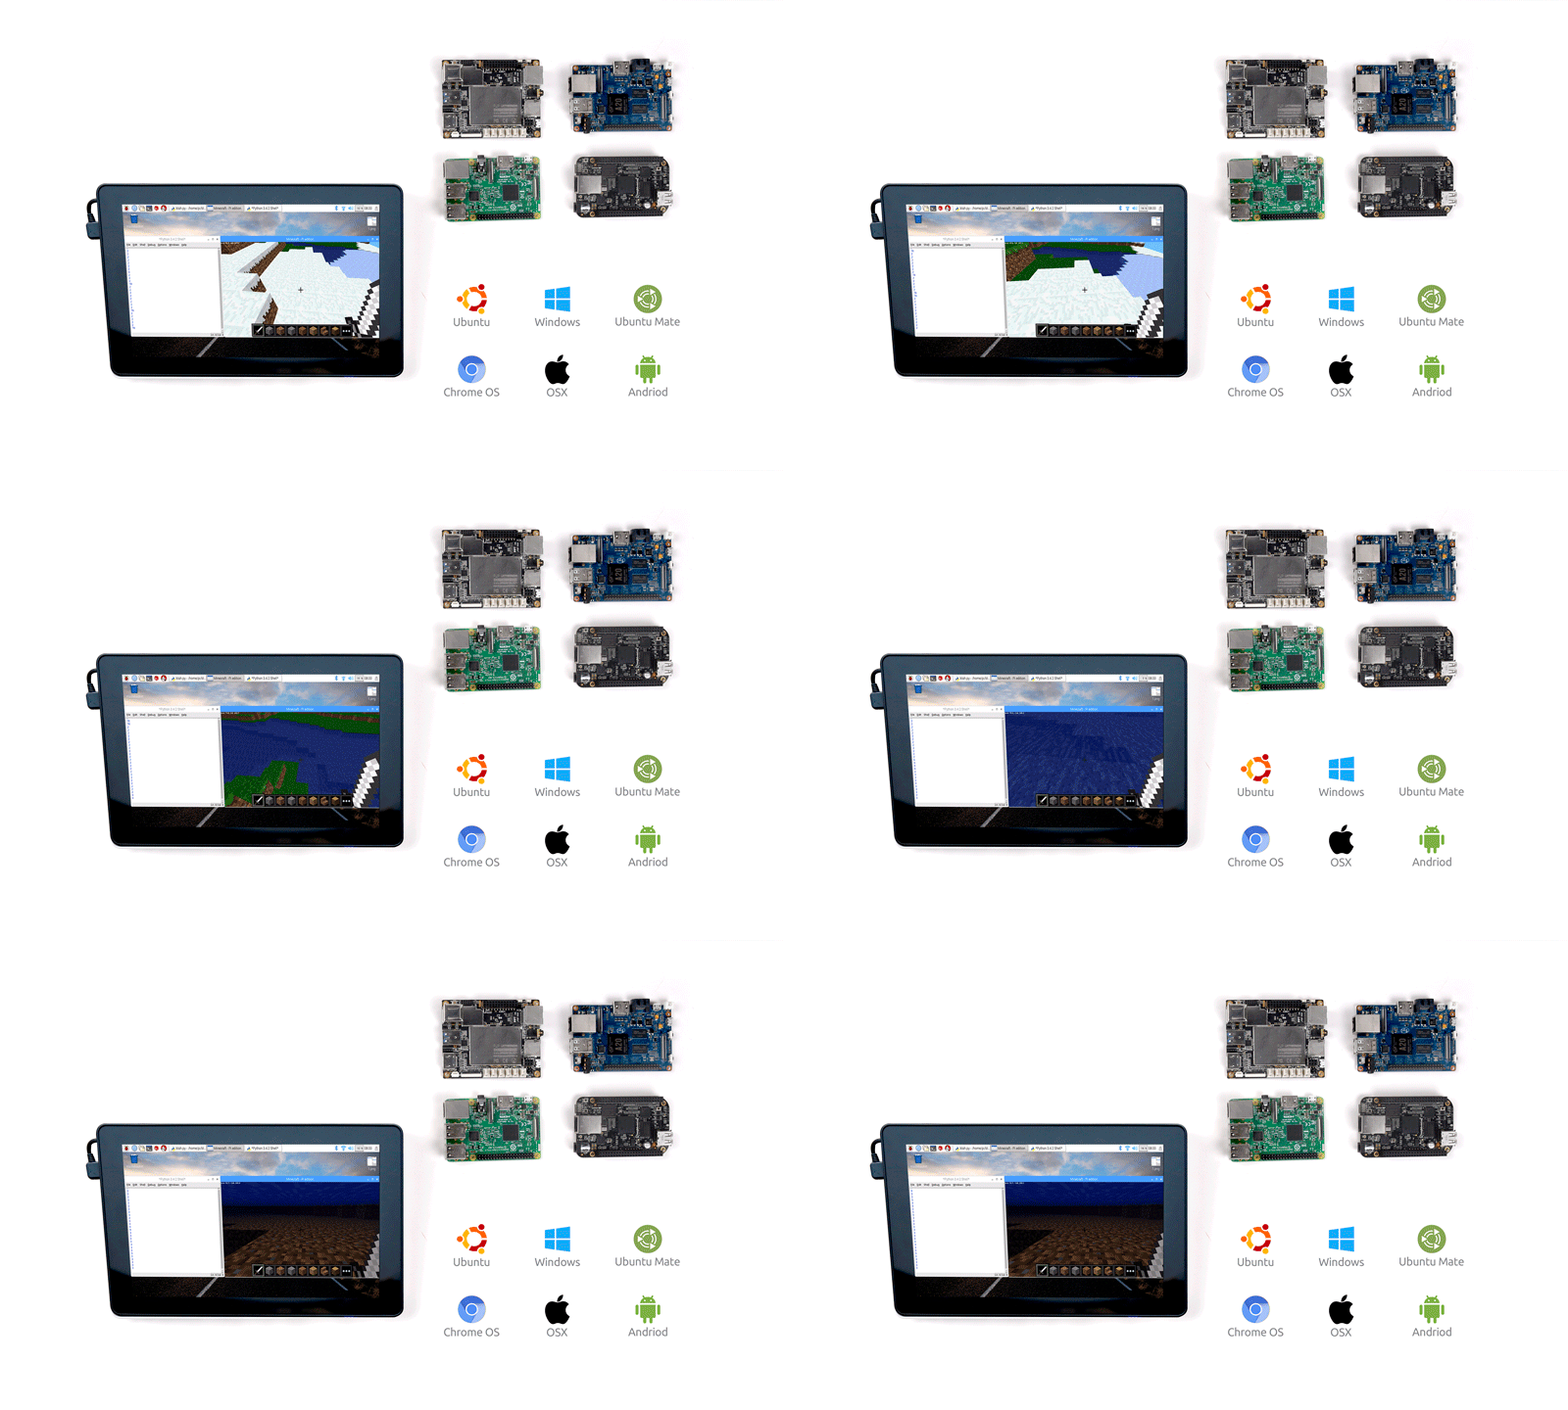
Due to its simplicity Minecraft has become a very popular game. This has long been available for the Raspberry Pi and can be played with it. A Minecraft client is already preinstalled. In addition, with Python it is possible to program the game.
But you can also simply write games yourself! This is e.g. possible with the Pygame library.
Beaglebone & Windows 10
For the Raspberry Pi, there is only a Windows 10 IoT version without graphical interface. On the other hand, we can use Win10 with the Beaglebone. This can easily be connected to the RasPad. It is simply connected to the side “USB Touch” and HDMI port, while the Raspberry Pi remains inside. Thus, we can quickly and easily switch between the two devices.
uArm Robot
Another project, which is also very interesting for beginners, is the uArm from the uFactory. This is even included in one version and Sunfounder provides appropriate software (uArm Creator Studio or uArm Play) for controlling the robot arm and displaying the camera image (OpenMV vision camera) available. The uArm can lift up to 500g and be extended with different modules from the sensor kit.
My conclusion to the Raspberry Pi Tablet “RasPad”
Personally, the Raspberry Pi Tablet has absolutely convinced me. Despite some teething problems of my prototype, the concept convinced me very much. In contrast to the official touchscreen, the RasPad offers some advantages:
First of all, the 10.1 inch touch screen is much more comfortable for working. The higher resolution of 1280 x 800 pixels is another leap compared to the 800 x 480 pixels on the Raspberry Pi Foundation touch screen. Nonetheless, the display is directly compatible, as it is connected via HDMI. Thus, however, no further display can be connected. An advantage offered by the official touch screen module.
The touch view works via the USB port. With 4 available ports, this is manageable. In terms of accuracy, I think both are equally good and very accurate. Even small icons are usually hit with the first touch of a finger.
In addition to the size and resolution the RasPad has a further advantage, since it is out-of-the-box compatible. There are 10-inch displays or touchscreens that offer a larger resolution, but don’t come as a complete tablet. The RasPad has a built-in battery that provides power for several hours. This also charges up quite quickly (in my test model, only a US plug, no EU plug was attached). The only drawback: The Raspberry Pi Tablet can not be charged via a normal power bank!
In my “extreme test” (1080p FullHD videos of the YouTube channel), the battery lasted about 1: 45h. For other applications (such as office or normal surfing), a full charge would last longer. Just before the battery is empty, the tablet beeps. My tip: To extend the batery life, you can use a power bank. Thus, the Raspberry Pi is powered by the power bank and the built-in battery provides power only for the display. Thus, a runtime over many hours is possible.
Another plus is that you can also use attachable hats and the GPIOs. This is enough space or openings for the insertion of the cable available. Likewise, other developer board (Arduino, etc.) and craft boards are possible in combination.
The finishing of the casing has pleased me to a point. The plastic is smooth everywhere and there are no sharp edges. Only at one corner of the touch screen was the casing initially not quite solid. On demand, I was assured that this is only the case with my prototype and that it does not occur in mass production.
My conclusion: The project on Kickstarter rightly exceeded the original budget by 50-fold. The price is not much higher than for comparable tablets, except that with a Raspberry Pi you have far more options. Of all the previously known Raspberry Pi Tablet alternatives, the RasPad convinced me the most.
If further tutorials are required specifically for this module, I would be glad to see a comment (with indication, which tutorial exactly should be shown).


3 Comments
mail me the dealer contact for this product in india
Is it compatable with any linux operating systems?
Hi,
Is their an upgrade path from my RASPAD (via your Kickstarter project) to your LATEST RASPAD.
Thanks
Paul
UK Based